


How to Achieve the Best Vase Life Out of Your Dahlias
Why is it that some of the most beloved flowers don’t last very long? Is that why we love them? Their ethereal beauty? Dahlias definitely fit into this category!
Before we begin, let’s set some expectations. Dahlias are a shorter vase life flower. There’s no way around it- it’s not gonna last 2 weeks. On average dahlias last from 3-7 days. Rarely do I find a variety that goes longer than 7 days.
However there are some basic tips to get the longest life possible out of your blooms. (And don’t you dare skip this part b/c everyone thinks they know this but almost everyone doesn’t do at least one of these!)
3 Basic Tips for Harvesting Cut Flowers:
Clean Vase, Bucket, Vessel — whatever your flowers are going into. Yeah, yeah, yeah— We know this. But do you really? More often than not, when people come to pick up flowers, they grab a random bucket and it’s always dirty. Florist and retail customers alike. I rarely see nice clean buckets. Now I know some people go clean their bucket when they get home or to their shop but at that point, the bacteria has already been introduced to the flowers. You want the bucket to be so clean you would let your kids drink out of it! Bacteria is the worse cause of shortened vase life.
Clean and Sharpen Your Clippers- Make sure you are cleaning your clippers regularly. Like at least once a week. You can scrub them, use an alcohol dip, or a special cleaner. Doesn’t really matter how, just make sure you are cleaning them. Also make sure they are sharp and make sure you are using actual clippers— kitchen and crafting scissors aren’t really made for harvesting flowers. There are some specialty floral scissors out there that can work if you prefer to cut with scissors instead of clippers. ARS is my favorite brand; I like the light duty fruit pruner to harvest.
Harvest in the Early Morning or Evening- Never cut in the middle of the day if you live in a hot climate. Every summer I’m jealous of Northern farmers who can harvest all day. Sugars in the plants are highest in the morning so it’s a good time to cut. The plants will re-hydrate faster. However, the evening will work too if you aren’t a morning person.
These 3 tips work with all cut flowers but now let’s talk about dahlias specifically. I had a conversation about vase life with a fellow grower last week and we were sharing our processes. And as has happened many times in the past, every grower I talk to does it a little differently. So I’m going to share my process- your mileage may vary!
Why is it not “one size fits all?” Because dahlias more than other flowers are very susceptible to changes in water (City or well, minerals in the water, etc), how hydrated the plants are in the field, current weather conditions, etc. Time of year plays a big part too- During the summer, I usually see a reduction of 1-2 days in vase life from the cooler days of Fall.
I’m going to talk about this from 3 points of view:
For the Home Gardener:

First- make sure you are following the above 3 steps. Second, go online right now and order a container of flower food. Chrysal and Floralife are the two most well known brands- either will work. I’ve never noticed one better than the other. You are looking for a powdered substance- not Quick Dip or Holding solution. Make sure you get flower food for cut flowers— not growing plants. ;)
Place the flower food in your water as you are harvesting. Let the blooms sit in the bucket in a cool, darkish place for at least 2 hours before using them. They need to cool off and really drink before you arrange them. Then make sure you put flower food in your vase as you are arranging. Read the directions on your particular brand and use accordingly.
So why did I tell you to go get flower food instead of the popular- “Just put a few drops of bleach in it” method. Well because dahlias need sugar— Flower Food not only has a bactericide which keeps your water clean but also has a sugar component which feeds your dahlias. Not every flower needs this but dahlias definitely do! Vase life usually increases by 2 days when you start using flower food.
Recut your stems at least every other day and change the water/flower food. You can do it daily if you really want but I’ll be honest, I don’t have time for that. (I actually do my vase life trials where I treat the blooms as rough as possible to see how long they can really make it!)
For the Commercial Flower Grower:

So obviously follow the 3 basic steps above. After I’ve cleaned my buckets, sharpened shears, I squirt holding solution into my water. Holding solution is a product that hydrates your flowers but also keeps them from opening. This is perfect for dahlias because you want a solution that slows down the natural process. After I have finished harvesting, I remove the organza bags and then I recut my stems into a fresh bucket of water with holding solution. (If you don’t use organza bags you may can skip this step b/c you aren’t taking the stems out of water to remove the bags— but check your water, sometimes it can become nasty while harvesting. You want it clean before it goes into the cooler).
The next step is to place your dahlias (make sure they are dry) inside the flower cooler. Now, I’m gonna step on my soapbox for a minute- If you are growing dahlias commercially, you need a flower cooler. Doesn’t matter if you are growing 10 plants or 10,000, you need a cooler to properly condition your flowers. The flower cooler gets the field heat out quickly which is imperative for good vase life. A cooling period of at least 12-16 hours “sets” the bloom- really this is the period the flower needs to hydrate properly. Then the dahlias can be held for up to 3 days before sale. I don’t hold any longer than that because after that vase life starts to drop dramatically. I try to cut my dahlias as close to their sale date as possible. The flower cooler is crucial to getting a high quality stem. Having a cooler means you can cut the flower at it’s peak point and not cut everything the night before you need them— this results in blooms being past their prime and not lasting very long. A cooler is one of the first investments you should make as a commercial flower grower. Ok- Off my soapbox now.
For the Florist:
If you are growing your own dahlias, follow the steps for a home gardener or if you have a flower cooler, then follow the steps for a commercial grower.
But let’s talk about processing dahlias when you receive them from the grower. First off, get to know your grower. Ask them if they have a flower cooler- if not, I’d hesitate before buying from them. If you can get your stems the day before your event, they’ll be fine. But if not, go with a grower who has invested in a cooler and has put time into learning how to condition their flowers. The stories I hear from florists about dahlias crashing on the wedding day are usually from growers who aren’t putting in the time to learn how to condition their flowers.
Now that you have vetted your grower, recut the stems into cool water with flower food. Once the stems come out of the cooler (from your grower or your own), they should go into flower food. You’ll also want to put flower food into your container water when designing with dahlias. Honestly flower food is a good idea anytime you are mixing flowers. There’s bound to be a dirty stem type of flower in your mix.
If you have a flower cooler, store your dahlias or arrangements with dahlias in there until your event day. If using large blooms such as cafes, I’d recommend adding those onsite as they can snap their heads easily during transport. If you are using dahlias in retail arrangements/bouquets, I’d recommend sticking to ball types or smaller decoratives. Those usually have a longer vase life. It would also be a good idea to question your grower as to what varieties last the longest in the vase. Also, when using dahlias for retail, it’s best to sell them within 3 days of receipt. Any longer than this and the end consumer won’t have much vase life. I always appreciate when a florist lets me know how they plan to use their dahlias- then I can give them the freshest bloom possible for their intended use.
To summarize- Clean Vessel Always, Sharp Clean Clippers, Cool Temperature Harvest, and Flower Food give you the longest vase life!


My Top Dinnerplate Varieties for Hot Climates
Recently I’ve had multiple requests for variety names of dahlias that like hot humid climates. Honestly, no dahlia really likes that but there are some that do better than others. Dinnerplates were mentioned specifically so I’ve decided to cover those today.
One thing to recognize about dinnerplates grown in a less than ideal climate is that they are more often saladplates. To get a true dinnerplate size, you’d have to do some pretty specific growing- strict fertilizer regime, no pinching, etc. (similar to how show growers do it). Also, I’m interpreting “dinnerplate” loosely. Some of the dahlias I mention here are large varieties but don’t quite have the genetics to reach dinnerplate size but I’m including them because they give a lot of “wow” factor in your garden. Lastly, it’s pretty average for some varieties to only throw 3-5 blooms per season. It takes a lot out of the plant to produce a bloom that size.
Here we go: (in alphabetical order)

AC Ben
Cactus type orange dahlia. This variety is about as prolific as a large dahlia can be in a hot climate (that means I get a minimum of 5 blooms per plant each year). That’s really good for a dinnerplate type. Pictures really don’t do it justice, you need to see it to know how amazing this variety can be!

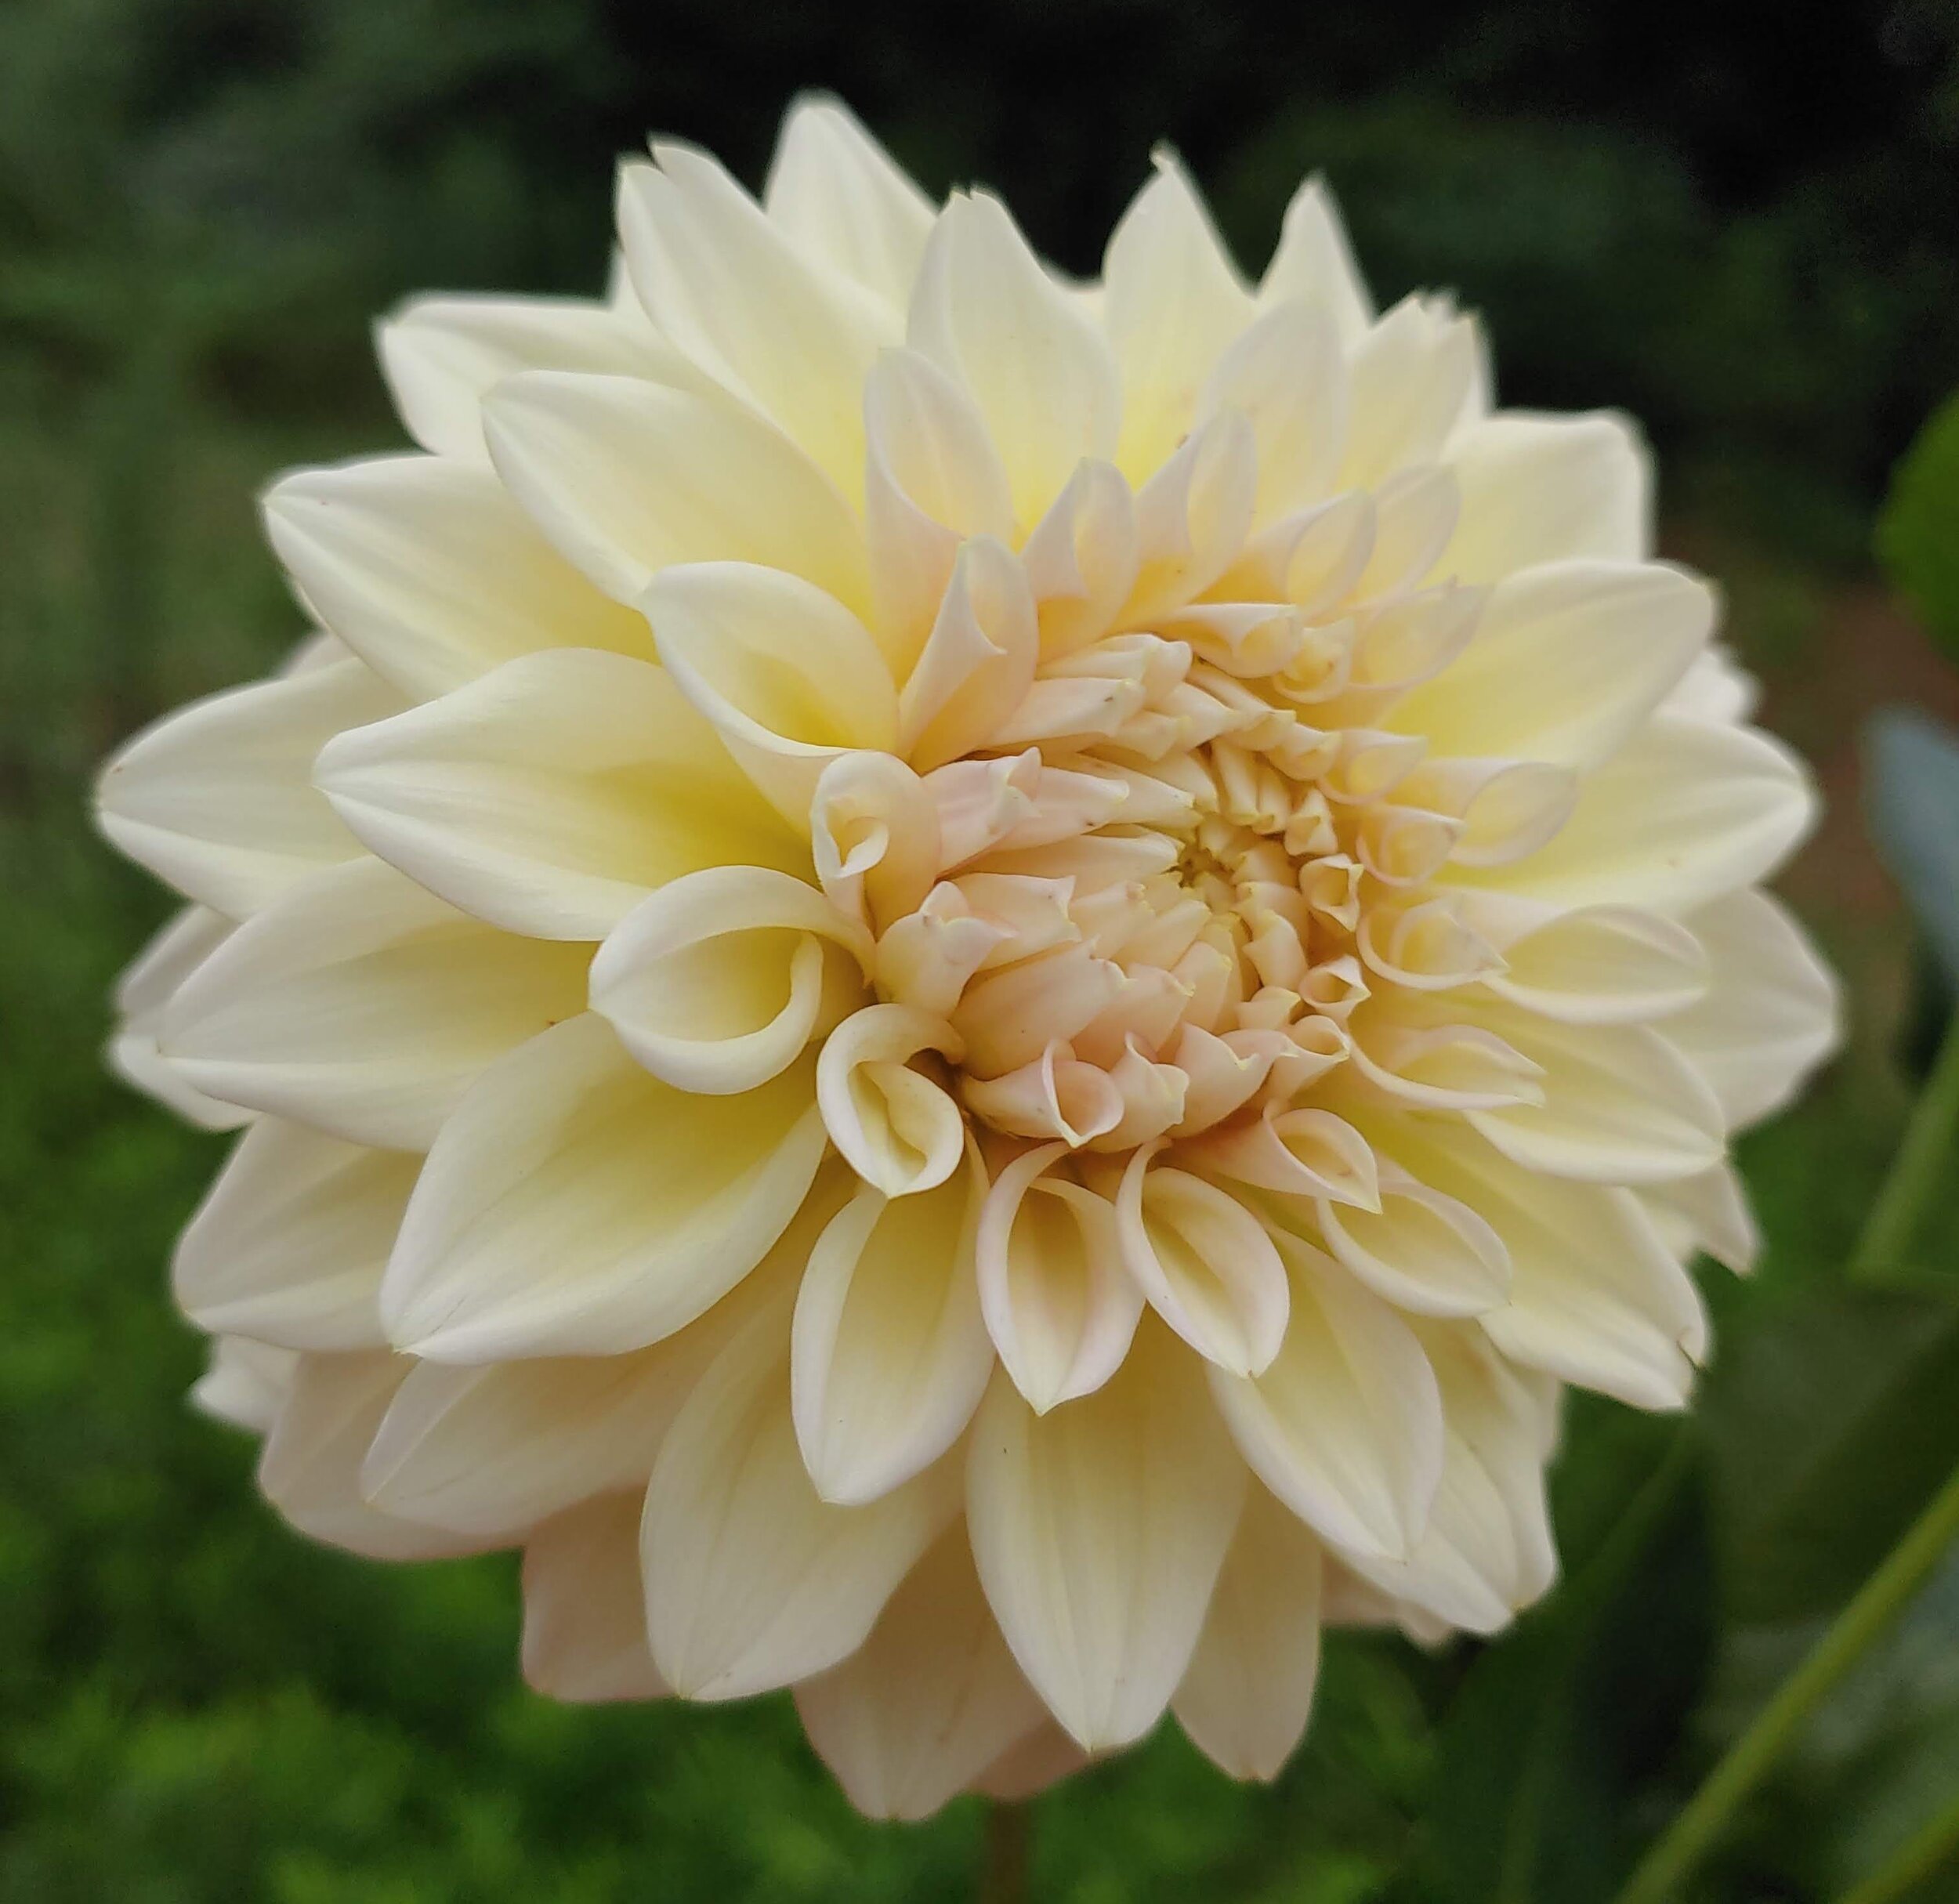
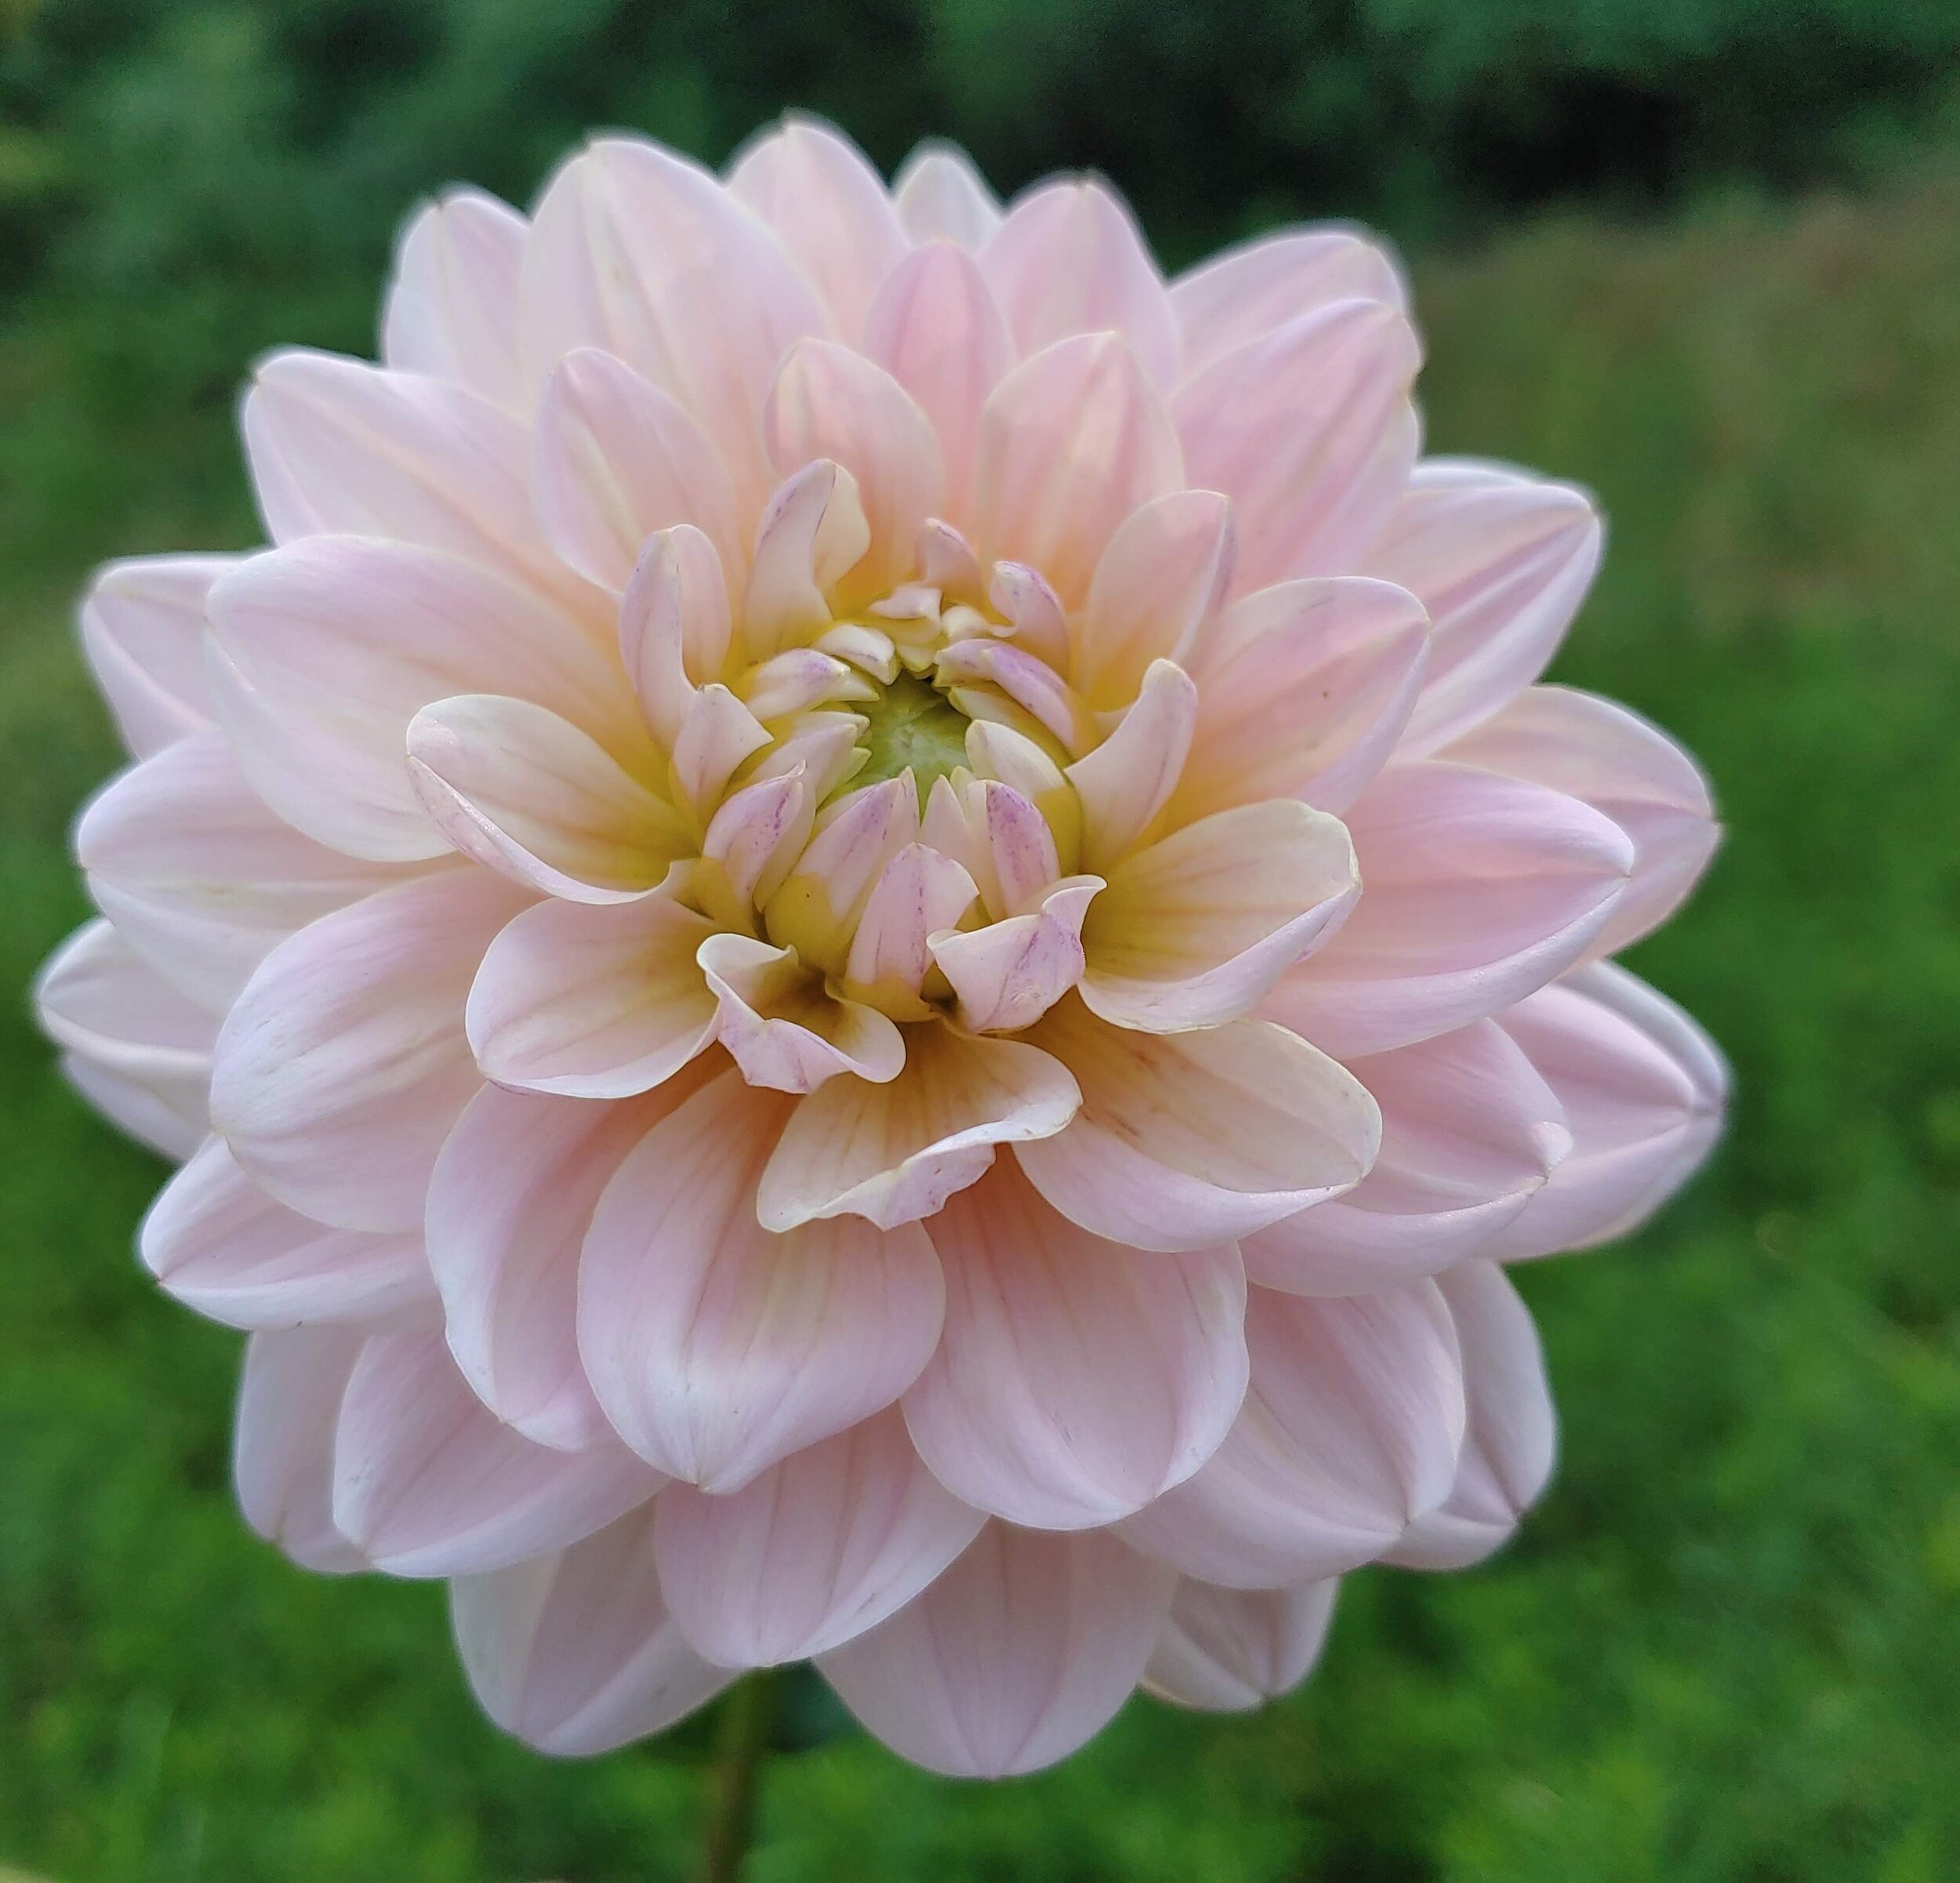
Cafe Au Lait
The queen herself— she actually does really well in the heat. She can vary in color and I still can’t figure out if it’s temperature related or soil pH. You can even get two different color blooms on the same plant. Her color ranges from cream to blush pink, can even have lilac streaks occasionally.

Hollyhill Black Beauty
Hands down, my favorite burgundy dahlia. Others are more productive but this one is stunning when it’s all the way open. The petals fall so elegantly into rows of ruffles!

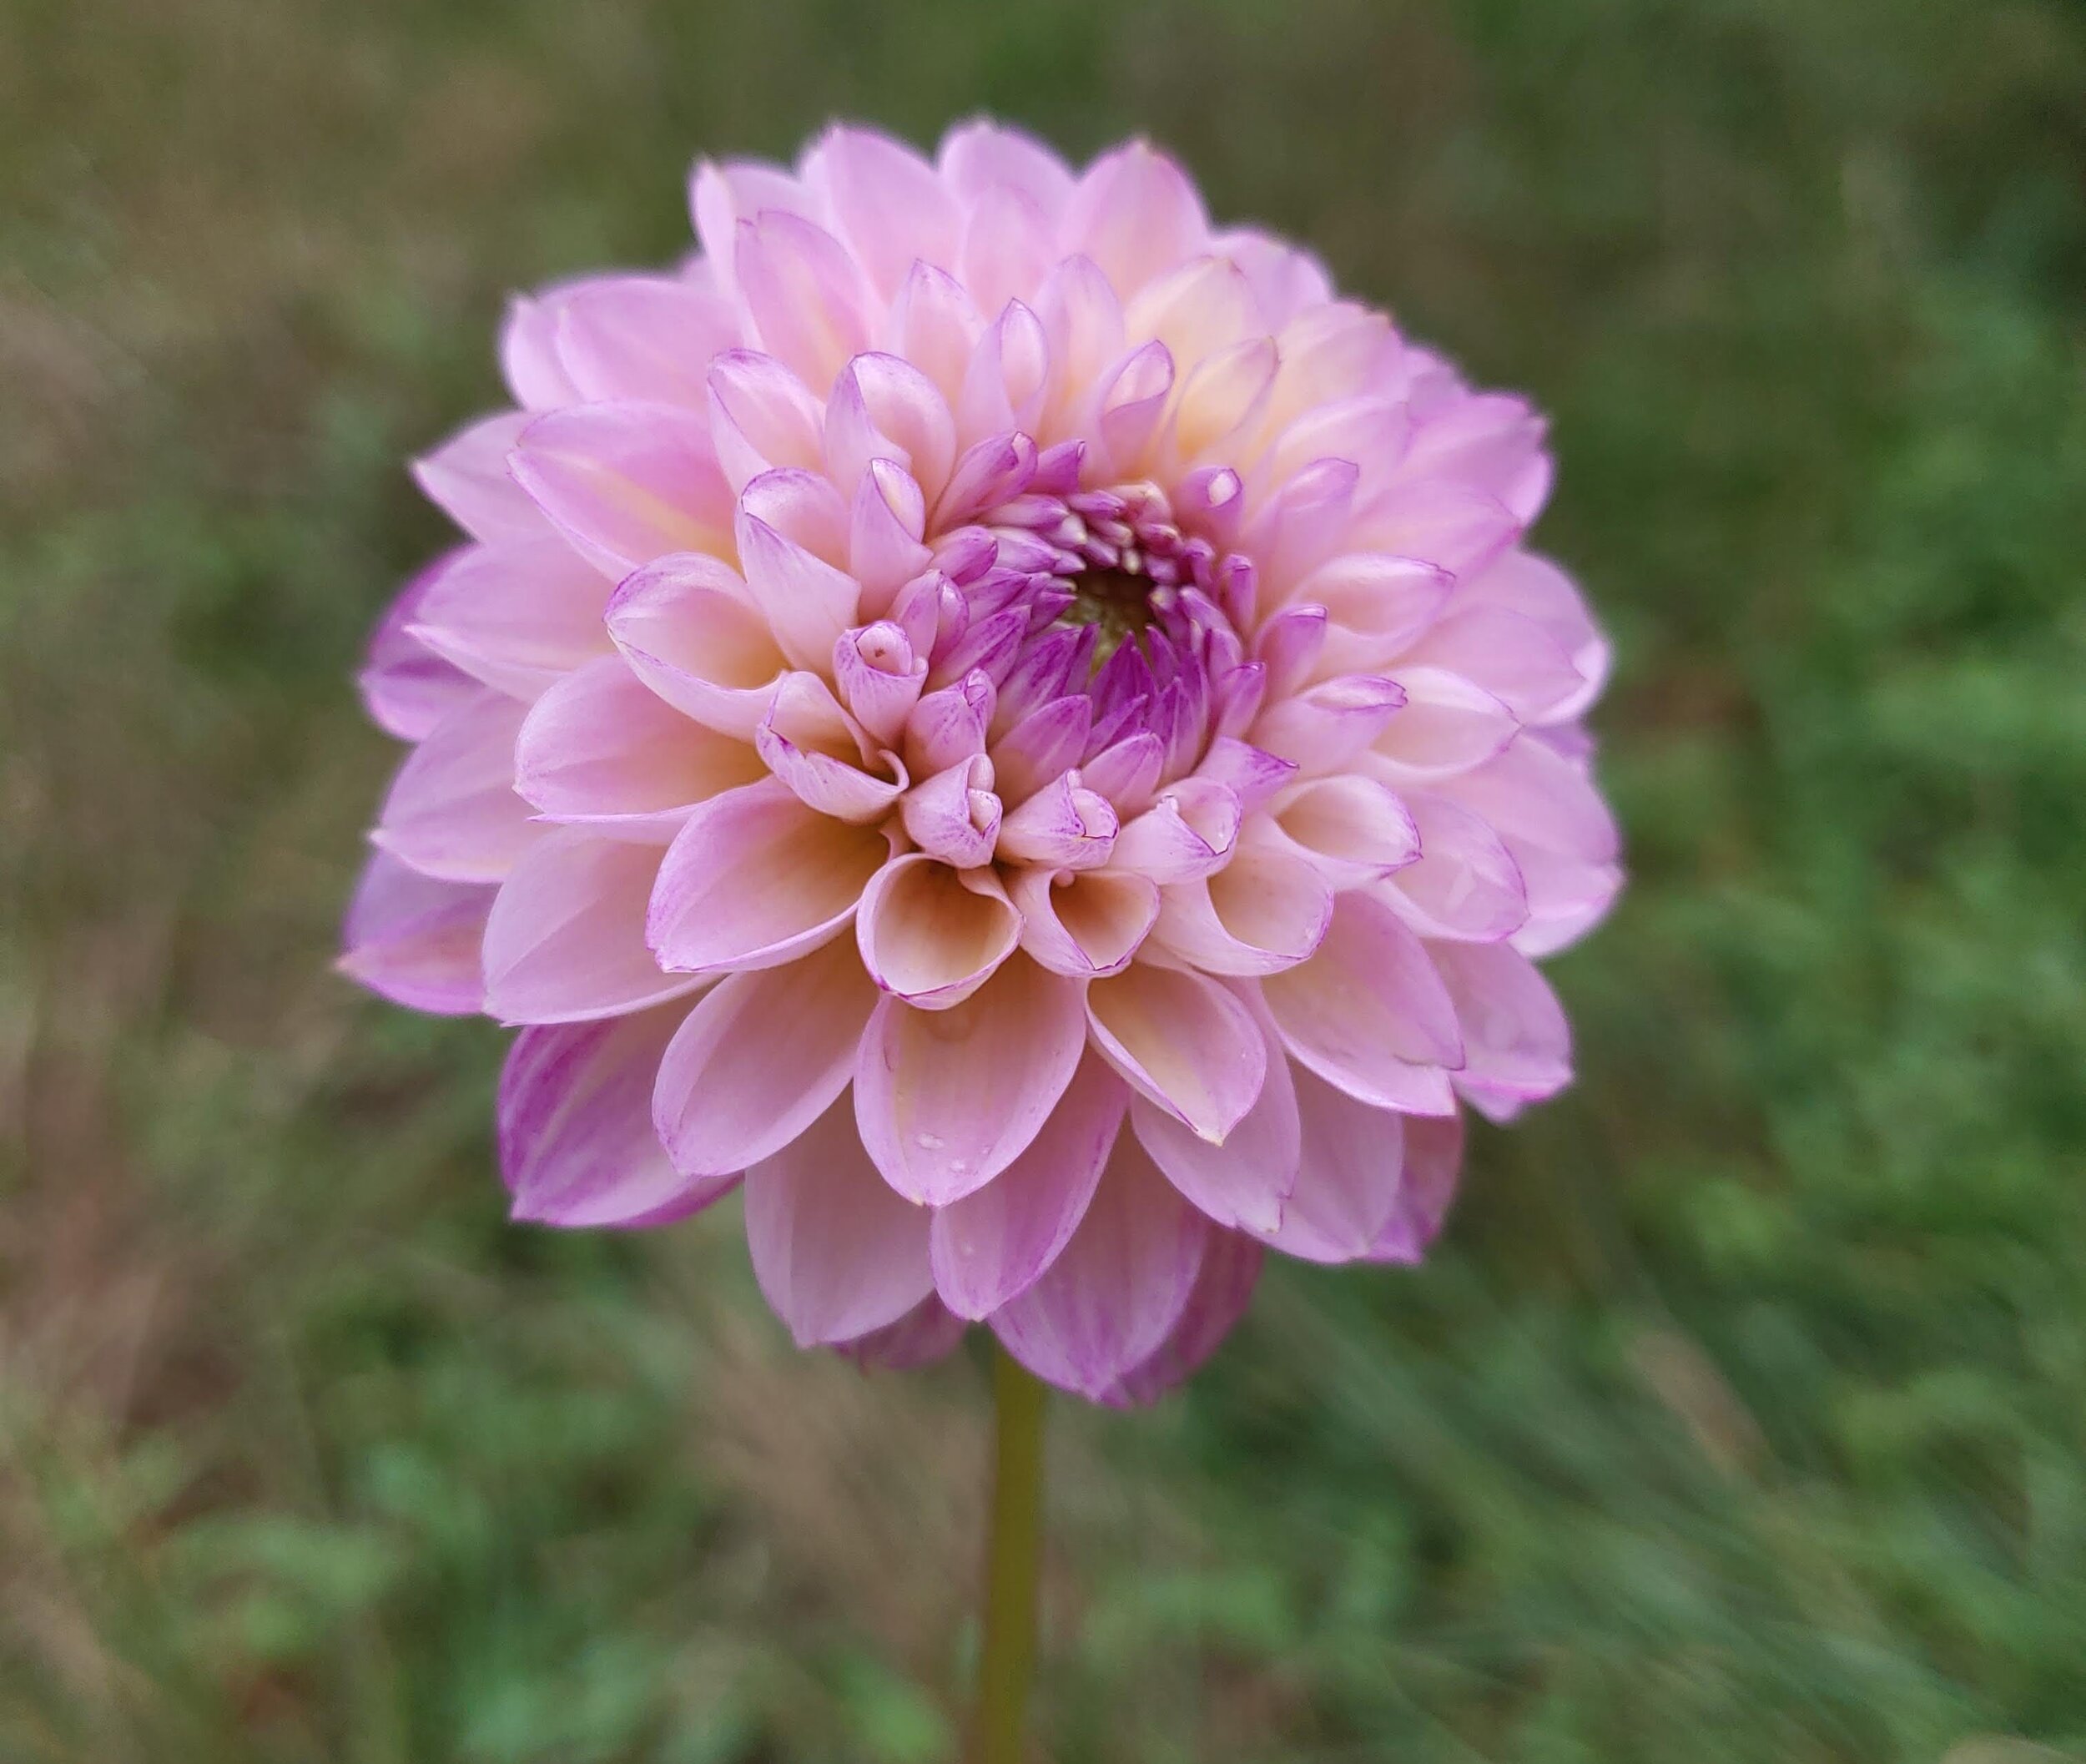
Kenora Lisa
Her color will blow your mind. It’s not just bright pink— there’s a whole sunset in there! Also- she has the glitter! Dahlia glitter that is.. some flowers have a natural sparkle to them called Dahlia Glitter. Fairly productive too.

Mary Lou
If you took a sunflower and turned it into an elegant dahlia, you’d have Mary Lou. She’s just the perfect shade of yellow, not too bright, not too garish, just right. Makes good tubers too- they store well. Excellent addition to the garden.

Rip City
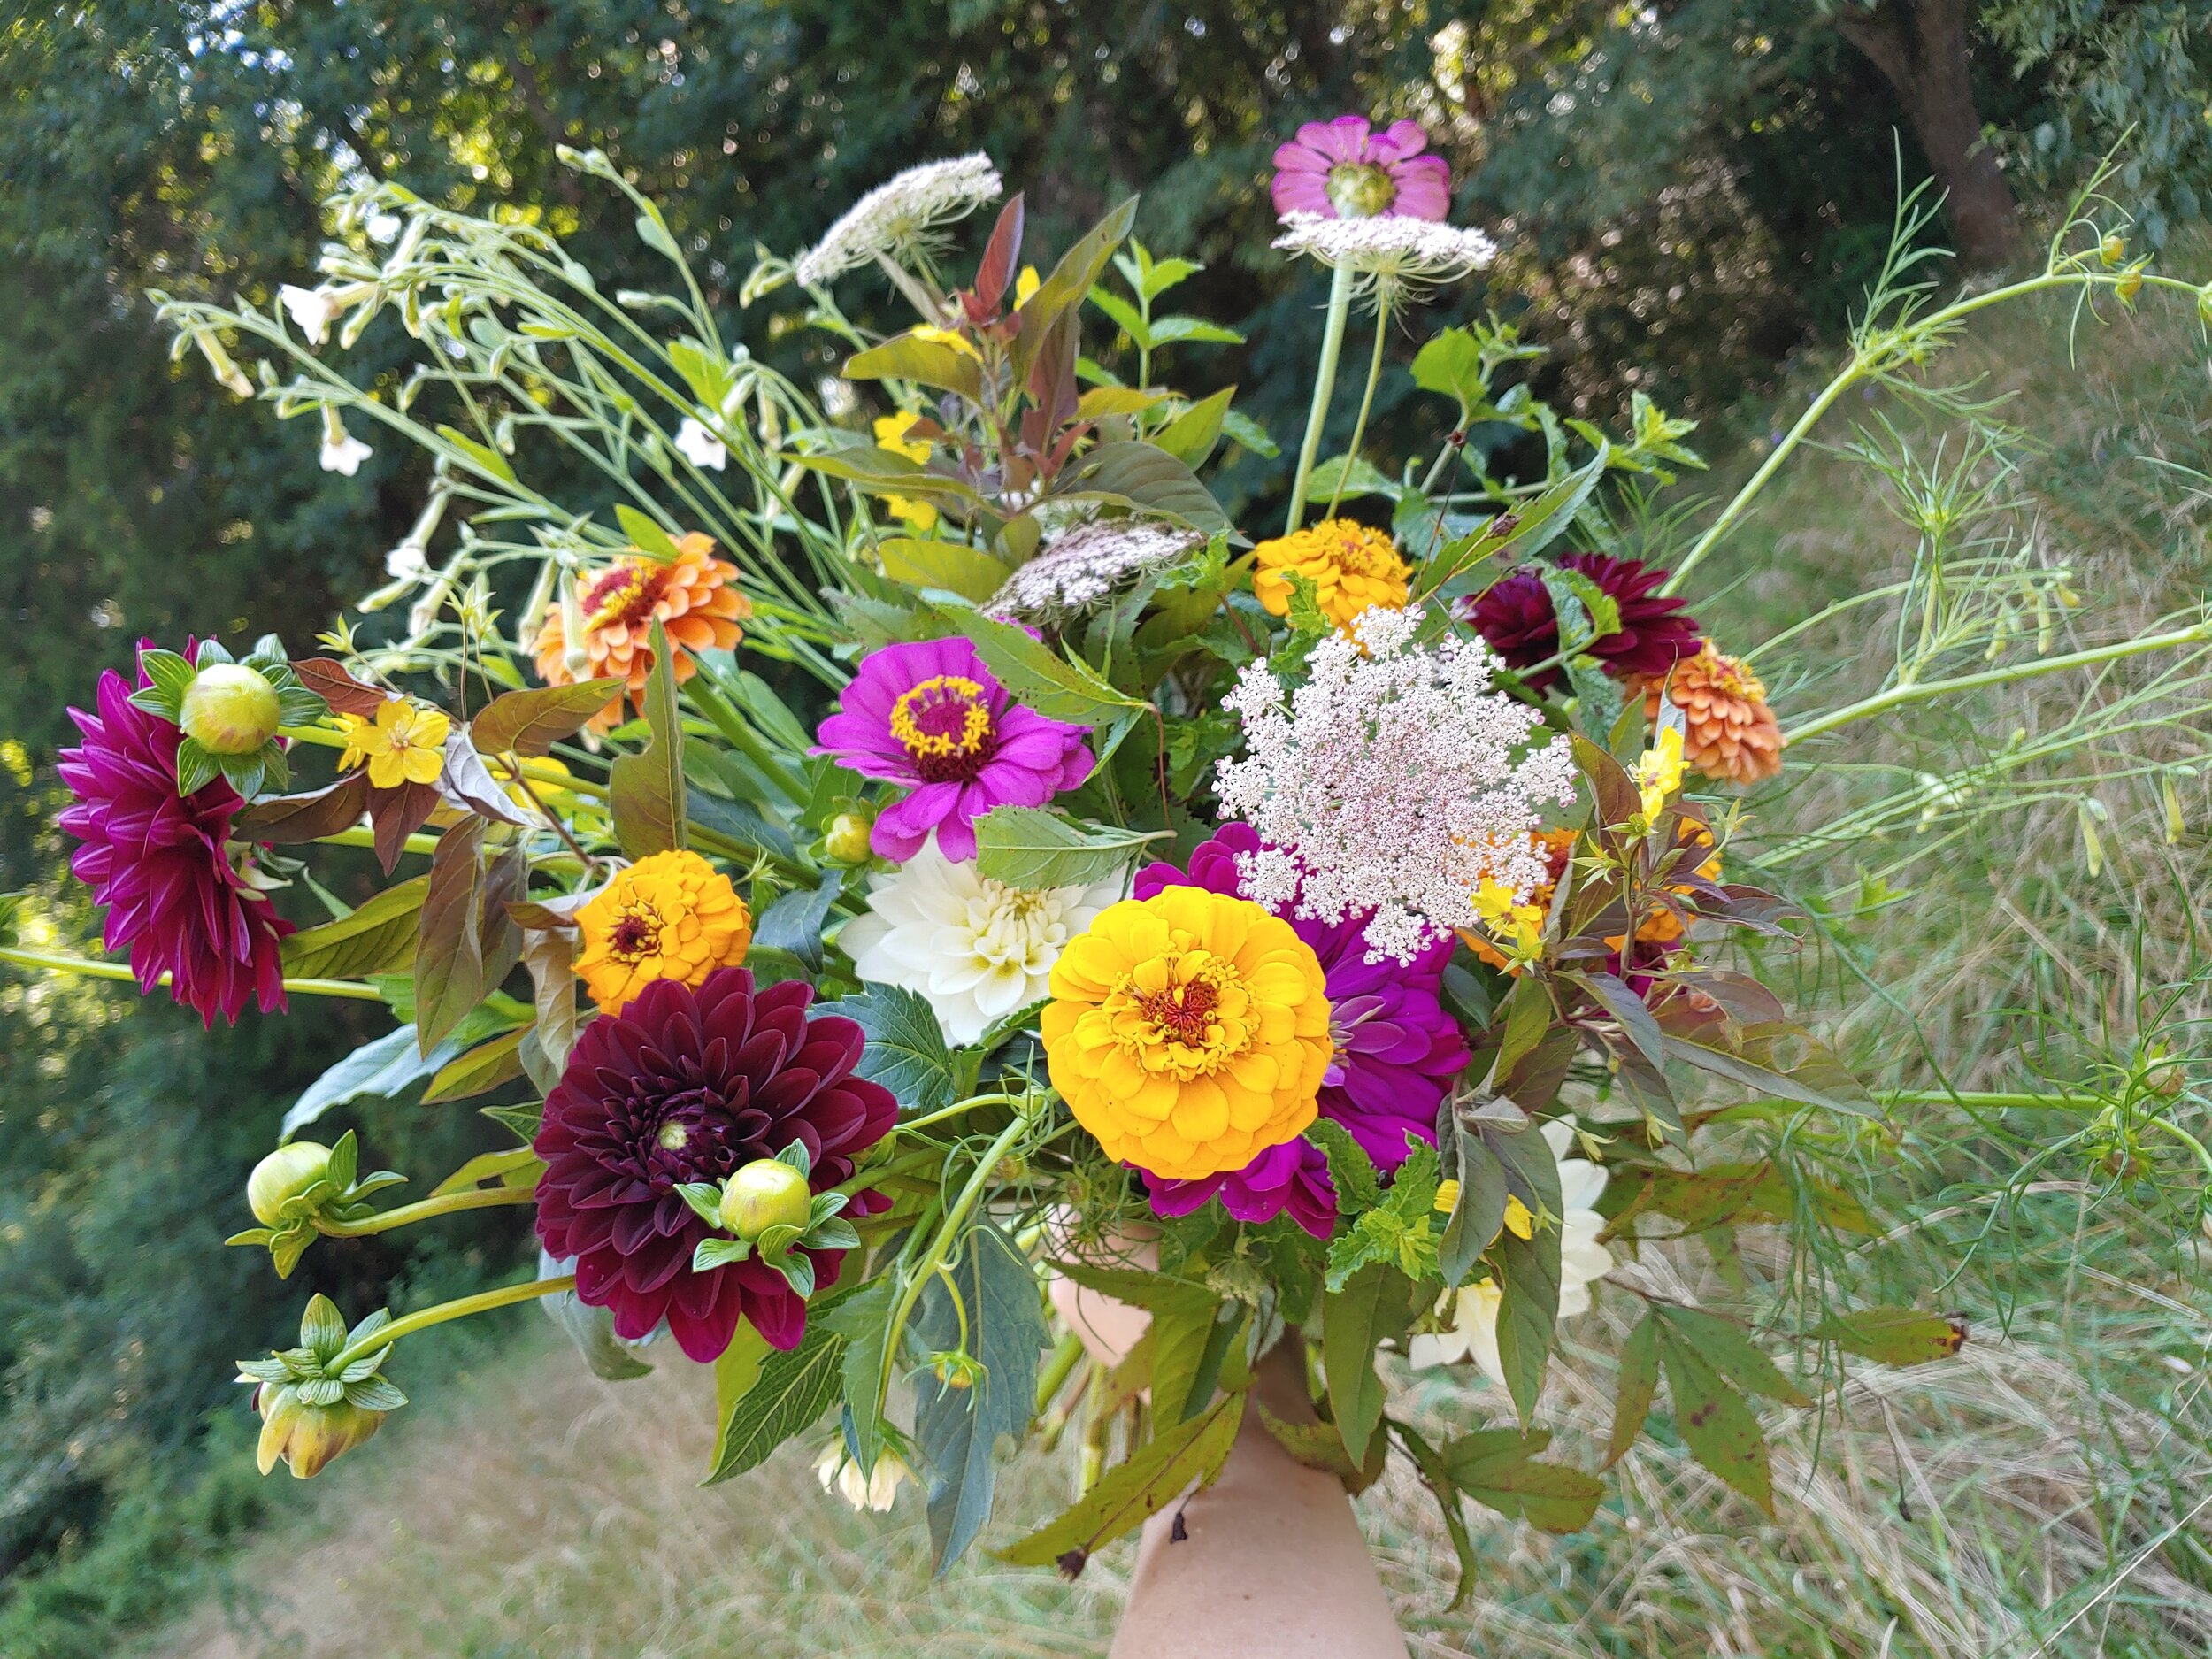
Rip City - the two burgundy blooms on the left here. Probably one of the best production burgundies out there. Amazing tuber maker too— you’ll never run out of Rip City tubers.

Roque Starburst
One of my two all time favorite whites. I only grow a few of these for me mostly b/c they are too big for most of my customers. But I love this one- often she has a blush center!

Sierra Glow
The large one in the center here. She changes color as she matures in the vase. Begins as a rusty tone but then turns a smoky mauve. Loads of ruffles! Very tall too- you gotta stake this one!

Winkie Colonel
A Big Bold Red! I stopped growing this one several years ago b/c it wasn’t popular with my florist customers but if you just want something to show off— This is it! Beautiful crimson red, nice and full!
Honorable Mention: This one doesn’t get to be on the list because it’s not the most reliable but it’s so pretty!

Hee Haugh
Unfortunately I have the hardest time getting the tubers to survive on this variety. It’s very on and off, some years I have it in my field, some I don’t. It didn’t make it this year. Maybe you’ll have better luck- it’s so pretty!
The Midsummer Malaise
Have you looked at your dahlia plants this summer and thought: What is going on with my dahlia? It looks awful!
You may be suffering from what I call “The Midsummer Malaise” (TMM). TMM isn’t an official disease or anything like that. But it’s a common issue I see on Dahlias at least once a summer, especially if you live in a hot climate.

Usually it looks a little something like this. Brown crunchy or soggy (if it’s been wet) leaves or perhaps yellow leaves if you catch it early. These are signs of stress. Ideally dahlias love more moderate cooler temps- 60-70’s. Well most places don’t get those until Fall. But in order to have dahlias in the fall, you have to grow them through the summer. So you have to get them through the heat.
So what do you do about it?
1. Clean up the plant. Remove any brown, yellow, crunchy dead leaves— anything that’s not green and luscious.
They should look like the picture below. Some growers actually pre-emptively remove all the foliage on the lower 18” of the plant. But I find that’s a lot of extra labor for 2200 plants. So I remove it where needed.

2. Inspect the plants for any sign of disease- especially powdery mildew. PM looks like a white dusting on your leaves- when it starts, it can occur just in small spots on the leaves. We’ll talk more about how to deal with PM another time. For now just notice if the plants don’t look “normal.” And by normal I mean, they should be solid green - dahlias don’t have any variegation in the leaves. It’s very slight in the photos below but those lighter greenish yellow patches are a tell-tale sign.
If you see sings of yellow mottling, then you are going to want to investigate further. That could be a sign of disease or nutrient deficiency. I tend to treat for nutrient deficiency before assuming disease unless I see any other tell-tale signs of disease.

3. It’s time for a little TLC. Dahlias are pretty hungry and need to be fed regularly to perform well. So it’s time to fertilize.
The type of fertilizer is going to depend on the stage of growth. If your plant is less than about 6 weeks old then a fertilizer that includes a bit of nitrogen is good. Dahlias don’t need loads of nitrogen. Nitrogen promotes green growth. Generally you are looking for a fertilizer that is higher in phosphorus and potassium. This is a good time to know what nutrients your soil contains (hence the reason you always hear gardeners talk about taking a soil test).
***But I know most of us didn’t stop and soil test this spring. (Don’t feel bad, I didn’t test for several years when I started gardening). You can test this fall and you’ll be ready for next year!***
So if you don’t know what nutrients your soil is low in, you do fly a little blind. But since we know that dahlias like phosphorus and potassium, we’ll look for that. Fertilizers that are made for tomatoes or roses are also good for Dahlias. I encourage you to seek out an organic fertilizer. Also I prefer liquid feeds at this point. I use a powdered/granular fertilizer when planting but prefer liquid during the growing process. I just find it easier to apply. (Brands differ from place to place and that’s why I feel it’s more important to tell you what to look for in the fertilizer than an actual name brand.)
Feed your dahlias (according to the instructions on your fertilizer) about every other week from now until about a month before your first frost date.
4. Lastly, make sure your dahlias are getting plenty of water. You can’t do anything about high heat but you can control the moisture. I try not to let my soil completely dry out. You do want to make sure you have good drainage though. Dahlia tubers don’t like sitting in mucky wet soil.
The Midsummer Malaise is bound to get you at some point and some years it is more extreme than others. But it doesn’t have to spell a death sentence for your plants. It just means it’s time for a little garden therapy for you and TLC for your plants!
Icelandic Flora
A few days into our trip, we visited the Grasagarður Reykjavíkur (Reykjavik Botanical Garden). It was definitely a highlight of the trip for me. Weather in Iceland in July is like perpetual spring. It feels like our March weather. I loved it! I highly recommend visiting Northern countries in the middle of the summer- great way to beat the heat!
My favorite part of the botanical garden was called the Systemic Garden. The understanding I eventually came too (b/c remember a lot of stuff is written in Icelandic) was that this was a test garden of sorts. It contained multiple varieties of each species planted in the garden. The plants were in raised stone beds with stone dividers.

Stone raised beds in the Systemic Garden
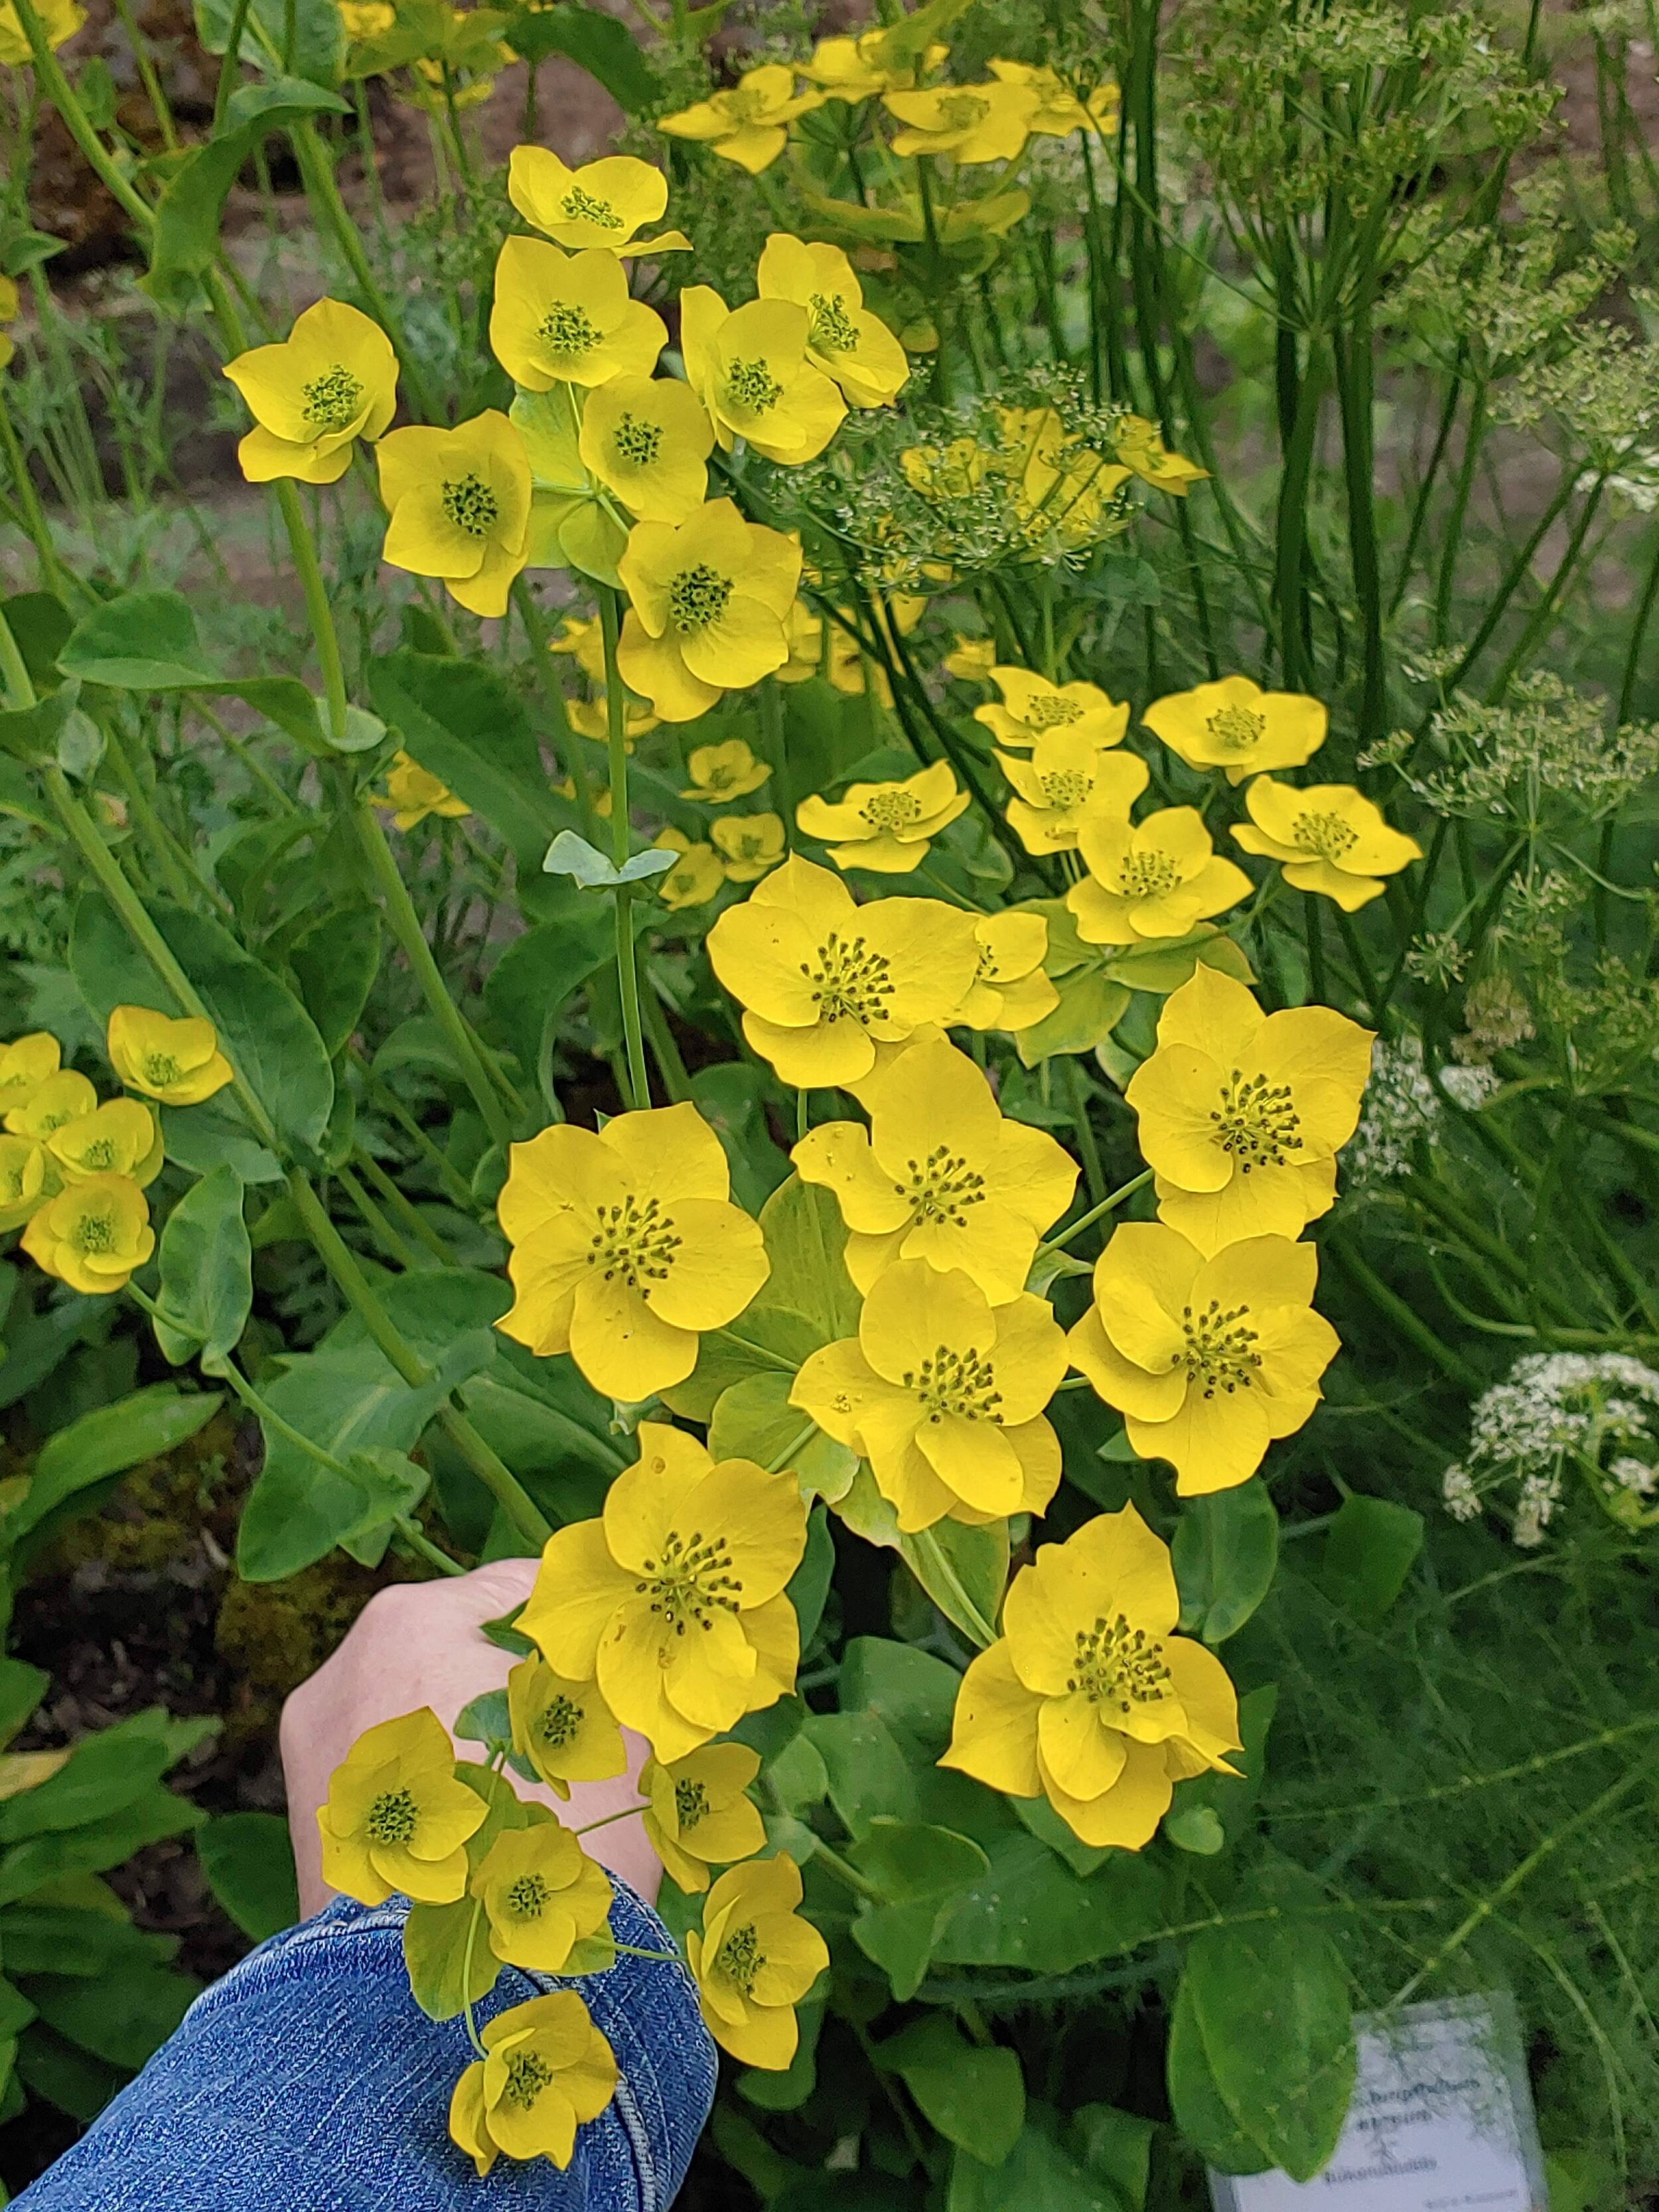
I had the chance to see so many plants that I dream of growing but I know won’t make it in our hot climate. But the best of all was the Blue Poppy!

Meconopsis Grandis
I’ve loaded up a gallery below of some of my favorites. If you hover over the photo, you can see the name.


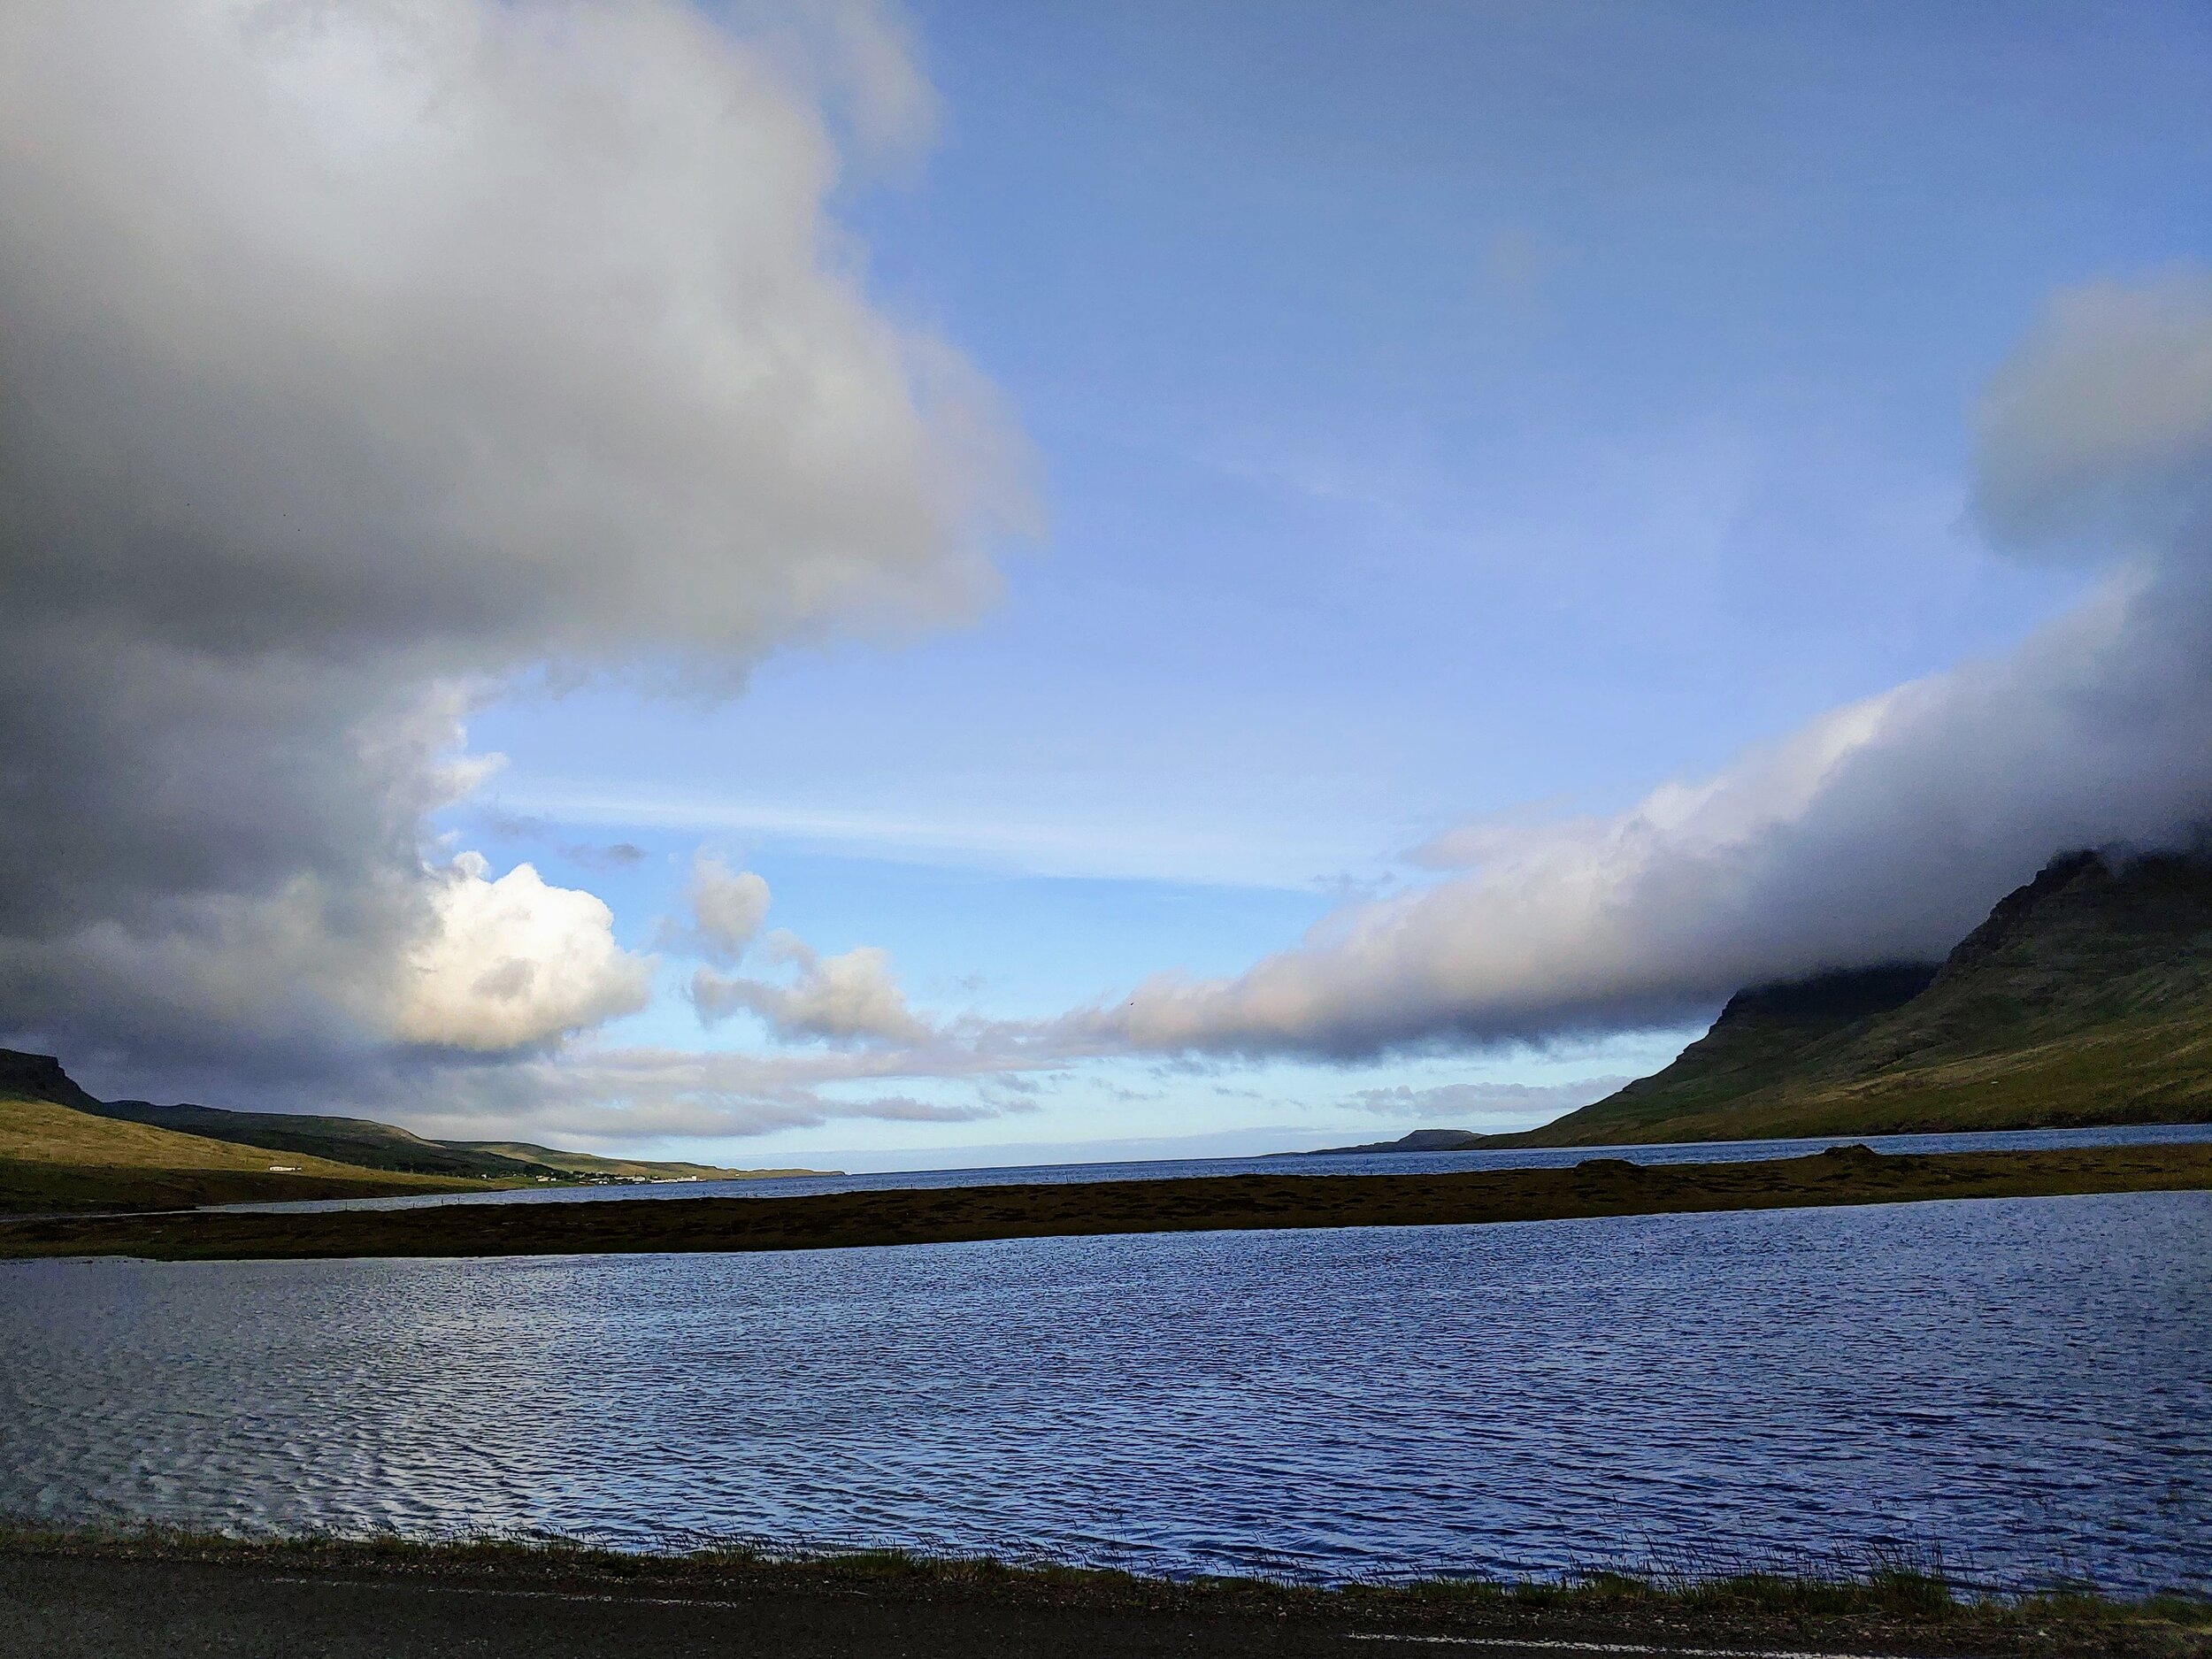
The wild flora was fascinating too. Back in the 1940’s lupines were brought in to increase soil stabilization. They appear to have done their job a little too well and now are taking over some of the native flora. We arrived at the tail end of their bloom. They were all over the roadsides during our travels through the southern part of Iceland.

Blue Lupine
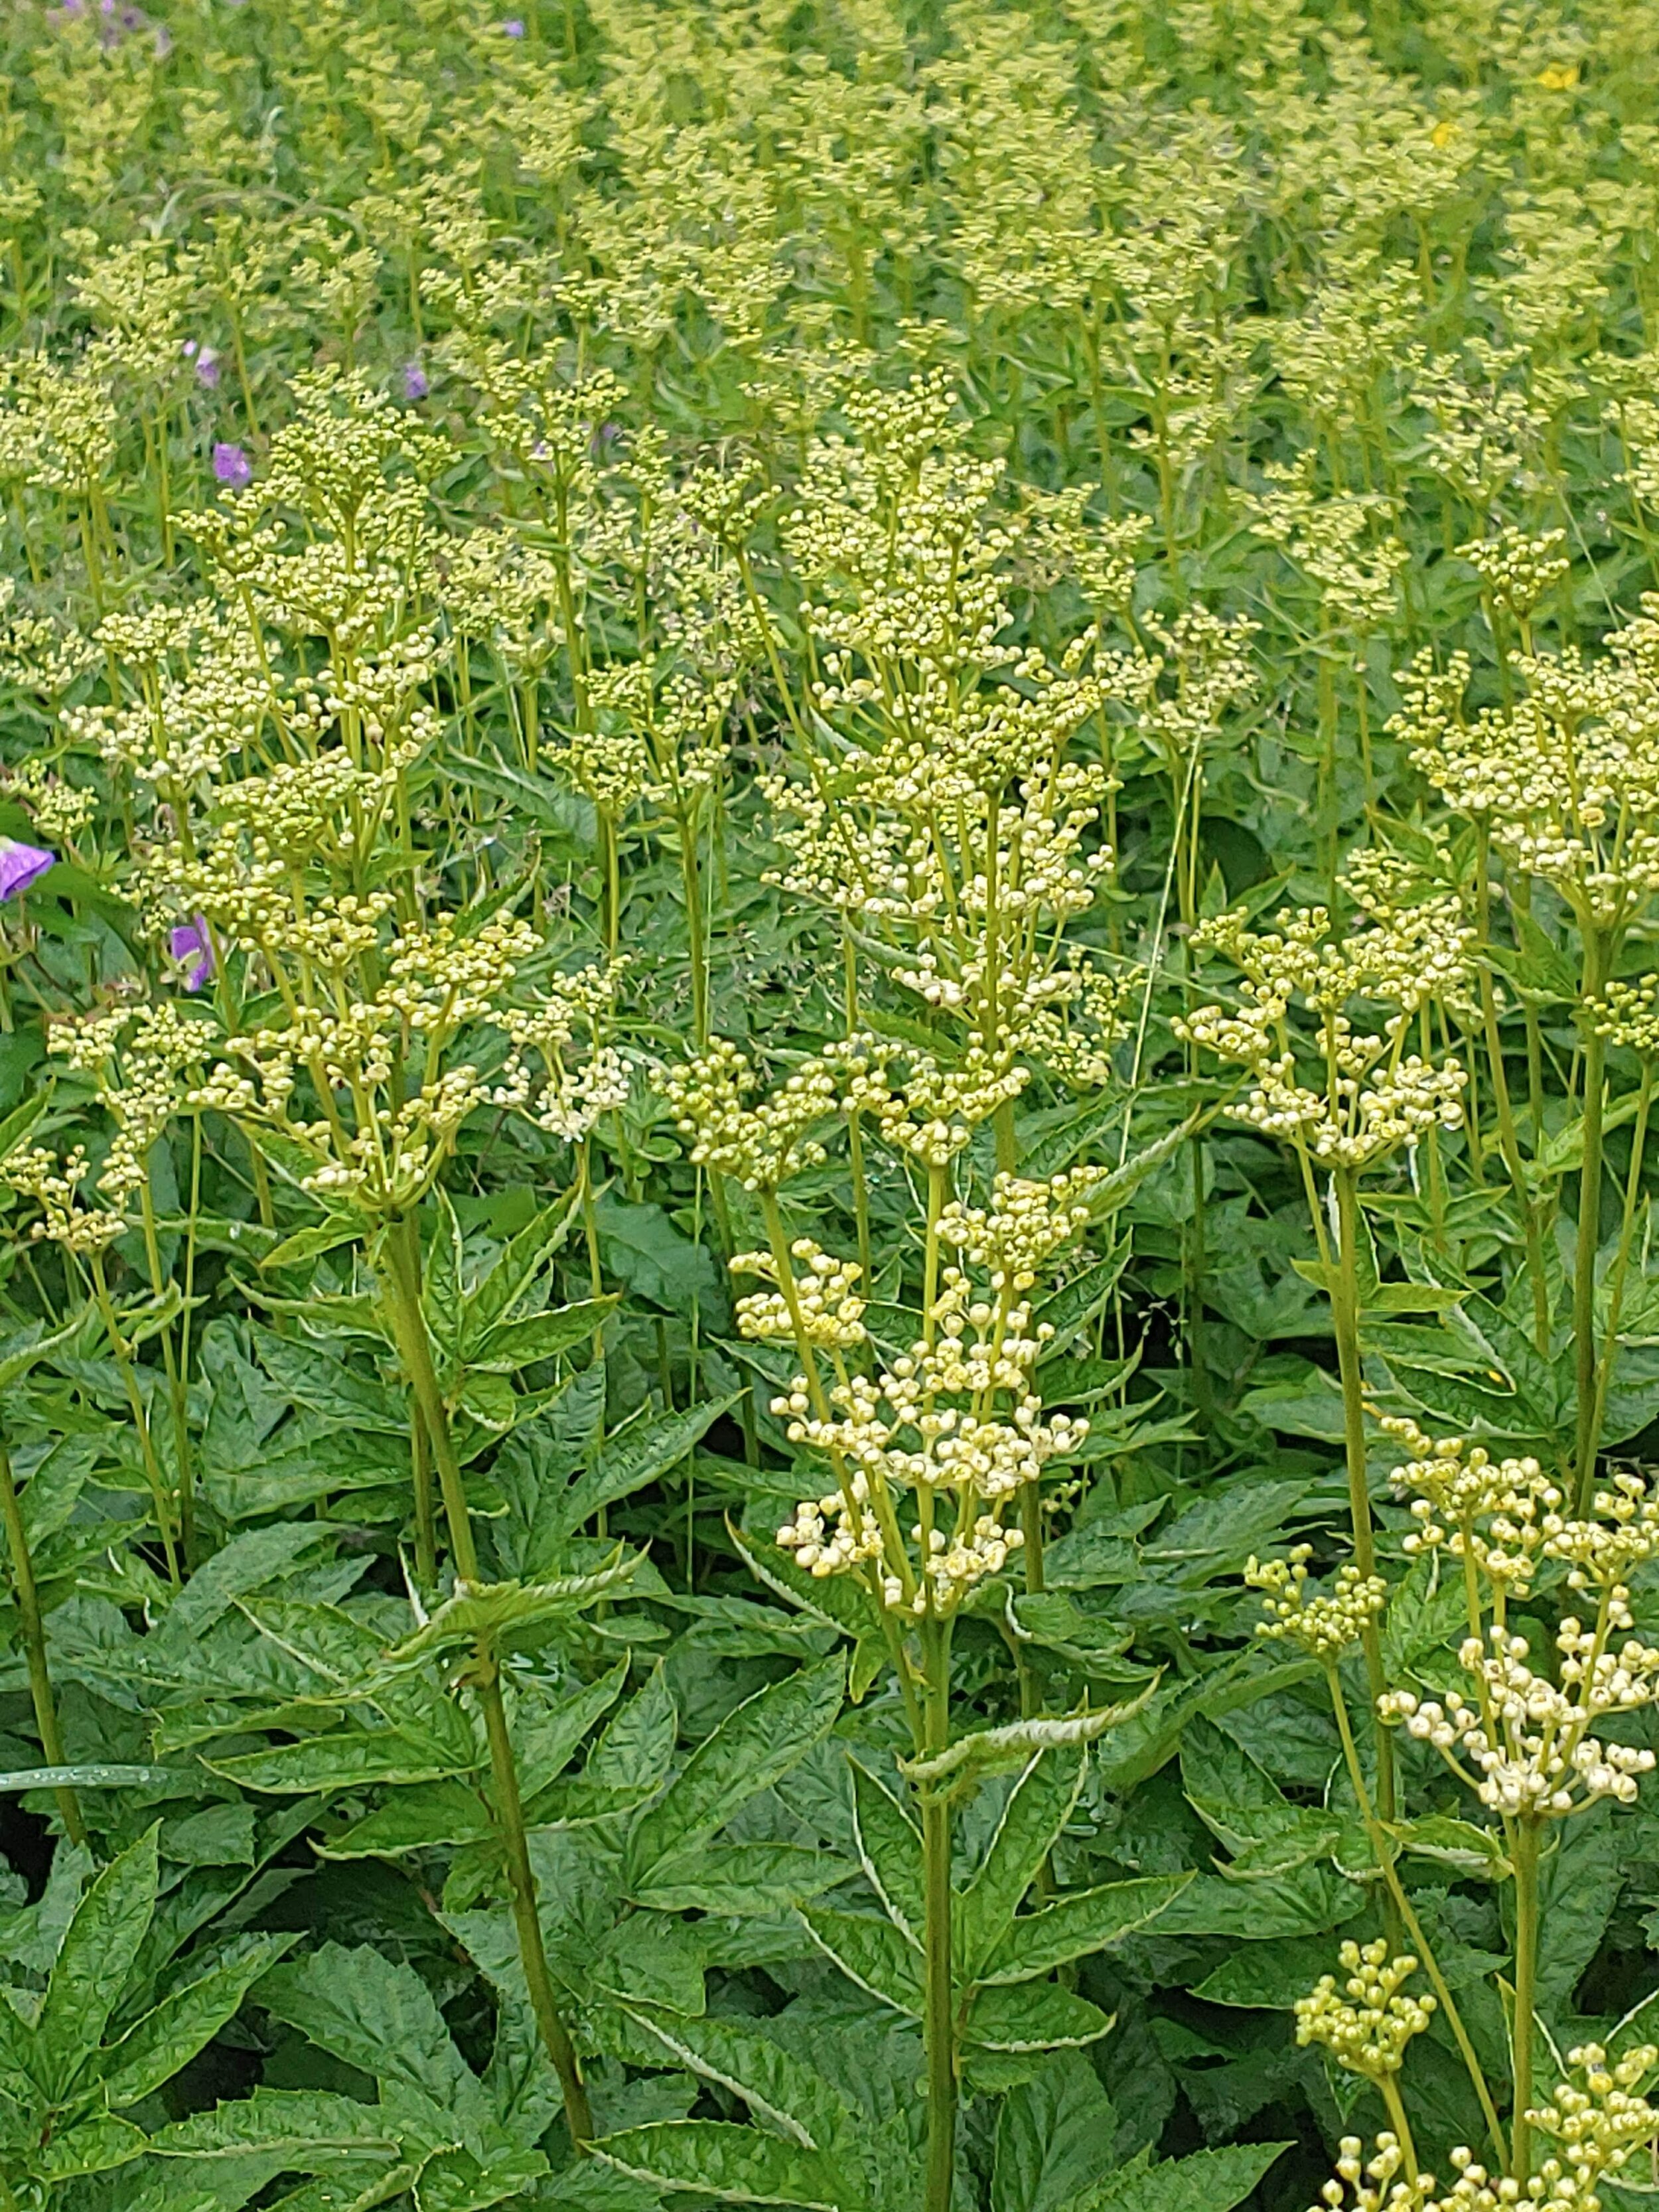
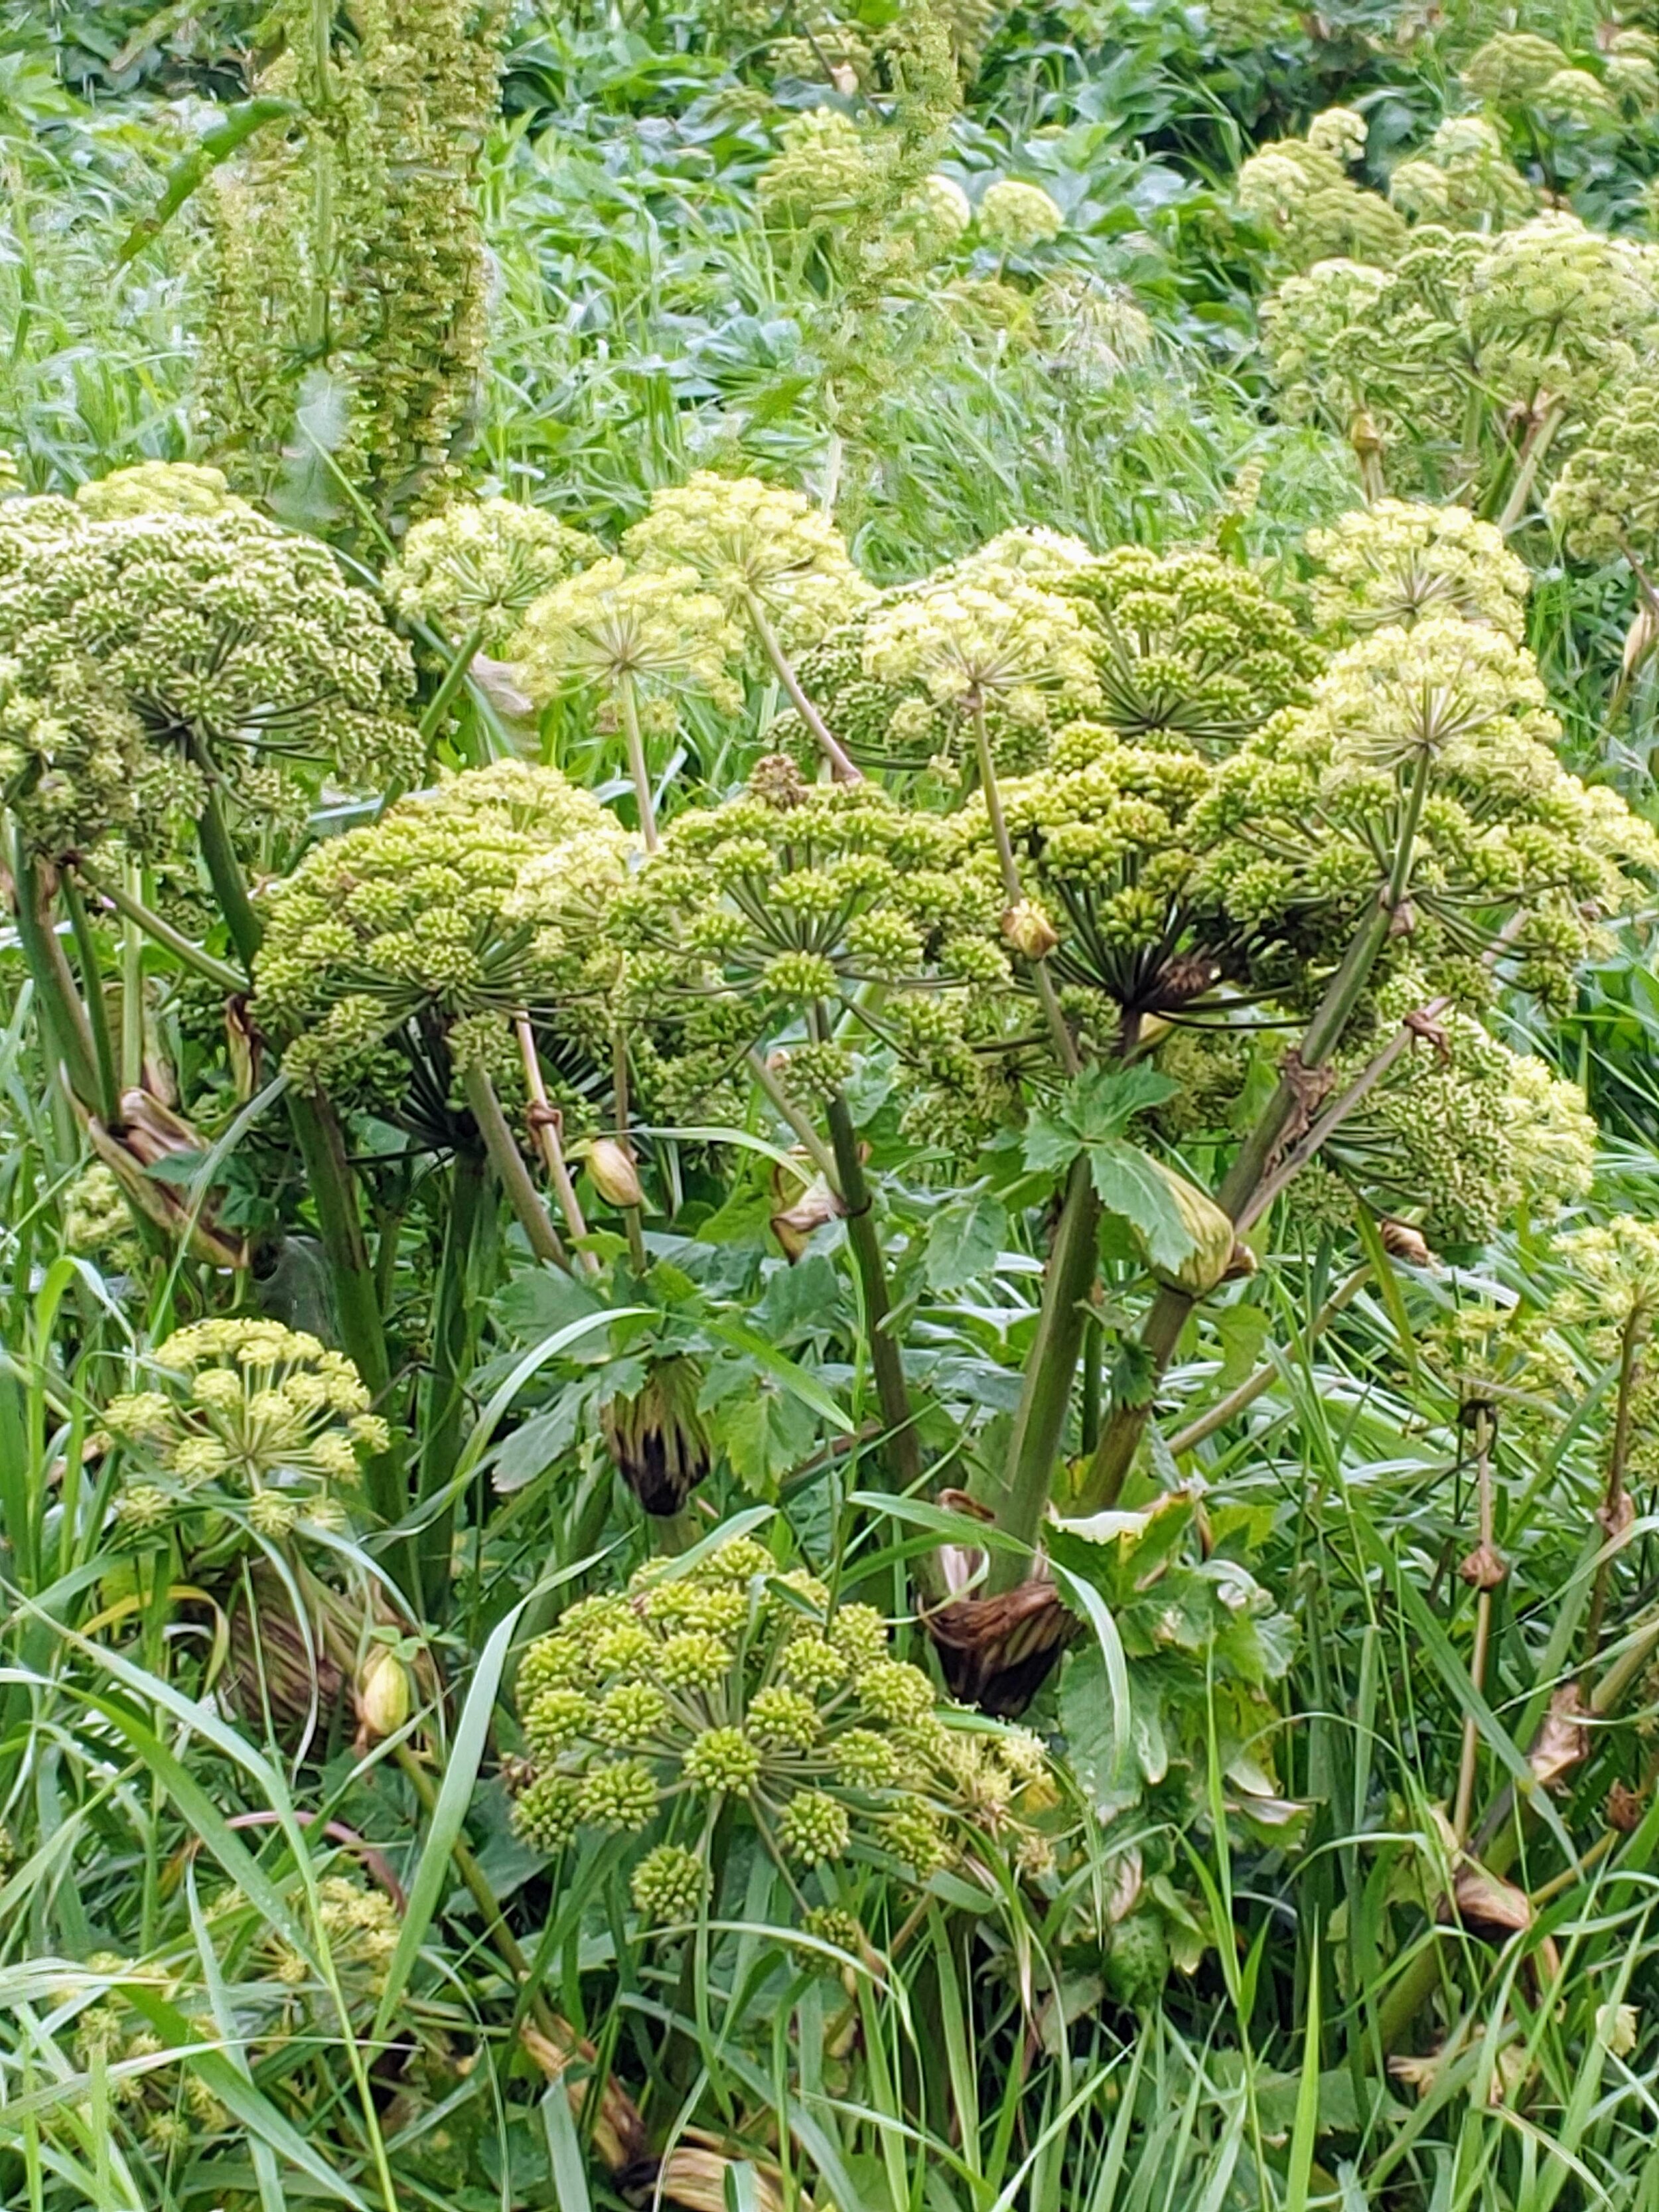
The northern part of the country had a higher population of wild Angelica and some type of filipendula.
The landscaping around the towns and homes was beautiful but surprising to me. It was an odd juxtaposition of plants. You would have a large planter bowl full of calendula, snapdragons, grasses and then a Dahlia! So lots of cool season plants and a warm season focal!

Local landscaping around Reykjavik
Also they like to use spirea, alchemilla, and snowberry as foundation shrubs in front of their houses or for hedges in the backyards. Can you imagine a hedge of spirea in July? All of these were blooming in late July.
Lilac was very common too (and it was in bloom). Think of it this way- what if someone swapped out all our crepe myrtles for lilacs? Their lilacs weren’t bushes— they were trees! (This would be an improvement in my opinion)
Iceland is a fascinating country. I feel like we took a geological tour for our vacation. I’ve included a gallery of some other things we saw below in case you missed when I posted them in my Instagram stories.


Tips for a great Summer Cut Flower Garden
It’s time to get planting! Here are my top tips to have a great cut flower garden this summer:
Pinch your plants. Most summer cut flower annuals need to be pinched. Pinching means you cut the plant back when it’s between 12-18”. Cut back to 3-4 leaf pairs- cut right above a leaf pair. Some plants that benefit from pinching are: Cosmos, Zinnias, Dahlias, Celosia (not the brain types), ageratum, Gomphrena and Eucalyptus. Pinching causes the plant to branch giving you more stems to cut and a bushier appearance to the plant.
Space Correctly. 9” is a good spacing for most cut flower plants. This allows the plants room to grow but also forces them to grow more upright so they produce nice long stems. You can go a little closer on some things but you have to watch more closely for disease issues b/c they can spread rapidly with closer plants. Also grouping your plants to the same variety in a cut flower garden aids their growth habits. Remember cut flower gardens are for producing stems and not necessarily for aesthetic plant placement.
Support your plants. Flower farmers often use a product called Tenax Hortonova netting. This is a horizontal support netting that comes in various widths. You can buy it online from most plant/greenhouse supply places. Use rebar stakes - these work better than wood if you have heavy clay soil. They also last longer than one season. Install your support netting while the plants are small- much easier than waiting until they are sprawling all over the bed.
Water, water, water! Make sure you are giving your plants adequate water. In order to produce abundant blooms, plants need water! Good drainage is also key. Most cut flowers don’t like to have their roots sitting in mucky wet soil. A small garden style irrigation kit is a life saver in the summer time. The time it will save you is worth the money. Not to mention the peace of mind while you are on vacation.
Feed your plants. Most soils in our Upstate area have decent nutrition but plants can use it up. So once a month, top up the nutrition in your beds with a liquid fertilizer. I recommend the Neptune’s Harvest brand. Fertilizers that work for growing tomatoes work well for flowers too! Cosmos are the exception though— if you give them fertilizer, they will make lush green plants with no blooms. Cosmos actually prefer poor soil.
Limit your use of pesticides. Most summer cut flowers don’t attract major pests. And if they do, the pest usually has a life cycle and is gone within a few weeks. I recommend adopting a wait and see approach. This means not reacting immediately when you see a pest. Do this instead: Research- find out what the pest is, make sure you can identify it correctly. Read about it and learn what it’s predator’s are, learn how to attract them. Water sources in your garden are one of the best ways to attract predators. They attracts birds and they are some of the most useful predators. Remember if you want a garden without harmful pesticides that you means are looking to strike a balance. You have to accept some bad bugs b/c without them the good bugs have nothing to eat and therefore won’t come to your garden. A few nibbles on your petals are a small price to pay for a chemical free garden.
So there you have it— some great tips for a successful cut flower garden! I look forward to seeing your flower photos this summer!