


The Mulch Chronicles- Part 2
Last time we talked about using straw as mulch. Part 2 is all about using cover crops as mulch. I’ve got 2 different scenarios to share with you.
Scenario #1- Raised beds (4x16)- Seeded mid to late November with a mix of crimson clover, greens mix and daikon radish. The greens mix came from my local feed and seed and probably contained mustard, rape seed, etc. I’ve used similar combinations before so knew these would give me good cover for the winter to suppress weeds and add a decent amount of organic matter to the soil.
So that’s where we started. Here’s how it all went- fast forward to mid December and if you pay attention to the weather you know that most of the US was extremely cold around Christmas Day. We got down to around 6 degrees in my field. Unfortunately this killed off most of the cover crop except the crimson clover.
Fast forward to spring and I had a nice crop of crimson clover with it’s deep red bloom - it was beautiful on a breezy day!
Now let me explain one thing about cover crops and why they have always been a bit frustrating to me.
Timing
As you read above, the crop was seeded mid to late November. That’s kinda’ late- we were still at the temps needed to germinate the seed (benefits of living in a warm climate). I can’t seed it any earlier because our dahlia season doesn’t finish until early November and it takes a bit to dig the tubers. This means we don’t get a lot of growth before winter. Most of the growth happens in April. But then the problem arises- I need to plant in May. Most cover crops require at least a month of tarping to decompose. So if I wait until the end of April to get the biomass I need, then tarp for May- I’m not planting until June.
Sometimes this can work out- depends on what varieties are going in there and my current crop goals for the year. This was the process I followed in the 2022 crop year. But I got to mid June and the crop still wasn’t decomposed. So I had to come up with a plan!
I was still using black fabric at the time so we removed the tarp and laid the black fabric on top of the decomposing cover crop. Then we took our hands and just moved the cover crop out of our planting holes. It looked like this:

Then I took an auger bit on my drill and made a hole. A bit time consuming but it was actually very effective. When we removed the fabric at the end of the season, the cover crop was 90% decomposed and the tubers that came from these beds were some of the best ones of our whole dahlia crop.
I was a bit worried about the decomposition and how it would affect the tuber growth but they did just fine.
This year, I’ve modified the process a bit. I’ve eliminated the black fabric from my process. I took a weed eater to the cover crop in mid May and then tarped it for about 3 weeks.

I’m just pulling the cover crop back, drill with my auger bit and planting. I do think I will add a bit of the straw mulch to these beds because there are some inconsistences in the coverage of the cover crop (probably due to losing half of it in December).
This was a very quick and easy process. I’ll probably use it again.
Scenario #2: This field consists of 45’ in ground beds that are 3’ wide and were cover cropped with winter rye. I chose winter rye because I hoped it would break down faster in the Spring. But when it came time to terminate the crop, I took a different route.
The rye made it through the December freeze just fine. (So side note- crimson clover and winter rye are extremely cold hardy cover crops!) It produced a thick stand of biomass. So thick that I decided it would make a great mulch without tarping it. Instead of terminating it by cutting, we “crimped” it.
Crimping is a common practice used in a lot of no-till farming operations but it really requires a bit of equipment (at least on a large scale). Large scale no till farmers have crimper rollers that attach to the front of their tractors that will flatten a cover crop. Well, we don’t have that.
So we did it the old fashioned way- with our feet! We stomped on the crop and used some metal rakes to rein in the rye grass. Here’s how it looked after about an hour (for 6 rows).

You can seed how the rye has just been folded in and laid flat. You want to try to get it going as much in one direction as you can- this is helpful later.
Now here’s where it gets creative…..
I had to figure a way to plant in it because it wasn’t going to spread into nice round holes like the other cover crop. So what did we do- we turned to a little fire power!

First off— proceed with caution if you try this method and it definitely requires two people. One to burn, the other to stand by with a hose! I know it probably looks like we caught the whole row on fire but we actually didn’t require the hose all that much.
You definitely want to use a template of some sort- that helps to control your burn. This is my template from burning holes in fabric. This template is a 9” on center spacing (experimenting with a closer planting on these too!)

Definitely don’t do this on a windy day and preferably a few days after you’ve had a good soaking rain.

The burning helped us break through the mulch layer which was a solid 6-8” thick. We took our hands and spread the mulch apart in the burn holes, used the auger to break up the soil and planted our tubers. They are already starting to sprout. This cover crop is thick enough that I don’t think it will require any extra straw mulch.

So pros and cons of the 2 scenarios. #2 is more time consuming- it took about 1 hr, 45 min to burn and plant a 45’ row containing 171 tubers with 2 people. However, the mulch is very thick and retains a lot of moisture in the soil (which is good because this is an auxiliary plot where I don’t have dripline irrigation on the dahlias. I can use overhead or hand watering if needed).
#1 is faster but requires weed eating which I don’t really like. I enjoyed the foot crimping process much more than weed eating. Also the crimping doesn’t require you to wait to plant— no decomposition time.
Definite pros and cons to each method and I really think that only time will tell. I’ll report back after a few months have passed with how each scenario is progressing.
Next time— mulch methods for the home or small scale grower.
The Mulch Chronicles- Part 1
I’ve said it before and I’m sure I’ll say it again but part of why I farm is the desire to experiment!
Weed pressure is very high on my farm so I have to have a solid system for controlling weeds. And preferably one that doesn’t require a ton of time either!
I began planting my dahlias the same old way this year but I knew in my gut that I wasn’t happy with it. I began researching, talking to other farmers, and just generally thinking about the process. The longer I farm, the more I question everything I do. There’s so much labor that goes into growing that I’m constantly looking for innovations and refinement.
So today begins a multi-part series on mulch! (Didn’t think I’d find enough to say about mulch for several posts but with everything that’s been on my mind- I don’t think it’ll be a problem)
So before we get to what I’m experimenting with- let’s take a look at where I started.
I wish I had a picture from the summer of 2018. But maybe I can describe it: mid July, 90+ degrees everyday, full sun, sweat dripping everywhere. I’m staring at a bed of weeds so high that you wouldn’t know there were dahlias growing in there unless I told you. This is what my dahlia field looked like!
I’m pretty sure I lost it several times that year. This is when I began thinking about planting in black fabric mulch. (I did have the dahlias mulched with wood chips— but as you see above- it didn’t work) Over the winter, I began burning holes into black fabric mulch for each dahlia bed. I had resisted the black fabric growing trend for years because I had a lot of reservations about it. But I was desperate!

These raised beds are 4x16 and each bed holds 64 plants at 1’ spacing. And up until this past week- this is the system I’ve used. And it worked reasonably well —until last year.
Last year’s weather showed a lot of the downsides to black fabric mulch. The things I feared began to come true! The extreme heat and drought we faced didn’t interface well with the black fabric. I lost hundreds of tubers that basically just burnt up in the ground.
I had to pull out all my tricks to cool the field down- overhead watering during the day. We also used Surround crop protectant (this is a kaolin clay based spray that is used by a lot of organic fruit farmers). The Surround spray is white so it not only protects your crop but also reflects light. We sprayed the fabric and the plants.

This picture is from late June of 2022. As you can see, you have to keep spraying as the plants grow. Also a lot of rain will wash it off (but it will last through some rain- just depends on how much). Also once your plants begin to bud you have to discontinue use because nobody wants a white chalky stem! But it helped get me to the point where the plants where big enough to shade the fabric.
Now do I think black fabric is a bad idea for hot climate growers? Well— it all depends. If you are a more extreme hot climate (zone 8 plus), then it’s probably not going to be the right thing for you. But I’m a zone 7b and I run this kind of weird borderline. Things that work for cool climates can sometimes work here as well as the really hot climate methods too.
I do think that if you plant early enough in spring to get a thick plant canopy over your fabric that this system could work well for a hot climate grower. But I don’t like planting super early because I don’t want blooms in July. I will say that the black fabric does a fantastic job at keeping the weeds down. We usually make one weeding pass through the field when the plants are around 18” tall and that’s about it for the season.
But after last years extreme heat and drought, I knew I had to find another way.
I’m experimenting with 2 methods this year: straw mulch and cover crop mulch. We’ll talk about straw first (cover crop mulch is part 2)
So why haven’t I tried straw before? It does seem like the obvious choice. Well I did try it - many years ago and not long after laying it down, I had a nice crop of green grass growing under my plants. I soon discovered there wasn’t a clean weed free source of straw locally to me.
I mentioned this to my grower friend, Lori (of Broad River Blooms). She, being the generous person that she is, shared with me her straw source.

For my local friends, you can order this through Tractor Supply stores, possibly Lowe’s too. It’s an extremely fine milled straw. It makes a very dense mat over the soil. It also has a tackifier that keeps the straw together and helps prevent washing away.
I decided at first I would try it on one bed. I put it down about 2 weeks ago and began keeping tabs on that bed. Watching for weeds (too soon to tell on that part) but also checking moisture levels. The black fabric tended to get so hot that the soil was drying out underneath it. After a few days (with no rain and only 1 run of the irrigation system), I did a moisture check. It was still moist underneath the mulch. The bed next to it with black fabric was bone dry!

Since this picture was taken, the dahlias have begun to poke through. We have also had a heavy rain— the straw stayed in place! Now we wait to see if it keeps the weeds down after all that rain.
(BTW- I’ve figured that one bale will cover at least 2 4x16 beds).
Another thing to think about when using any type of mulch while growing dahlias is removal. If you dig your tubers in the fall, you must think about how the mulch will affect that process. The straw seems easy to handle. If it’s too thick, we will rake it off the bed. With the fabric mulch, we had to be very careful pulling it off to make sure we didn’t knock the labeling tags off our plants.
Another bonus to using a natural mulch is that it will break down and add organic matter to the soil over time.
The only cons I’ve thought of for the straw mulch so far are — expense. The black fabric is reusable so it’s a one time expense. But I’ve done the math and the straw is still affordable within my crop projections. Second, there is always a risk of residual herbicide when bringing something like this into your farm. I do feel better about buying this brand rather than sourcing straight bales. I know that straw bales are often purchased from many sources and therefore there is less control over what gets sprayed on the grass before it’s cut.
Over the next week, I am going to be removing the fabric from the beds we’ve already planted and adding the straw mulch. The tubers are just beginning to sprout so if I do it now, I won’t damage the plants.
I really hope the straw keeps the weeds down because if not, it’s going to be a lot to keep weeded!
Next time— using cover crops as mulch. Let’s just say this is where it gets interesting (and a bit creative)!
The Layered Garden Bed - Update
Everything is sprouting in my layered bed. The Tahiti daffodils are blooming. One small dahlia sprout came up last week due to the 3+ weeks of warmer than average February temperatures. But the last 3 days of frosts killed it off. It will resprout though! The concept is working beautifully so far!
If you missed Part 1 of this project, click here.
The Layered Garden Bed
While relaxing a bit before Christmas, I was browsing Sarah Raven’s Cut Flower Garden. I read about a method of planting bulbs in a layered method— but in a garden bed setting. I’m familiar with this process for bulb pots. But I’d never considered it on a larger scale.
But why not? Of course I needed to give it a try! I filmed the process of planting the bed and I’ll report back occasionally as the season progresses.
My Favorite Perennials to Add to Dahlia Bouquets
Y’all know I love Dahlias but my second love is perennials! What’s not to like about plants that you plant once, give a bit of love once or twice a year and then enjoy their amazing show year after year!
There are some well known Fall perennials but I’ve been doing a lot of work over the years to find some more unique plants to add to my collection.
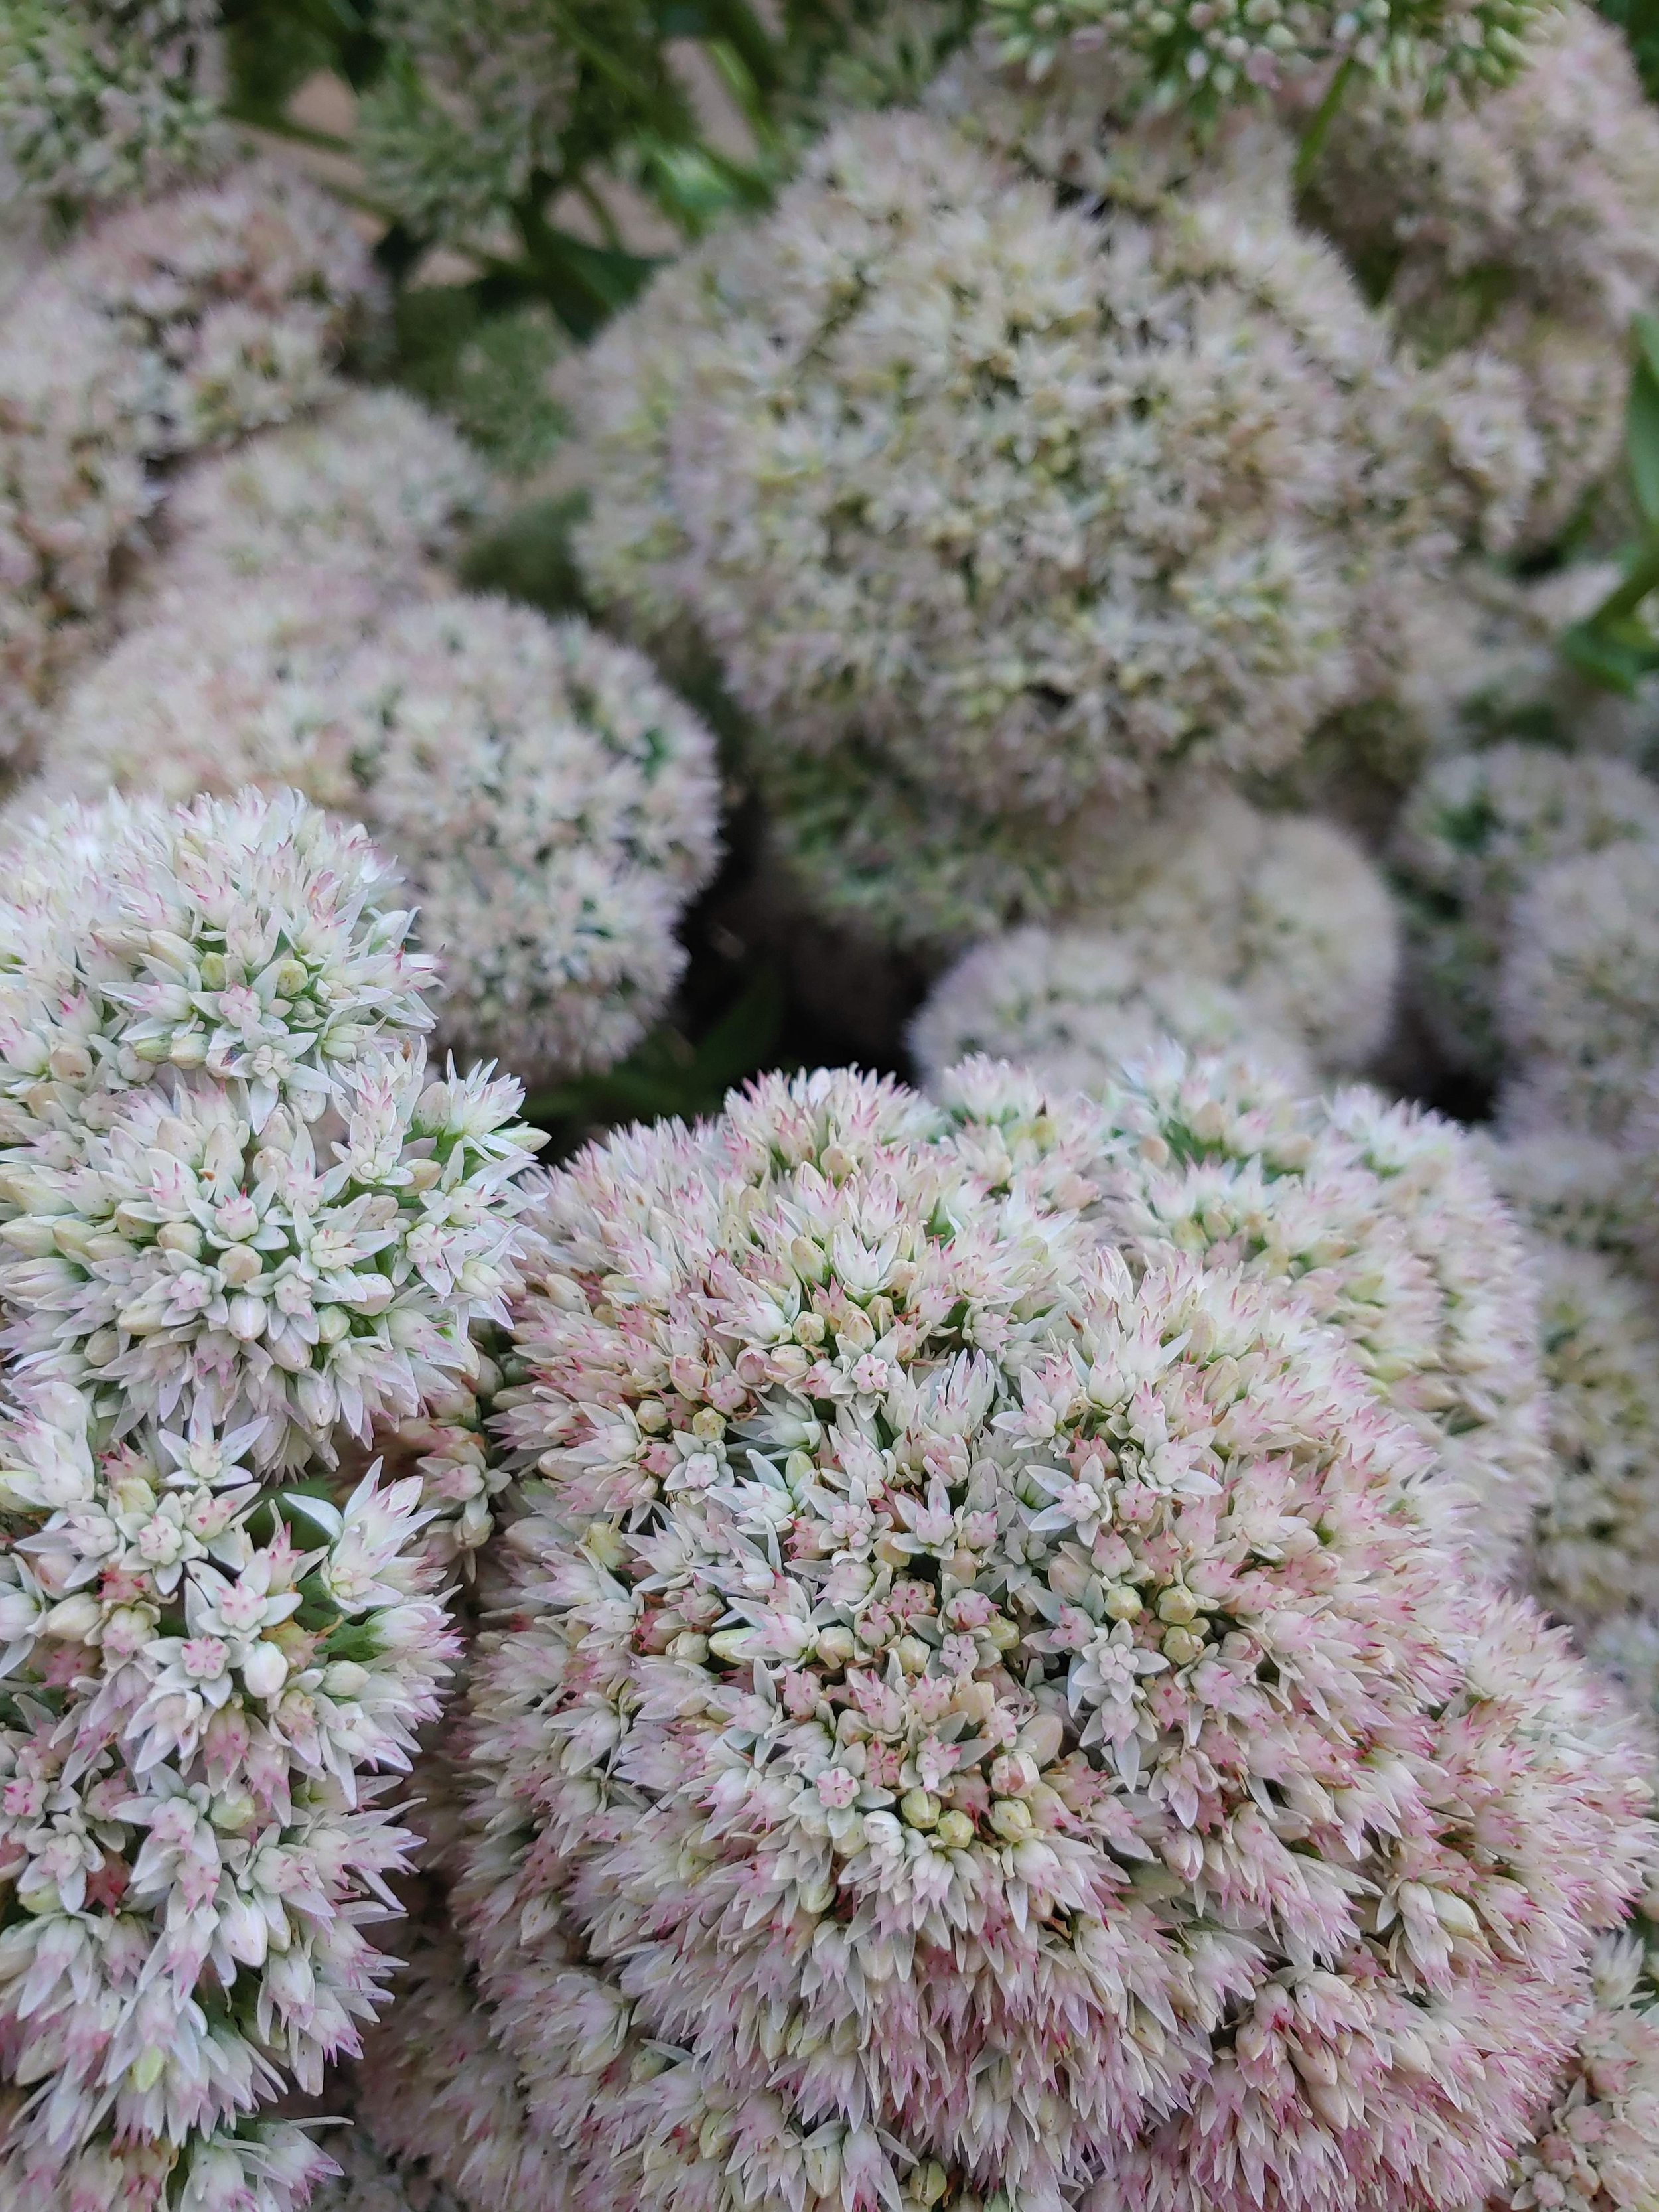
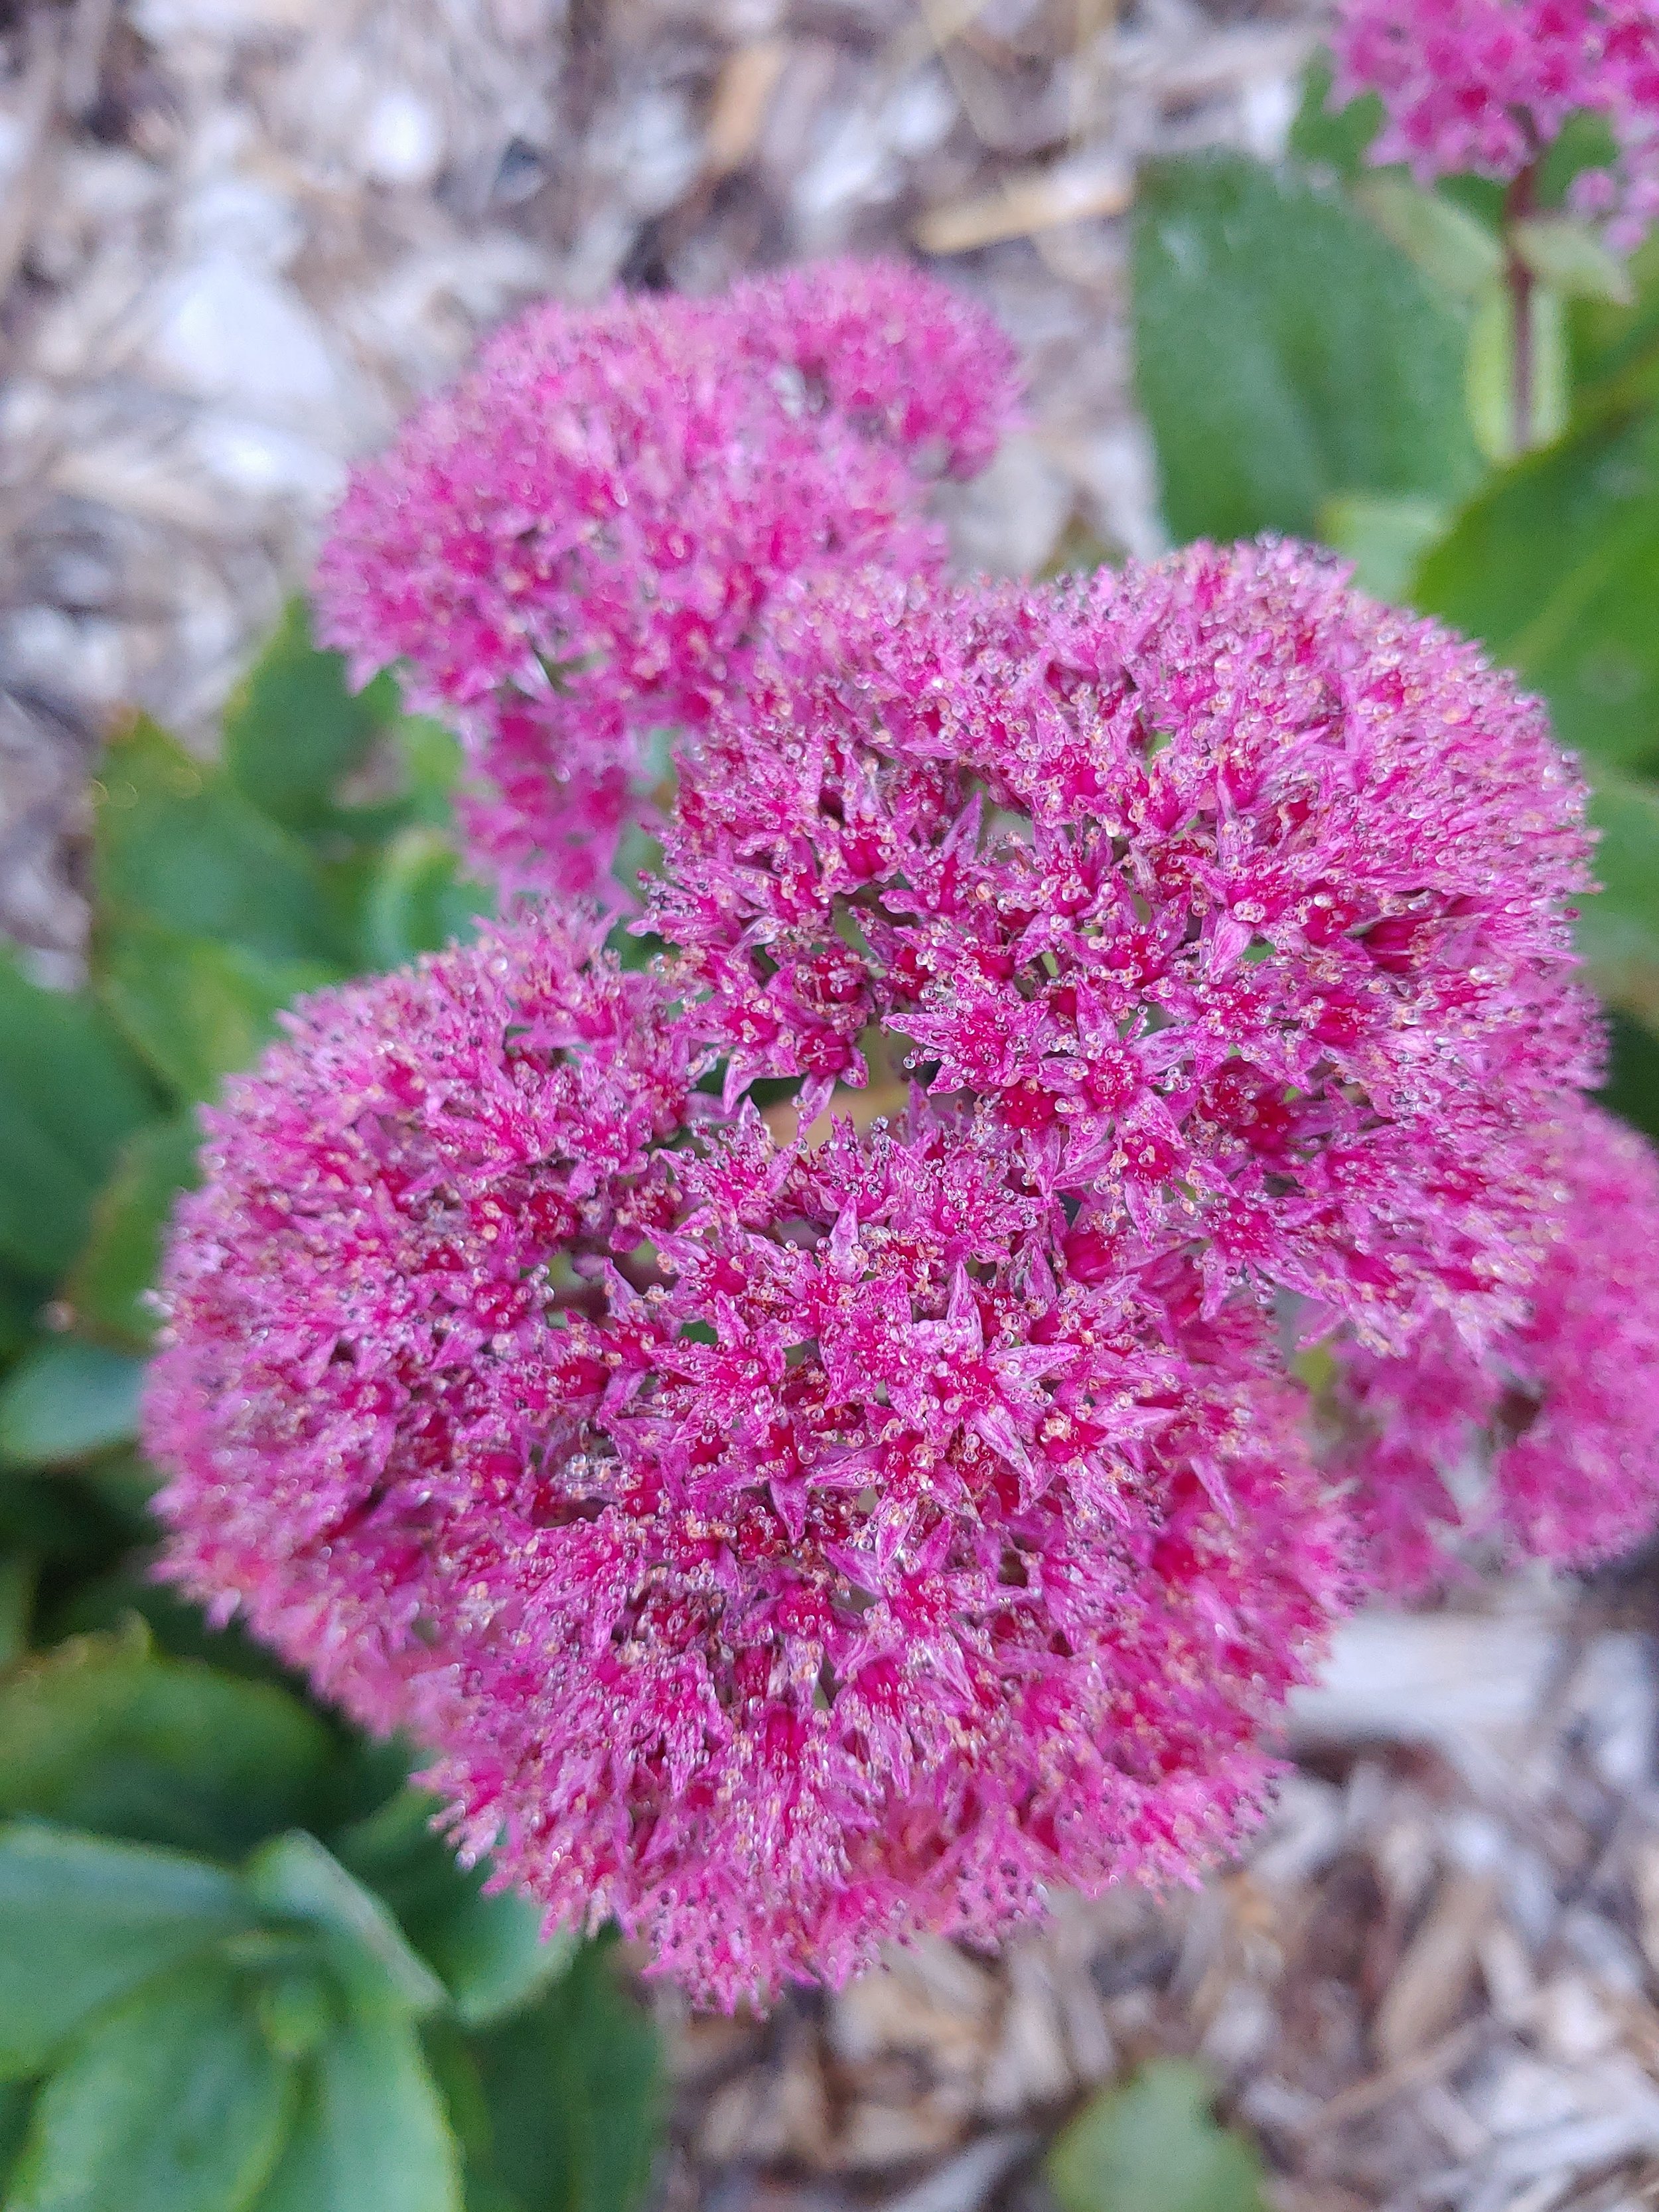
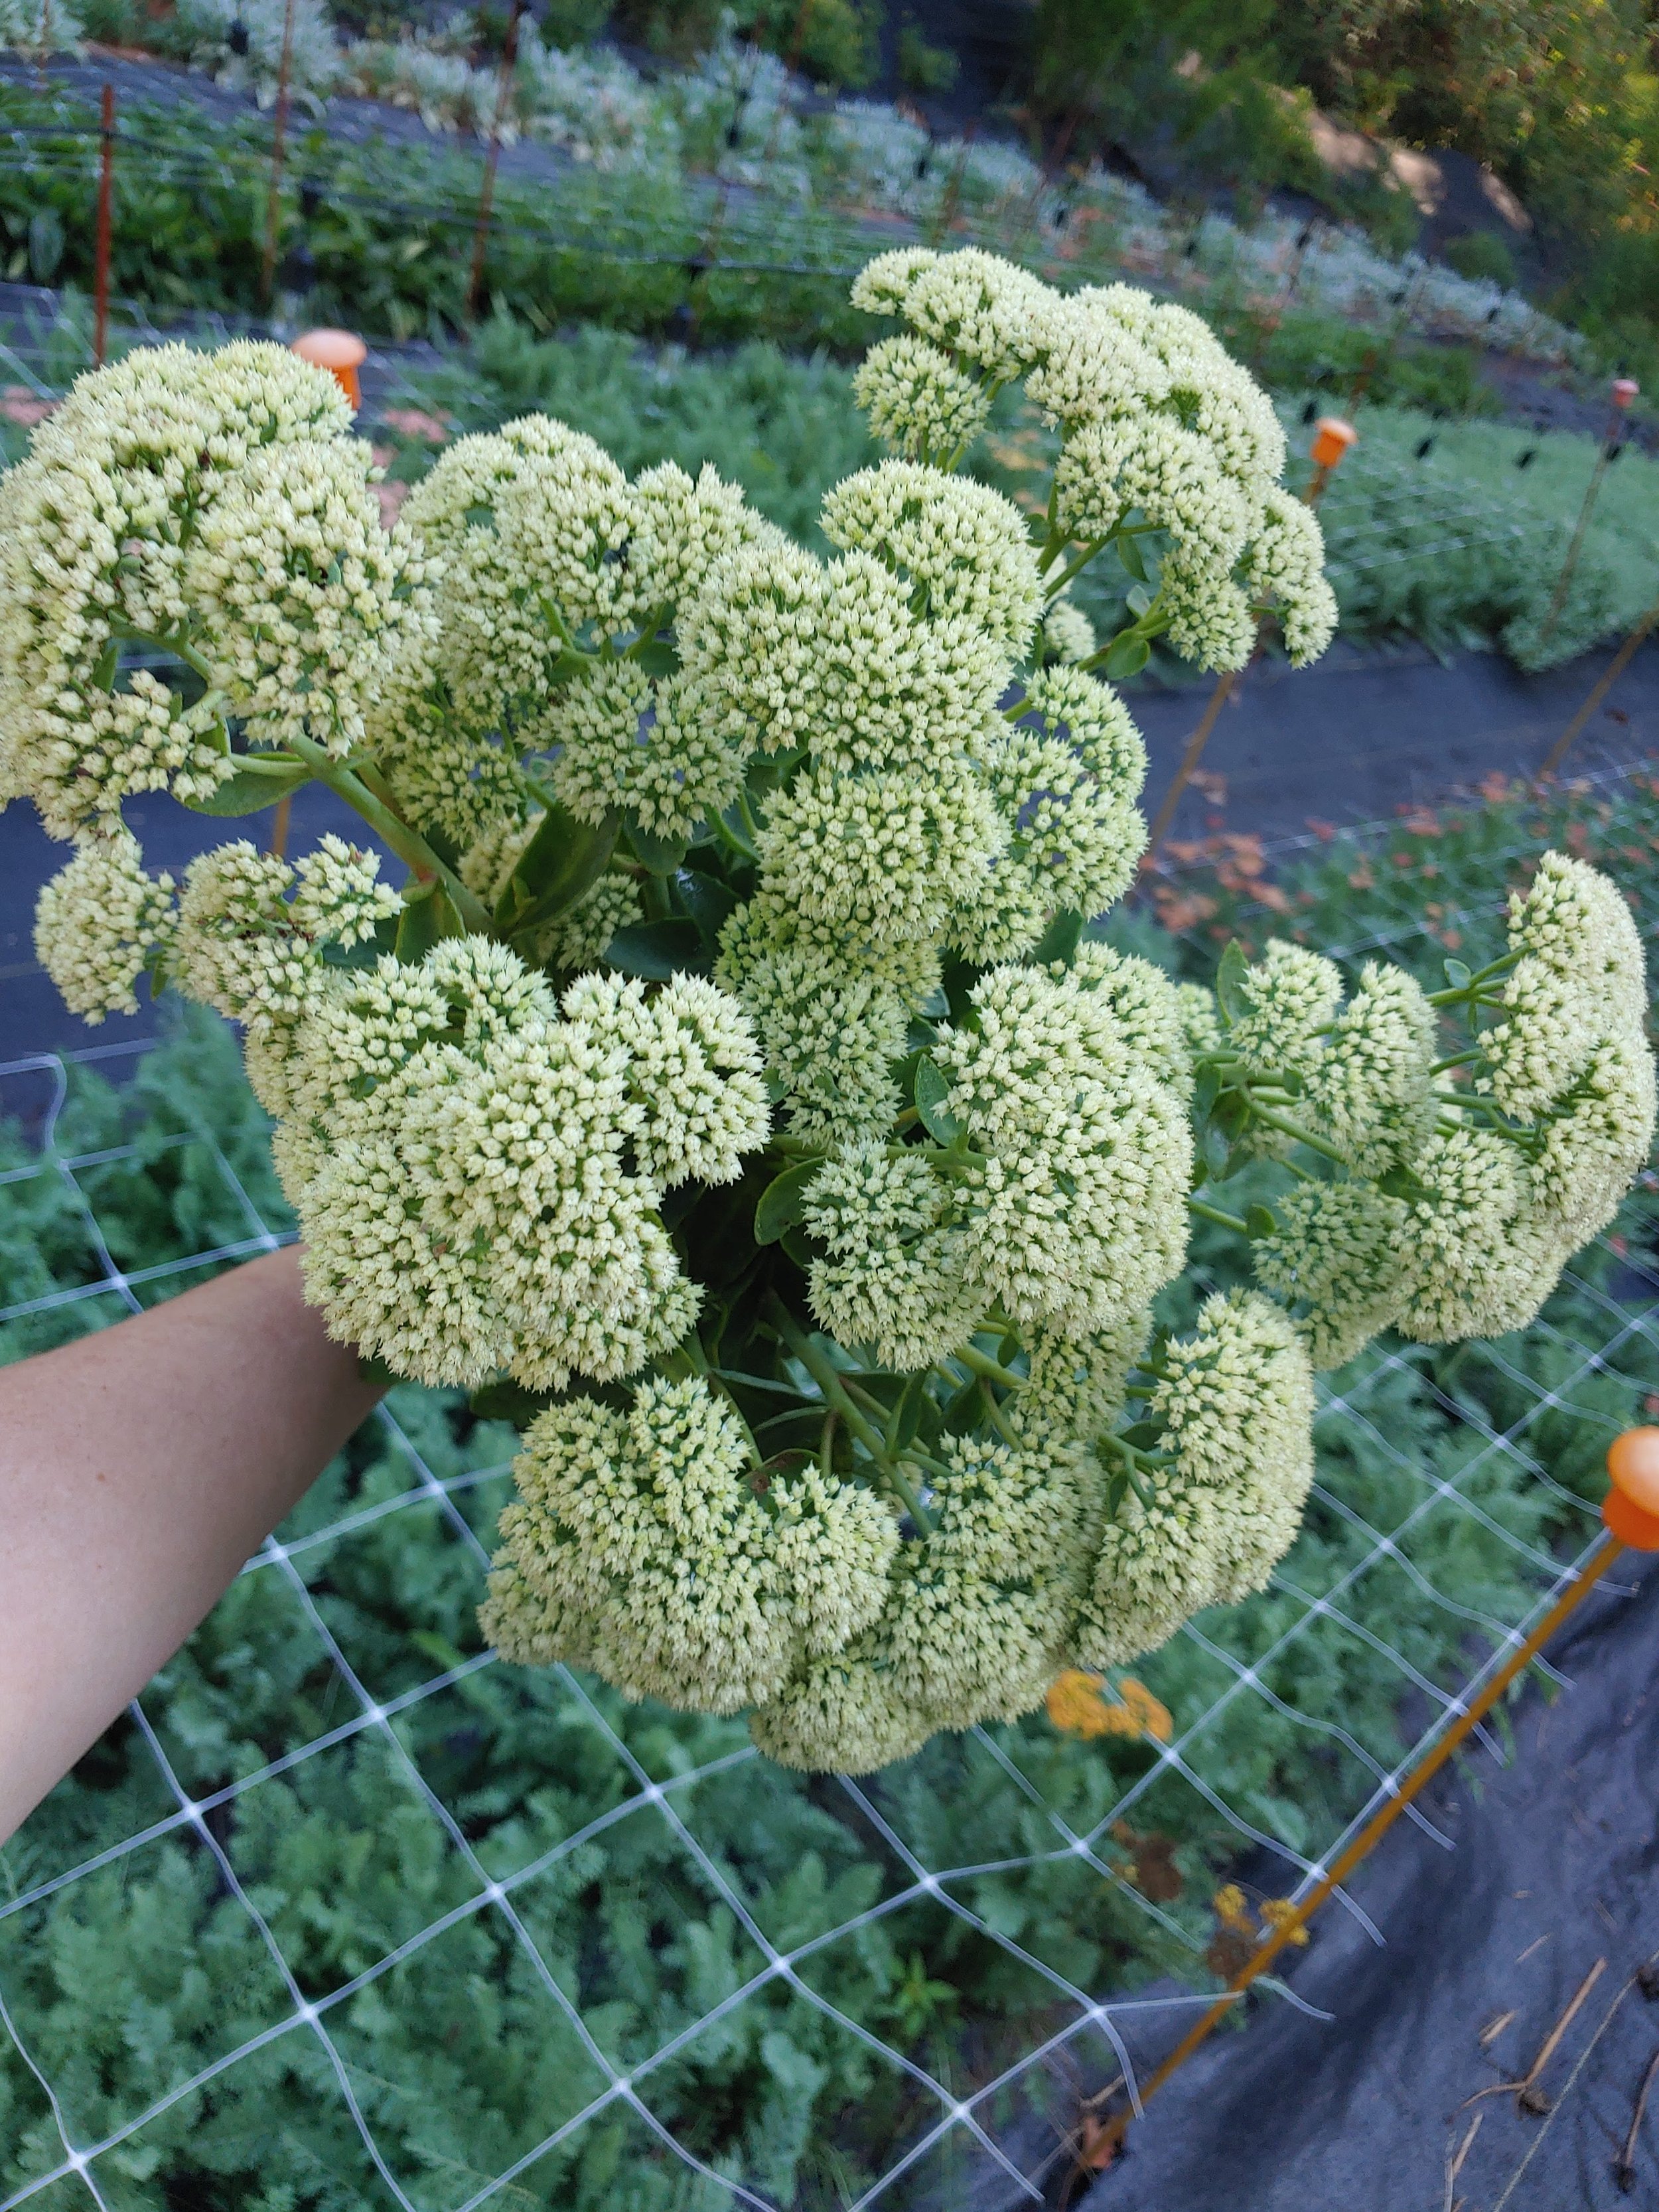
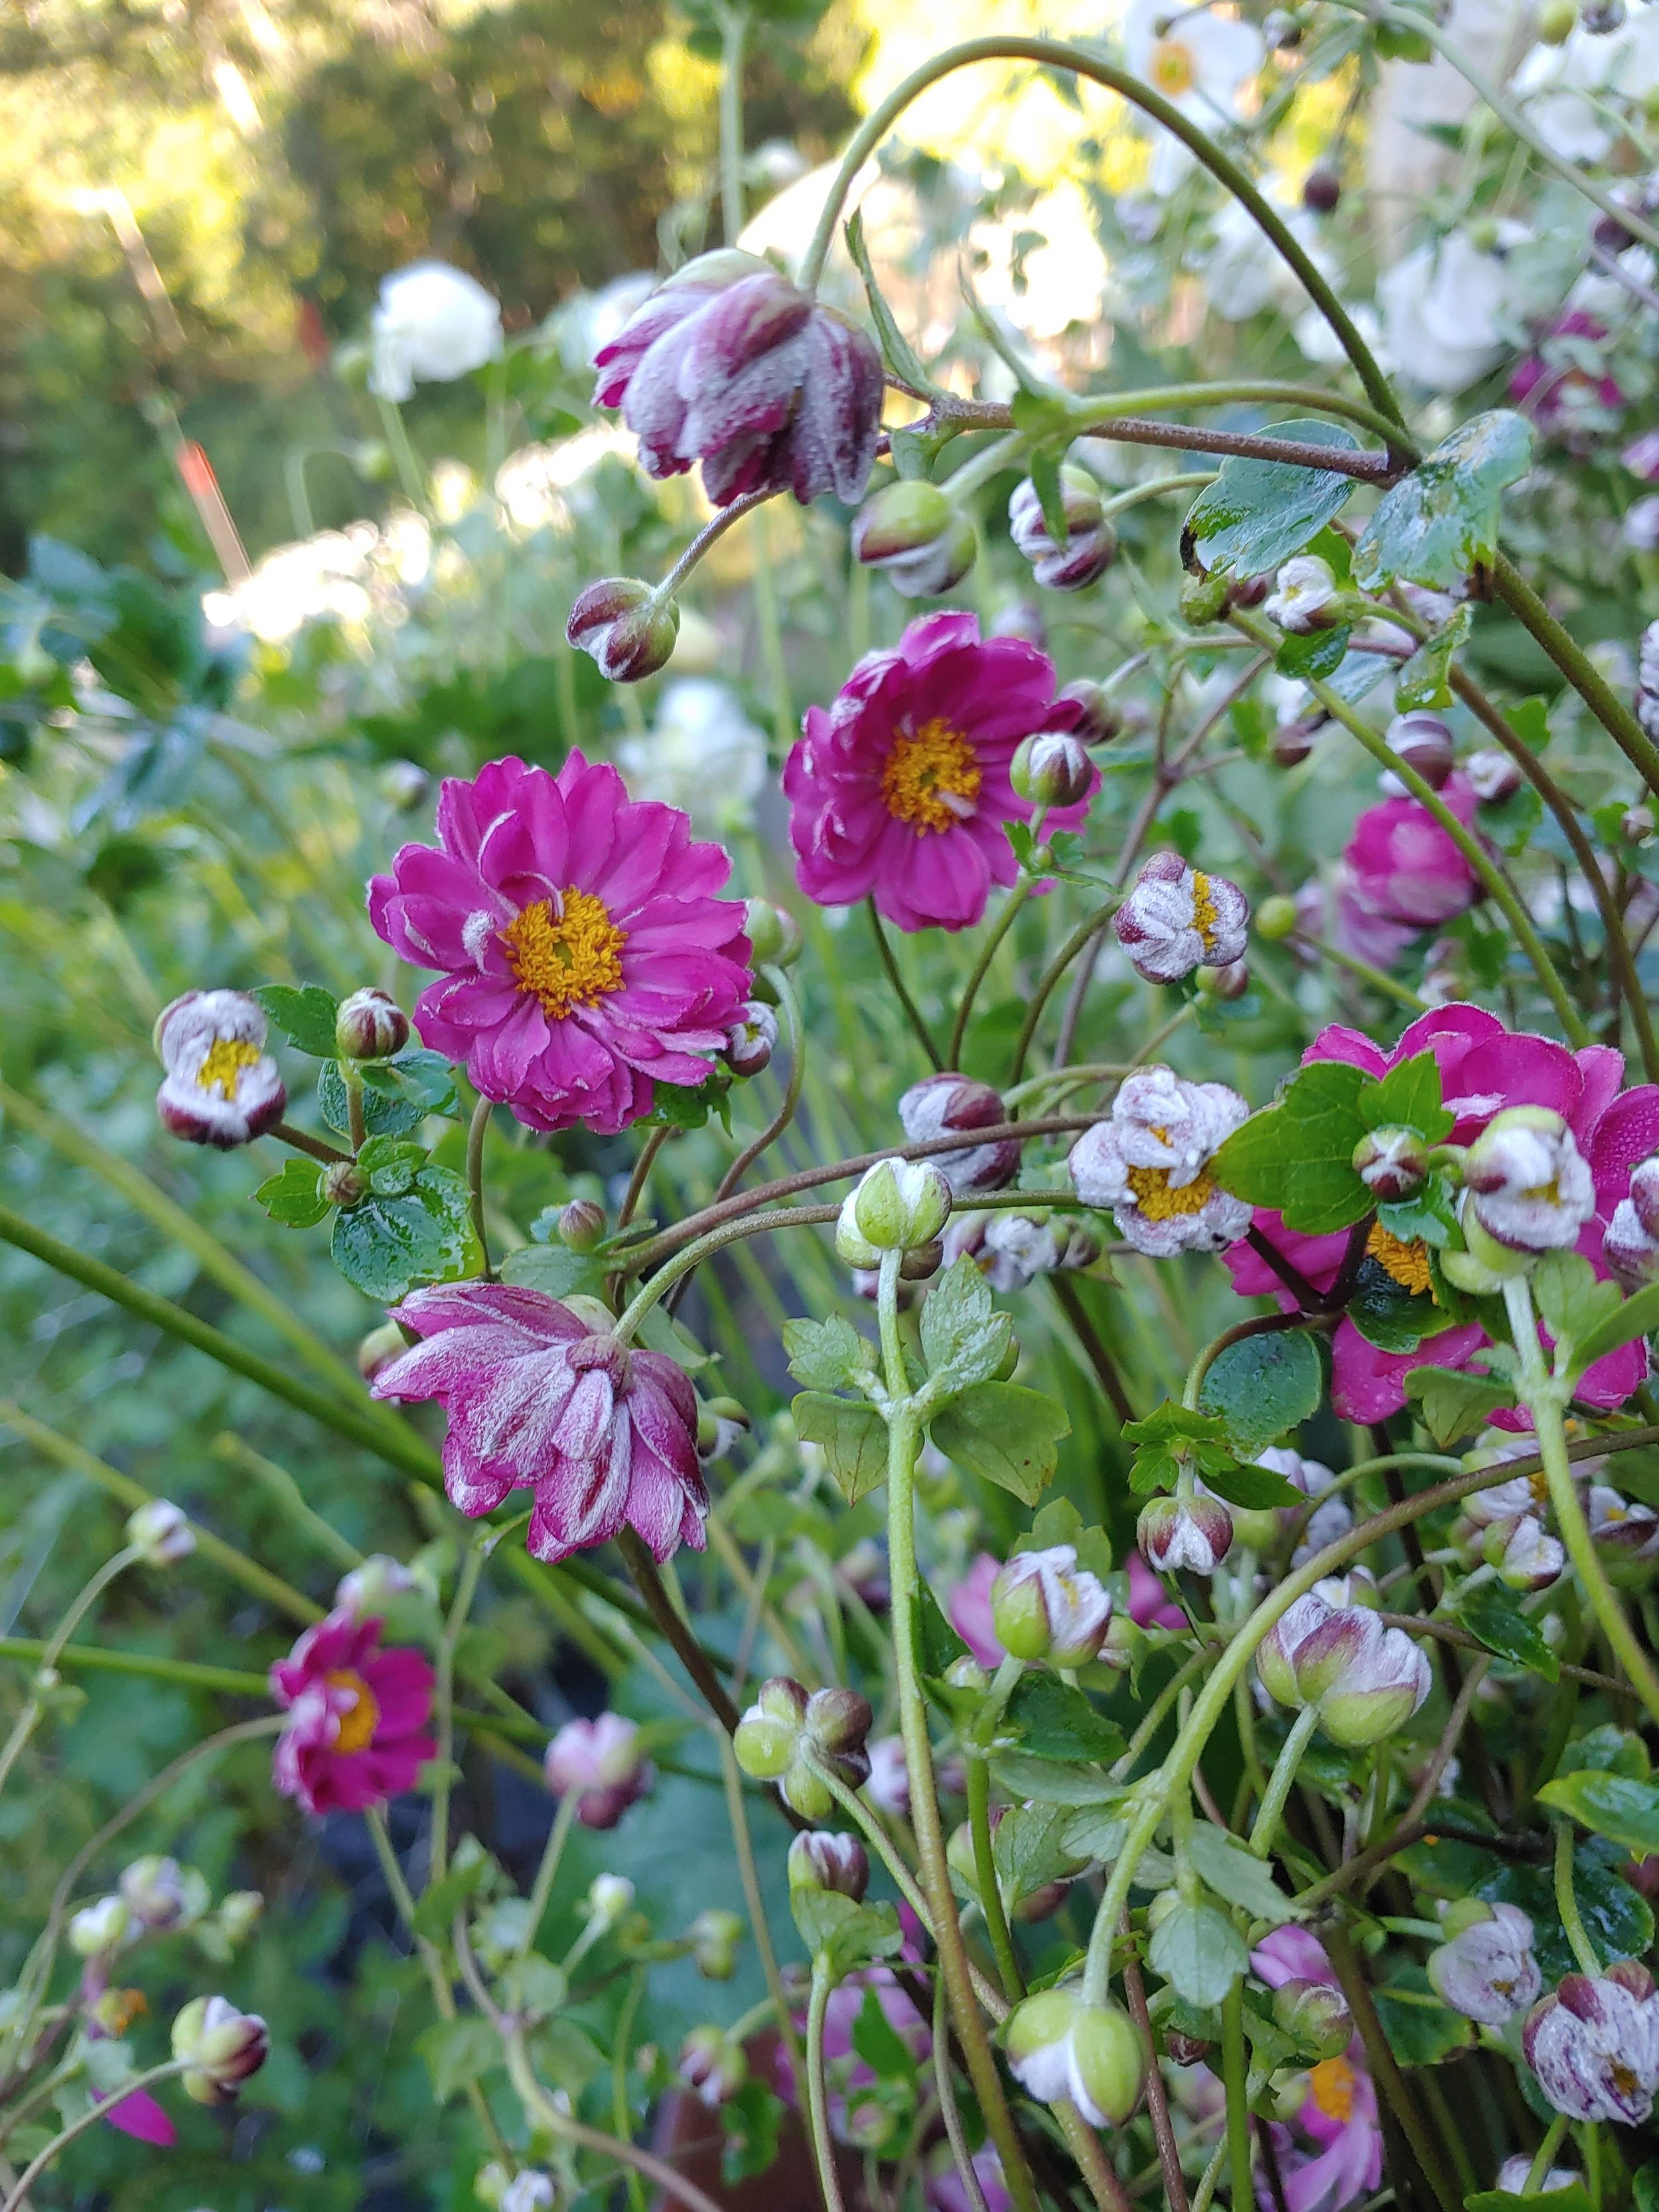
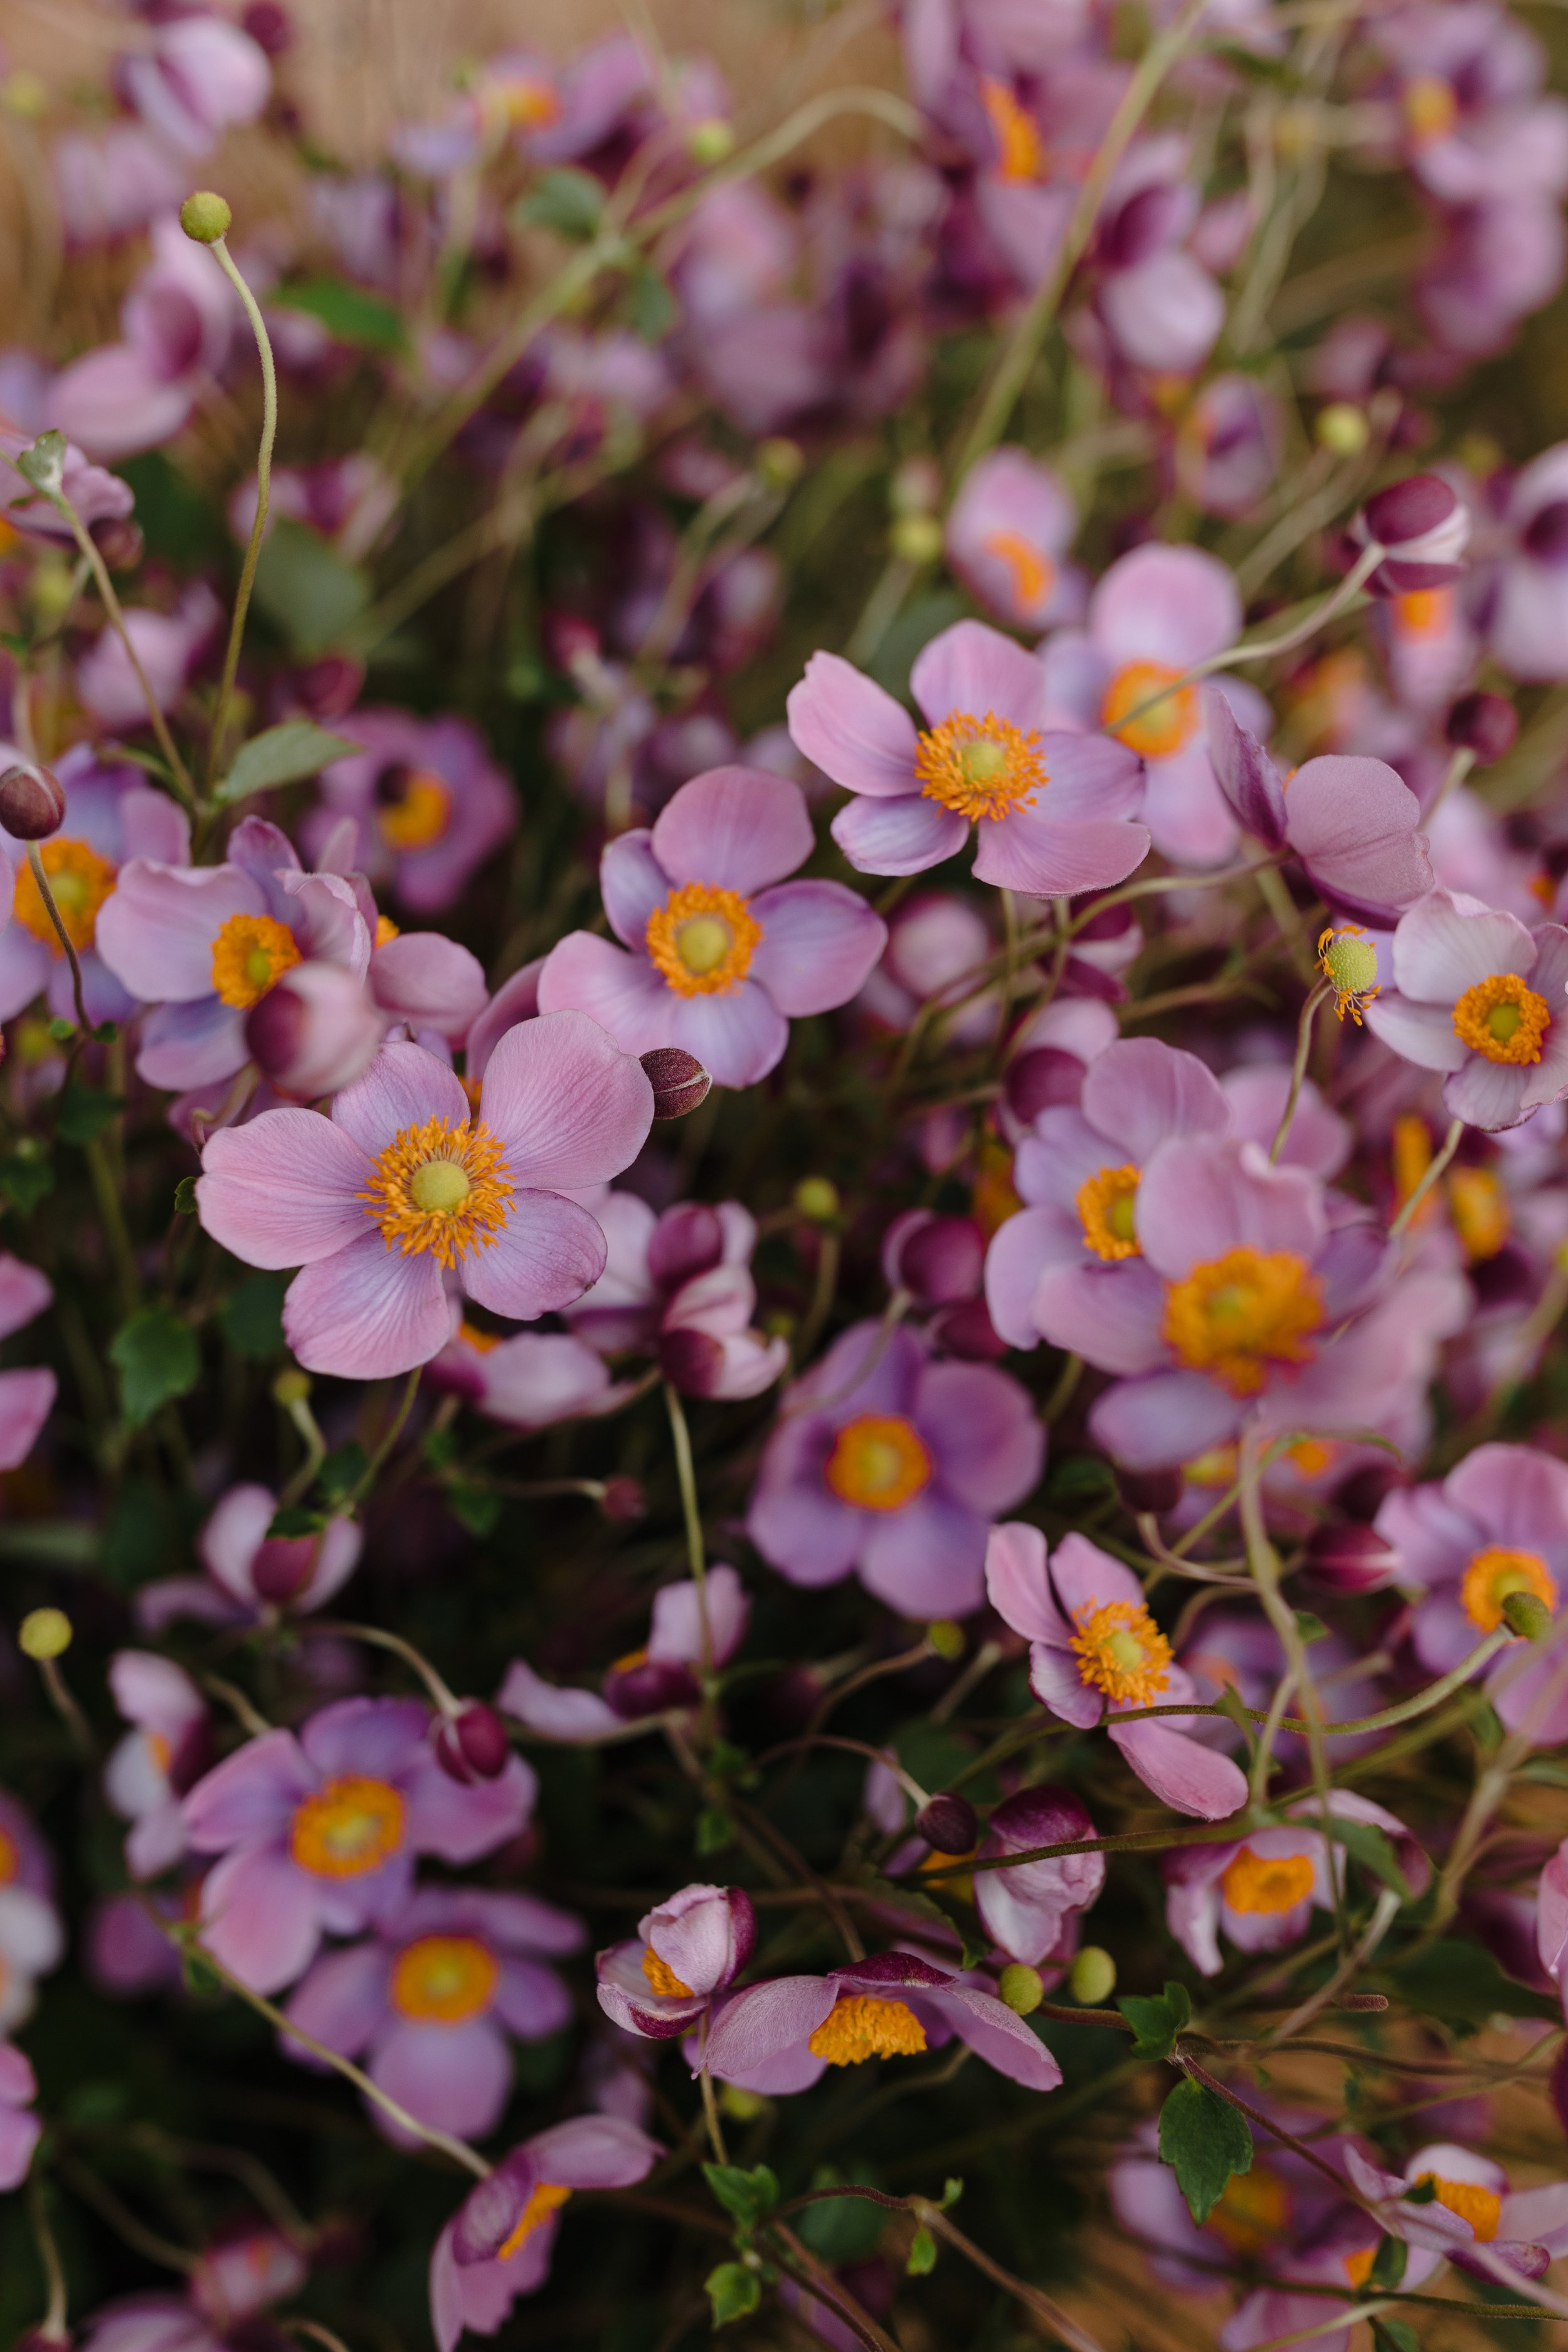
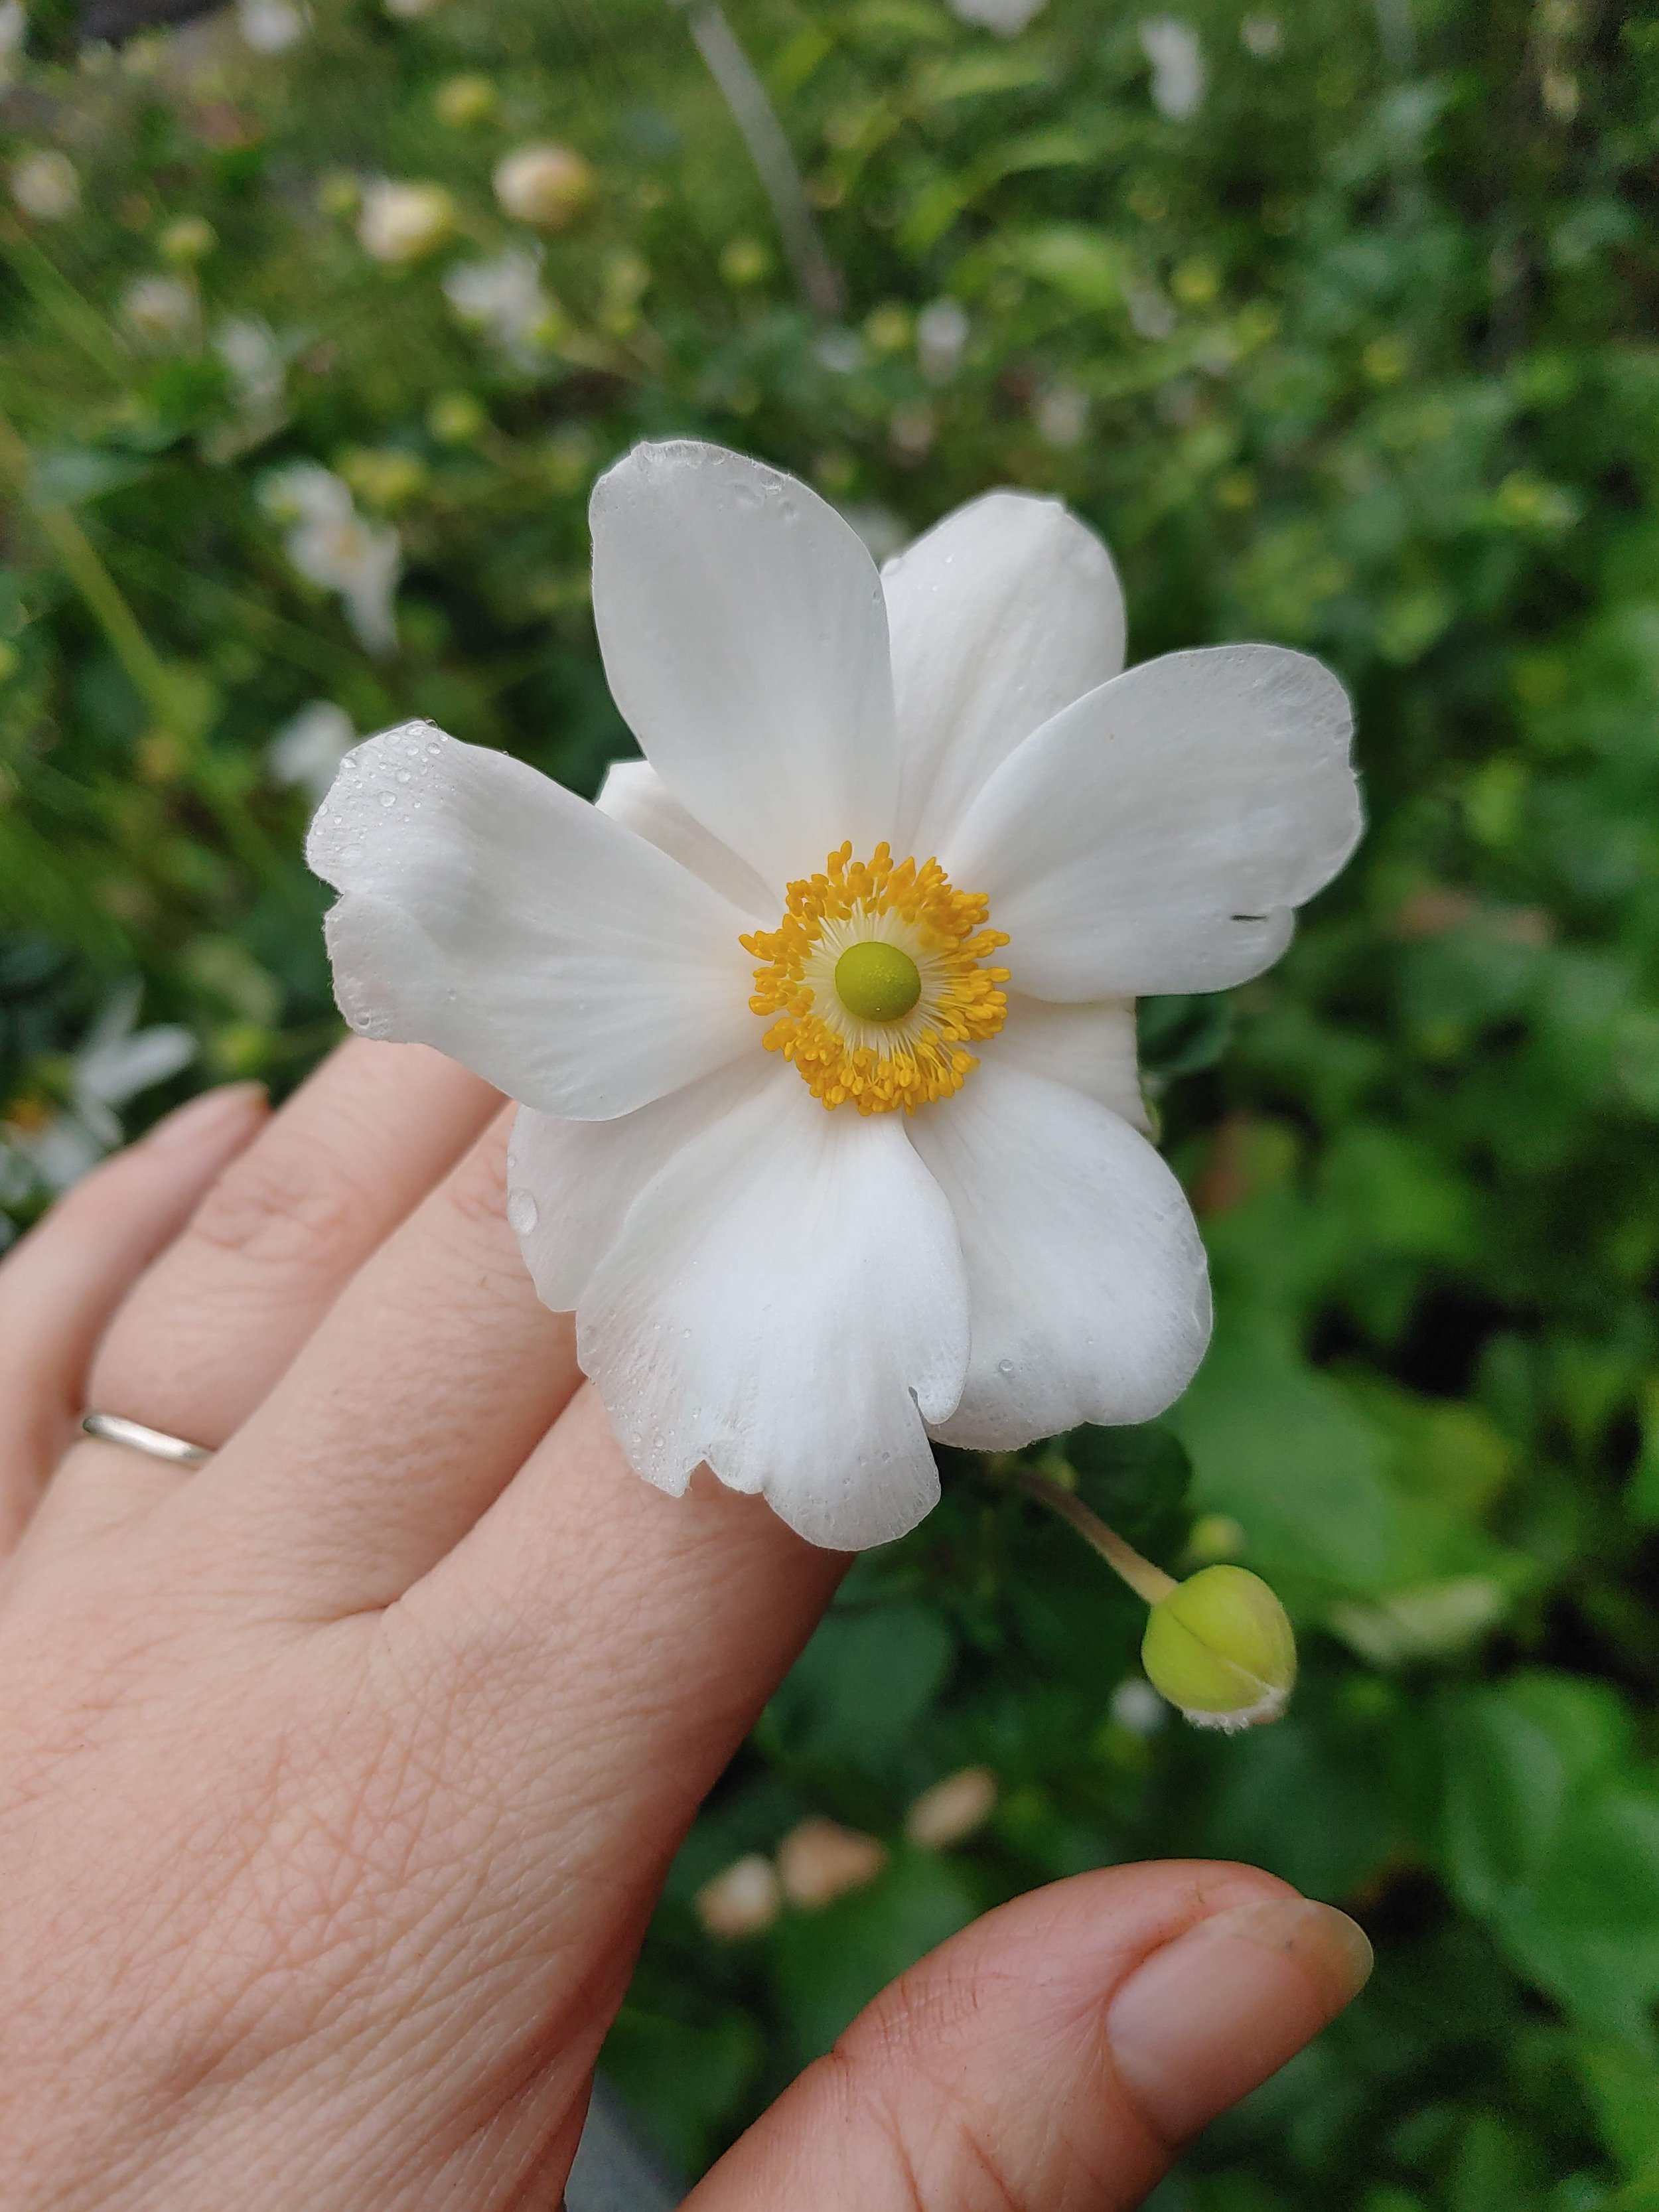
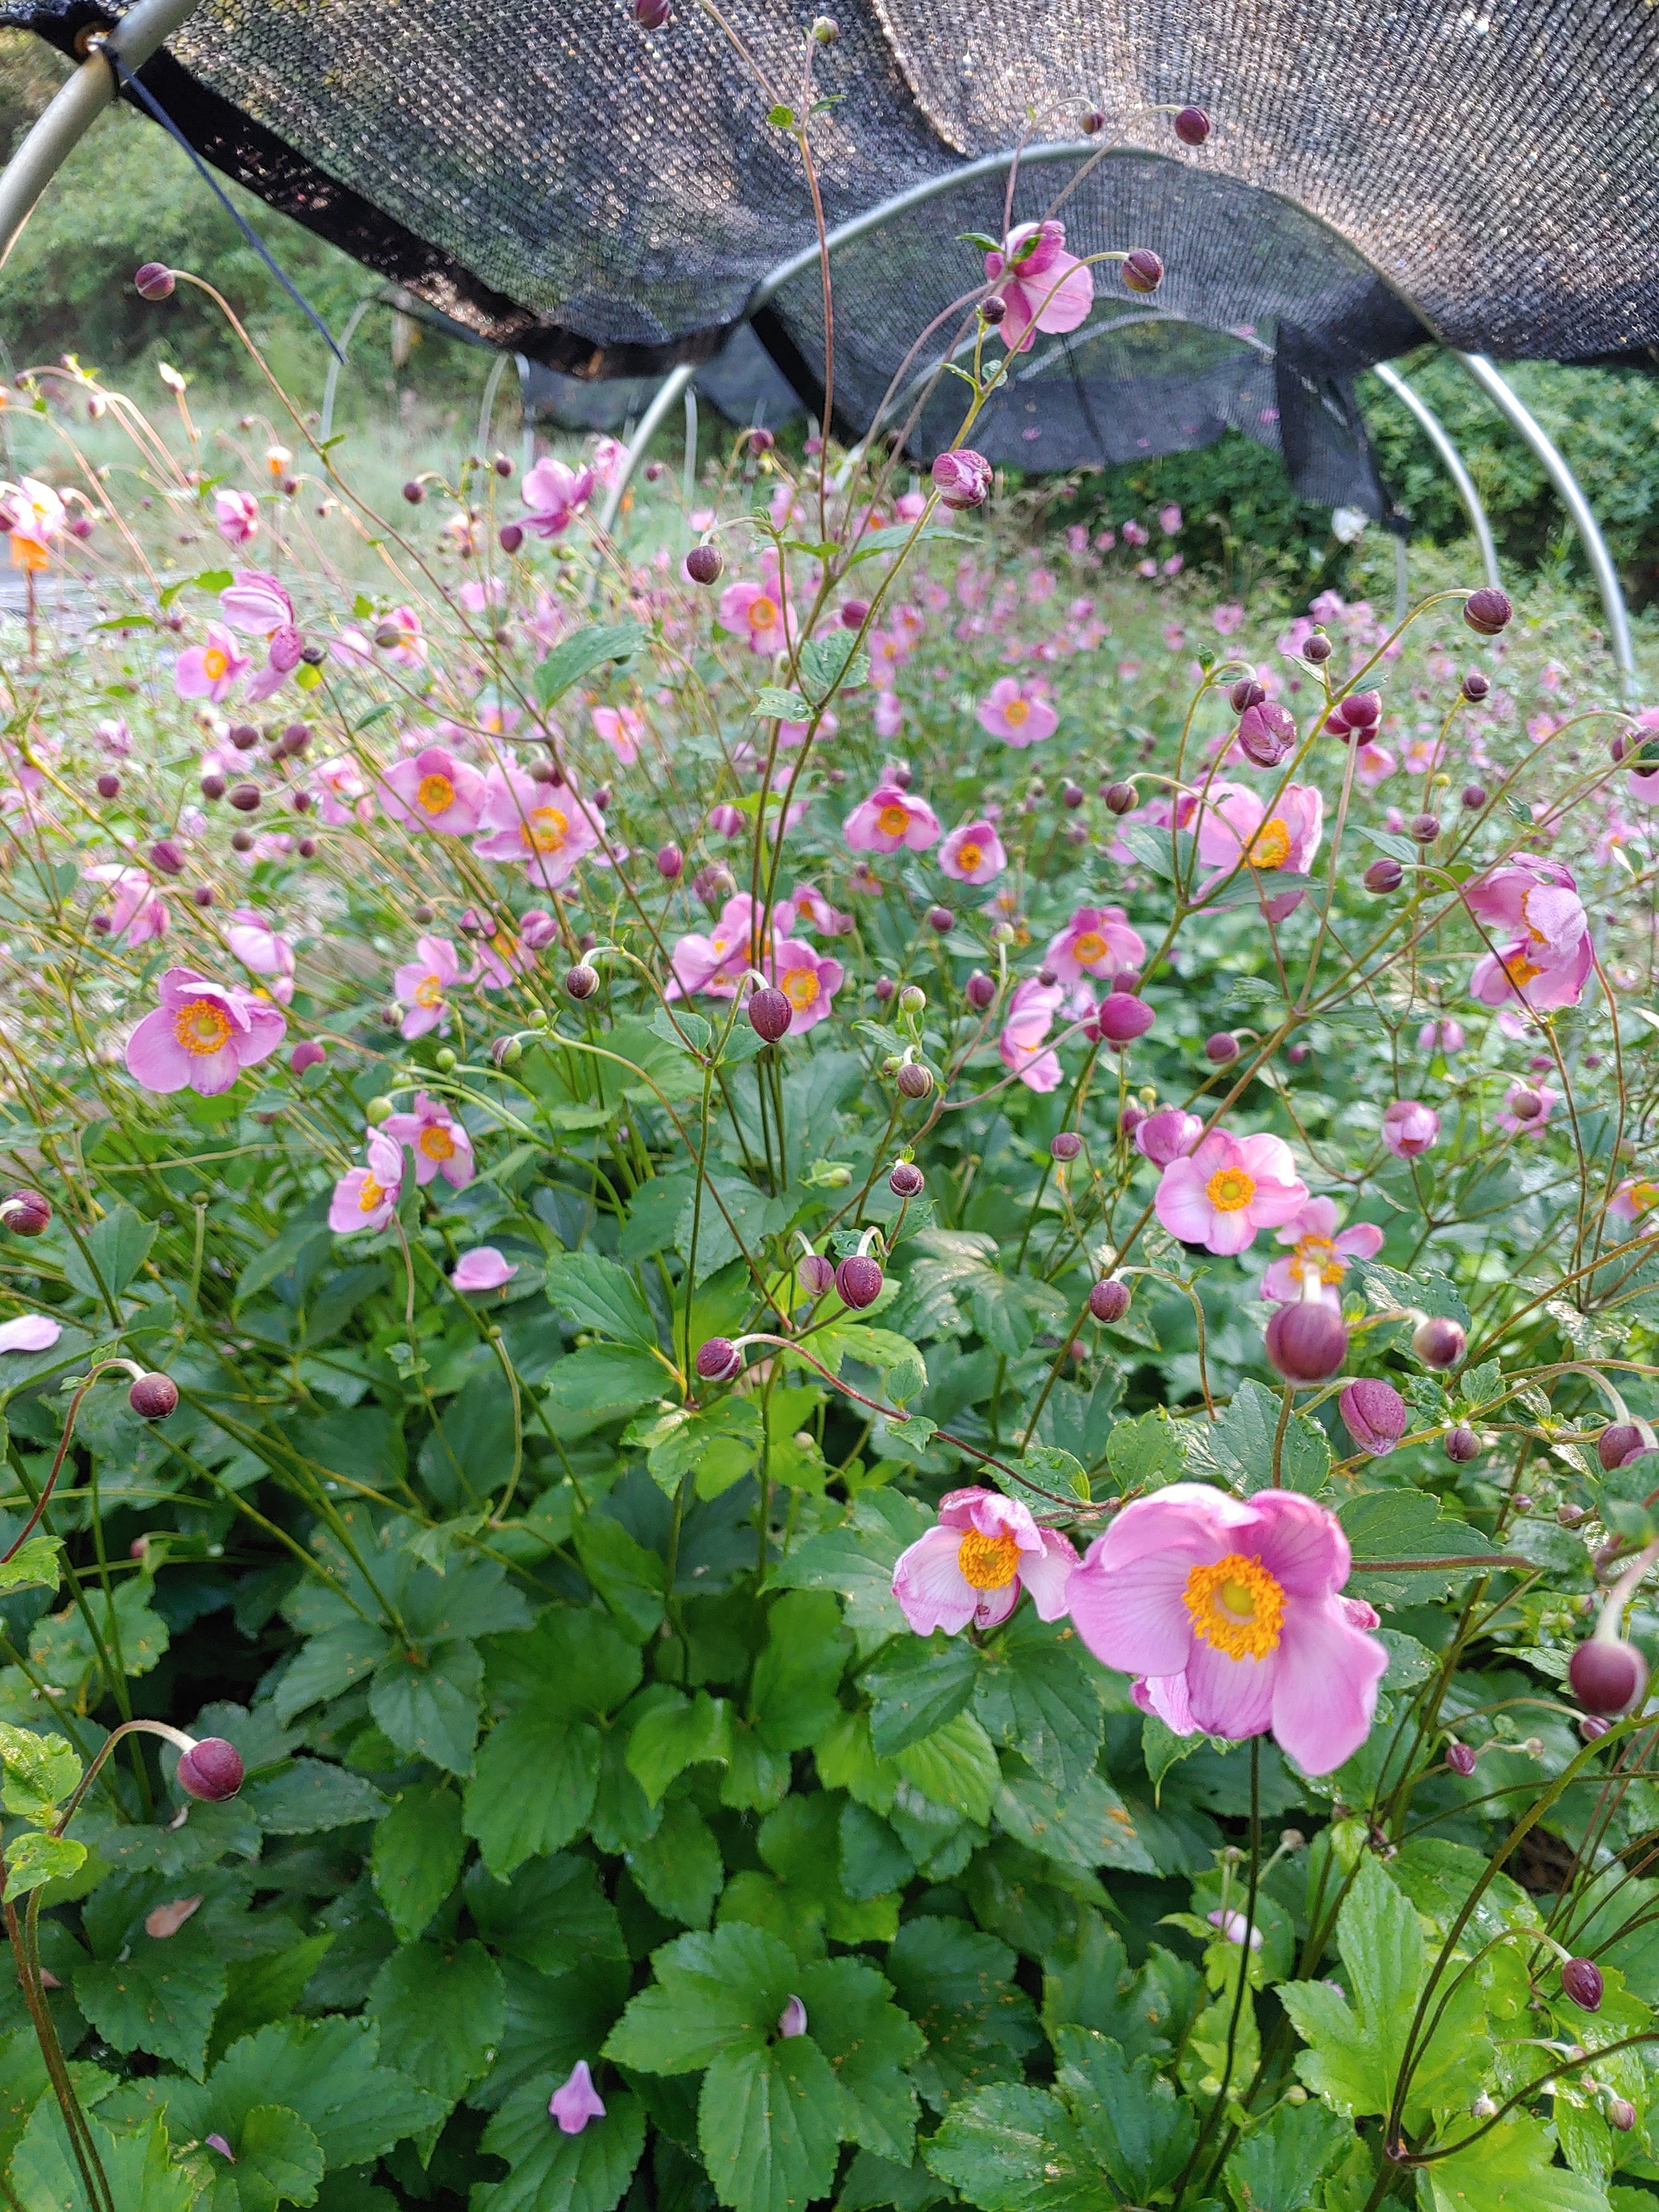
Sedum and Japanese Anemones are two of the most common autumn perennial choices but they are actually two of my favorites because they are so easy to grow.
Sedum is about as close as you will get to a plant it and forget it plant- drought tolerant, rarely bothered by pests, lasts forever in an arrangement, holds up out of water for days. I grow a couple of varieties but my favorite is still Autumn Fire (the darker version of the well known Autumn Joy). Really all you are looking for with sedums is enough stem length for a bouquet— just make sure the variety is at least 20” tall and you’ll be fine. They like full sun and you can easily create more plants by dividing every few years or propagating via rooting the leaves.
Japanese Anemones are a shade lover here in our warm climate- Partial sun. If you only have a full sun area you may get some sun scorch but as long as you give them plenty of water, they’ll still flower well. They tolerate our heavy clay soil very well- I think because the clay holds water and they prefer their roots to be cool. Once again, you want to look for varieties with a taller stem length- 22” minimum. There are single and double varieties in whites and various shades of pink. They are a bit shorter in vase life - harvest them once the first bloom is very mature and the secondary buds have begun to open.
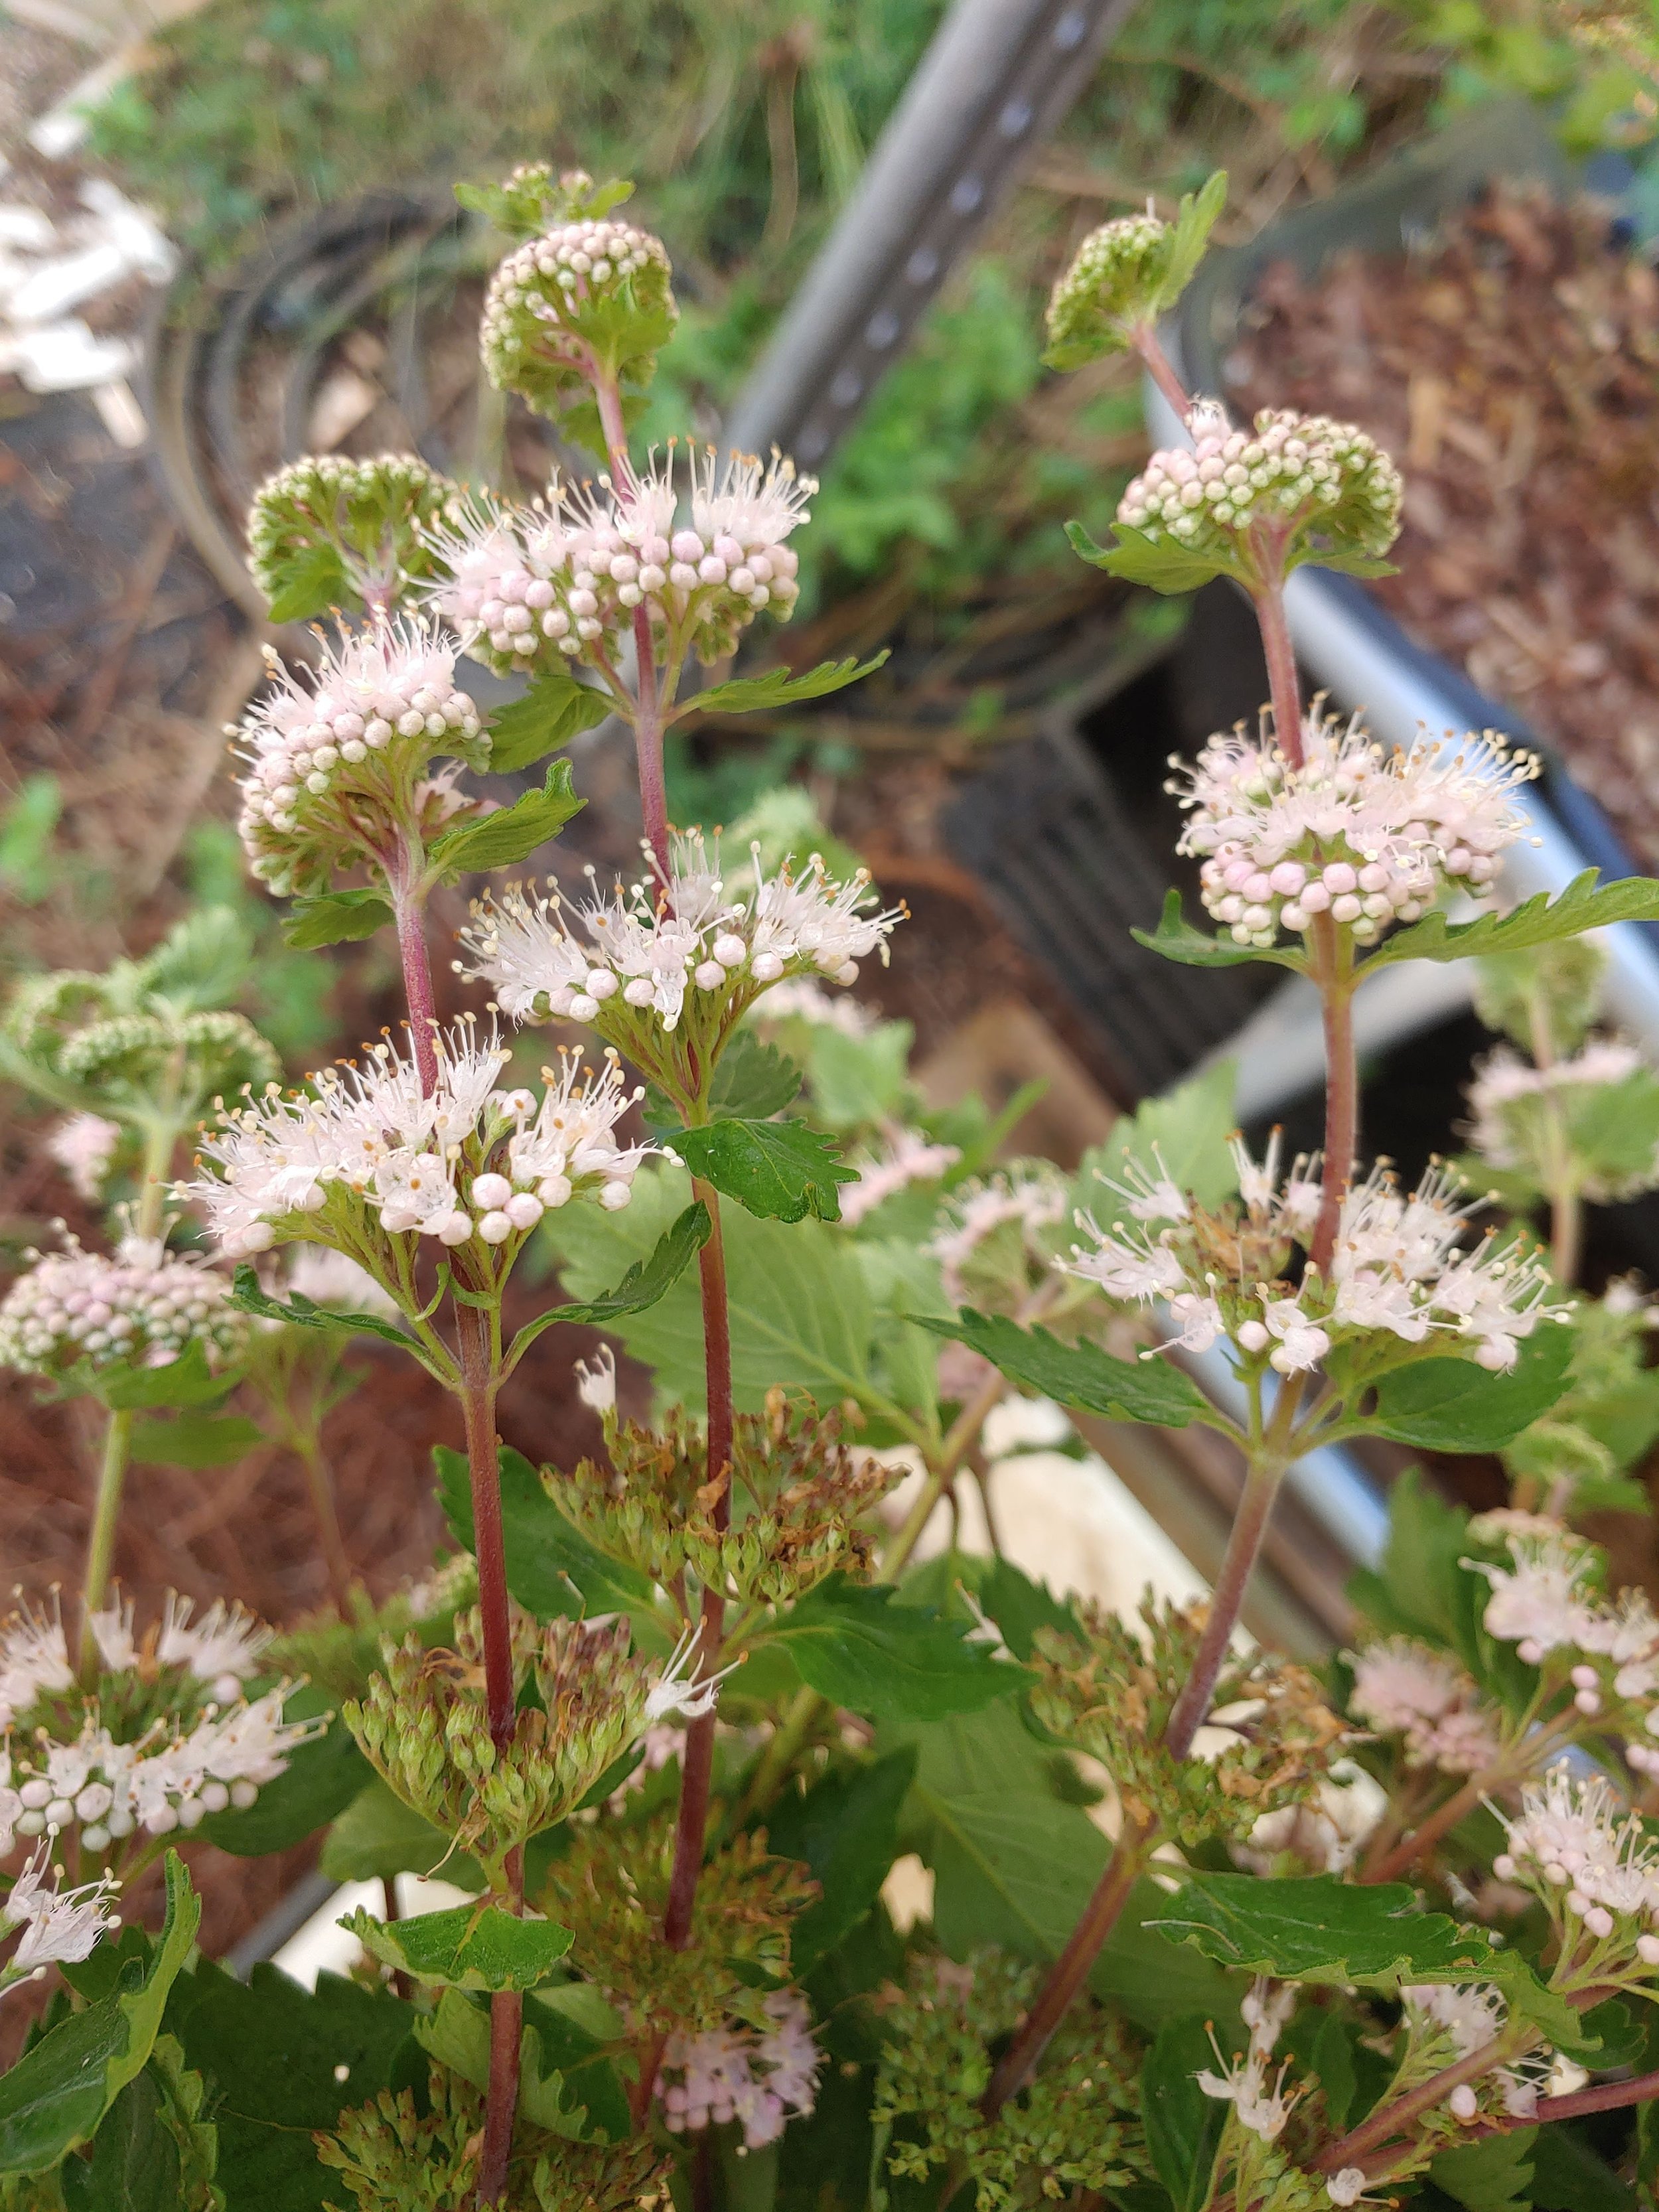
Now- a few things that aren’t quite as common. There are several really good shrubs that make great cuts for bouquets and bloom/berry in the fall.
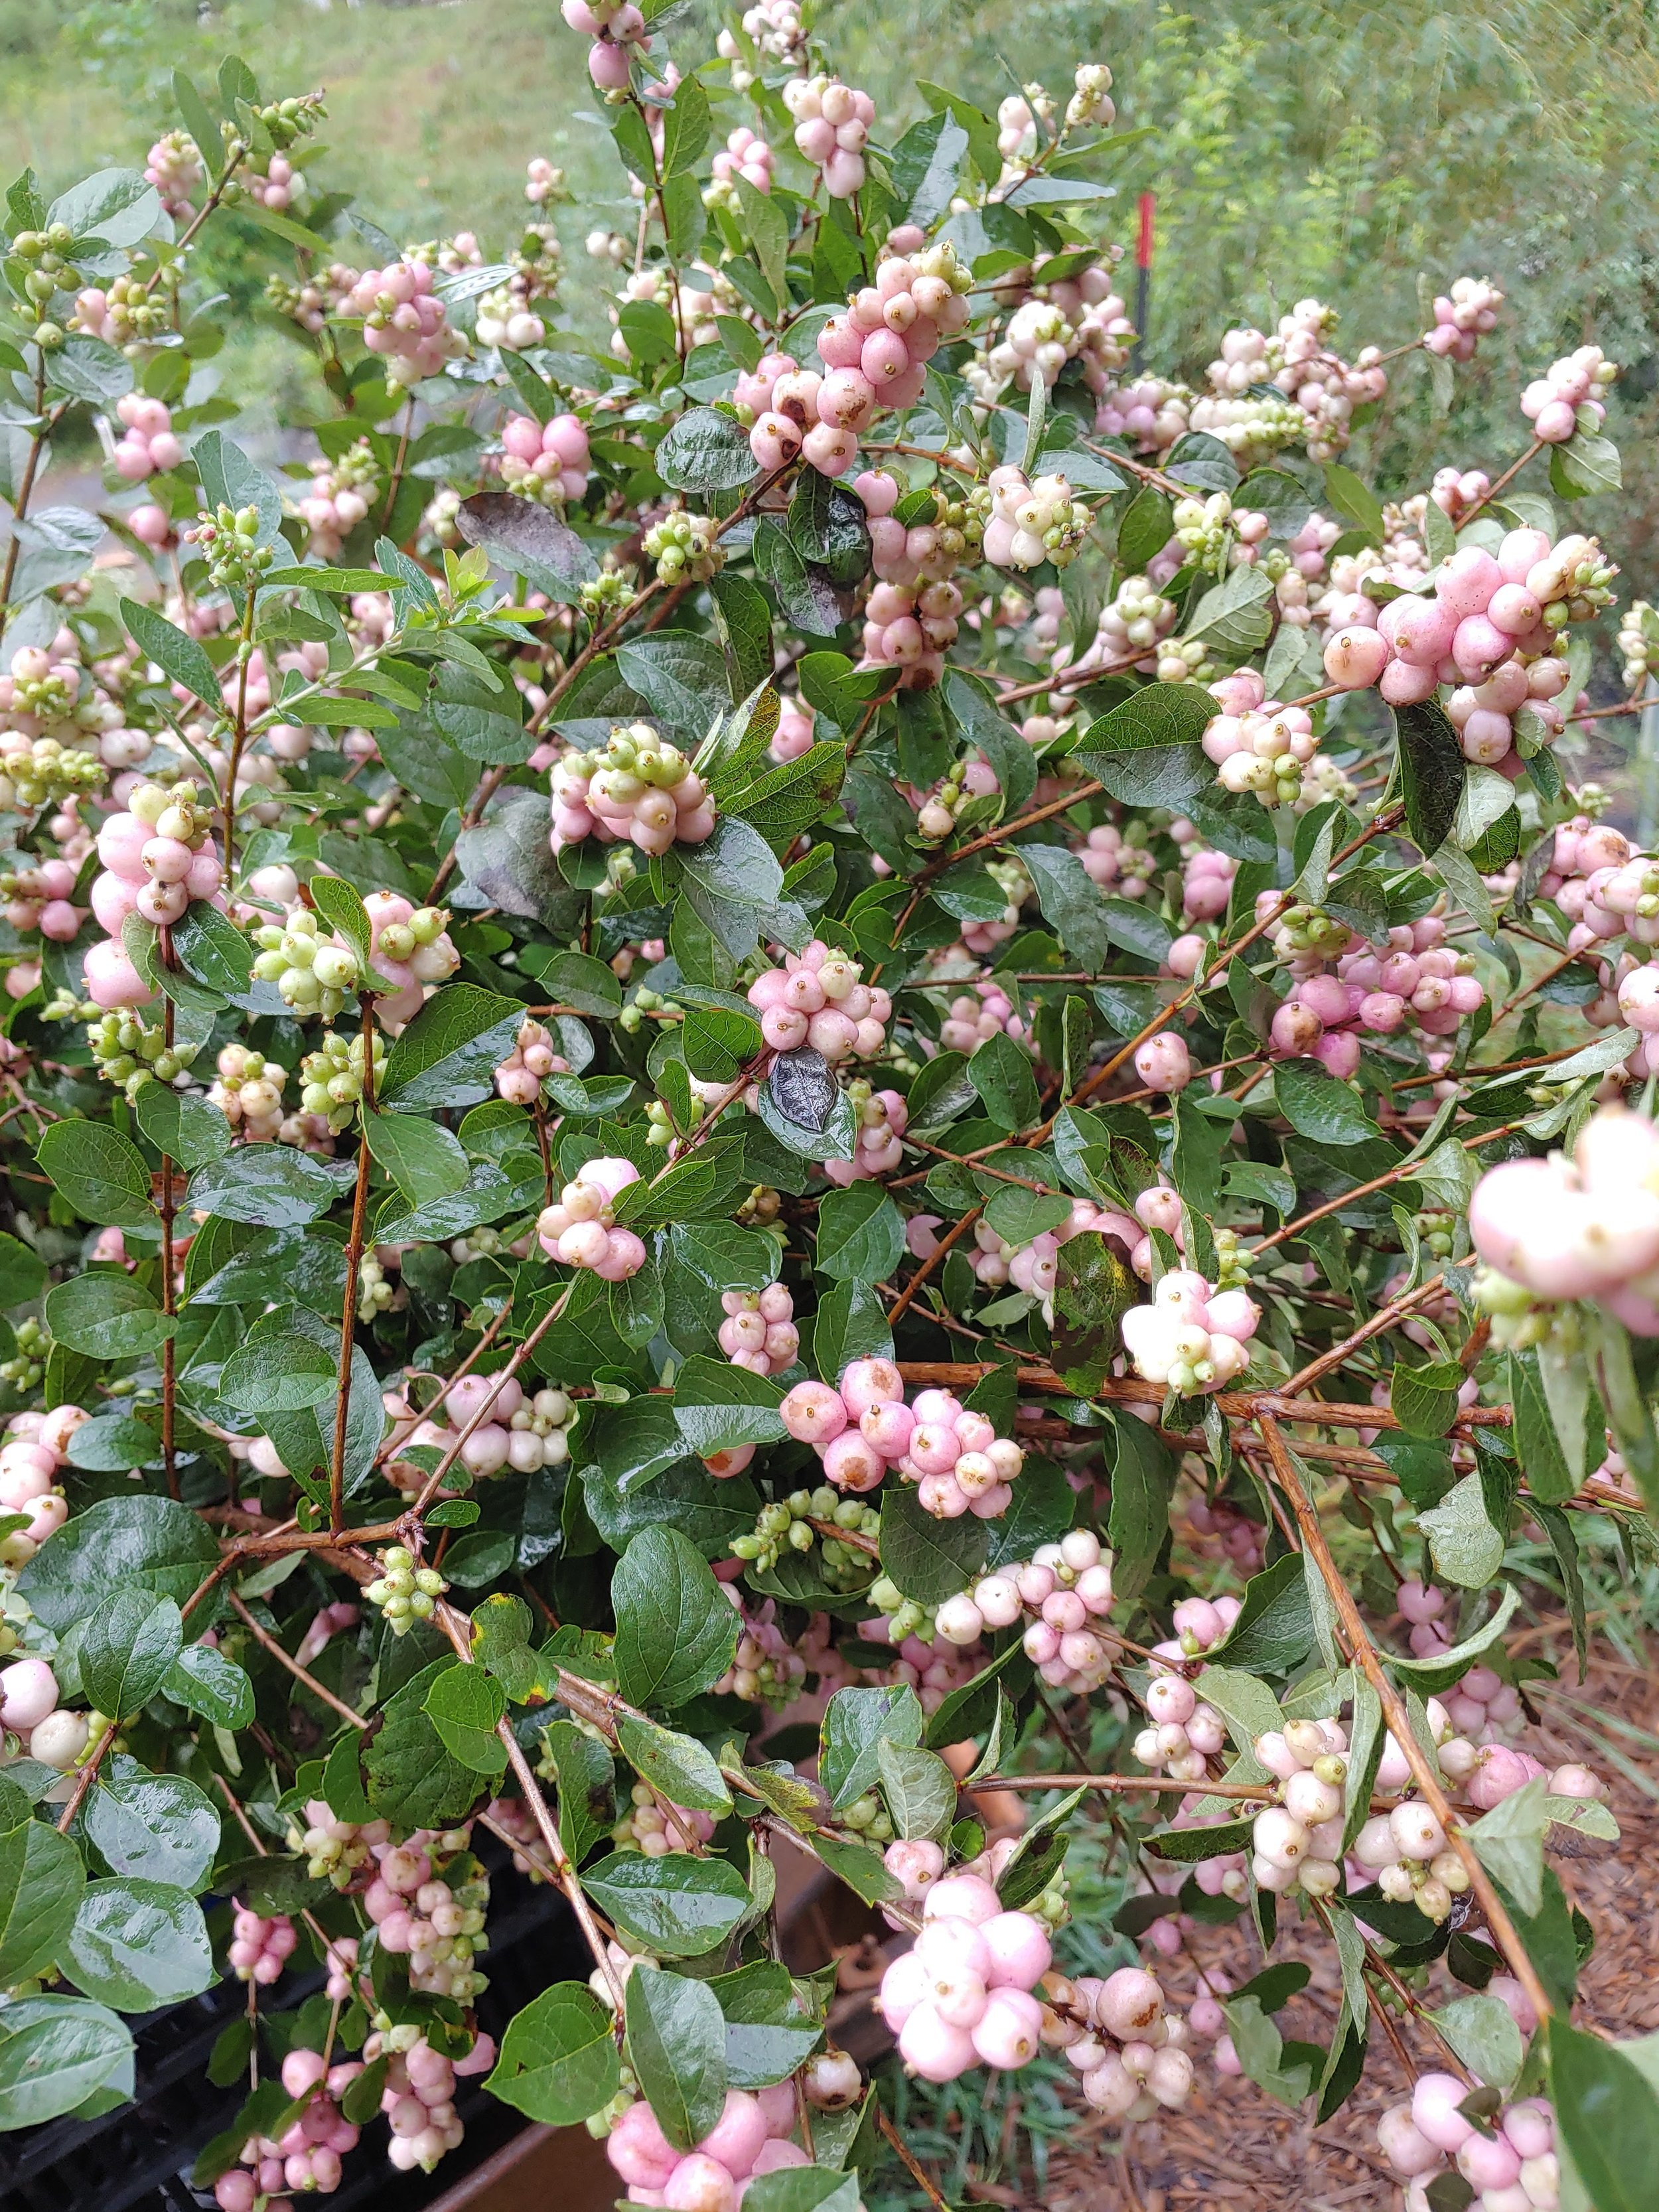
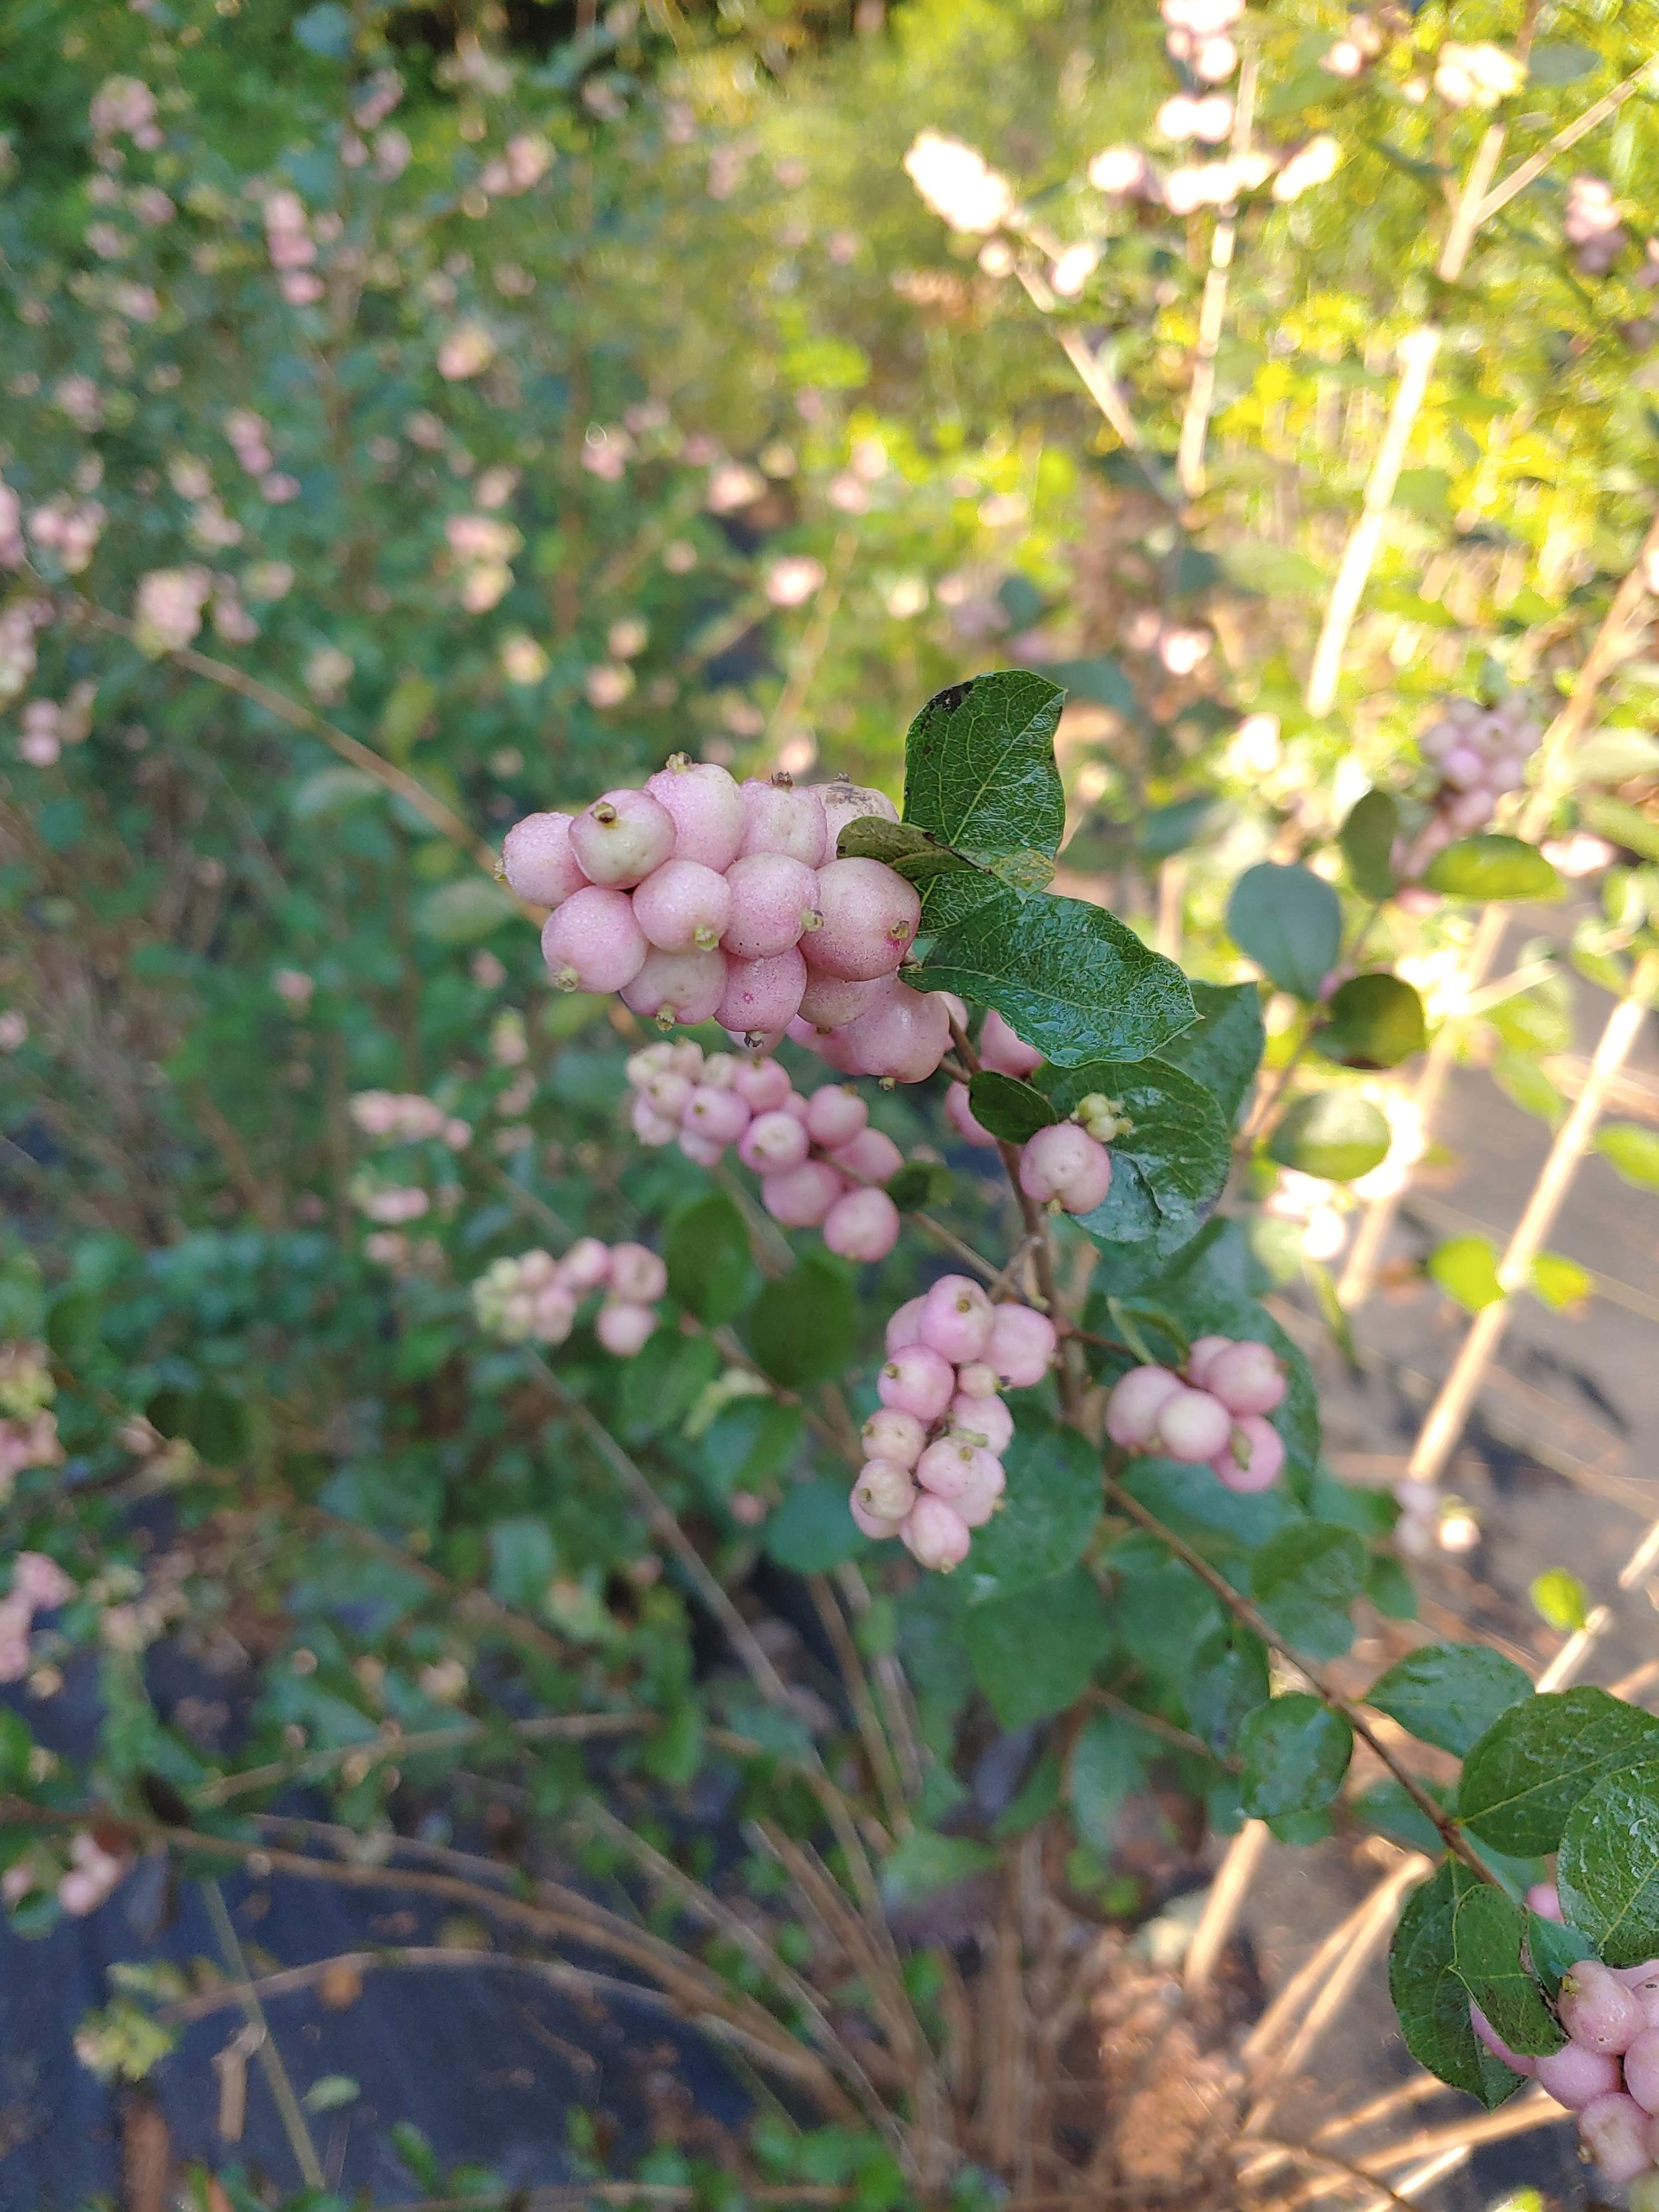
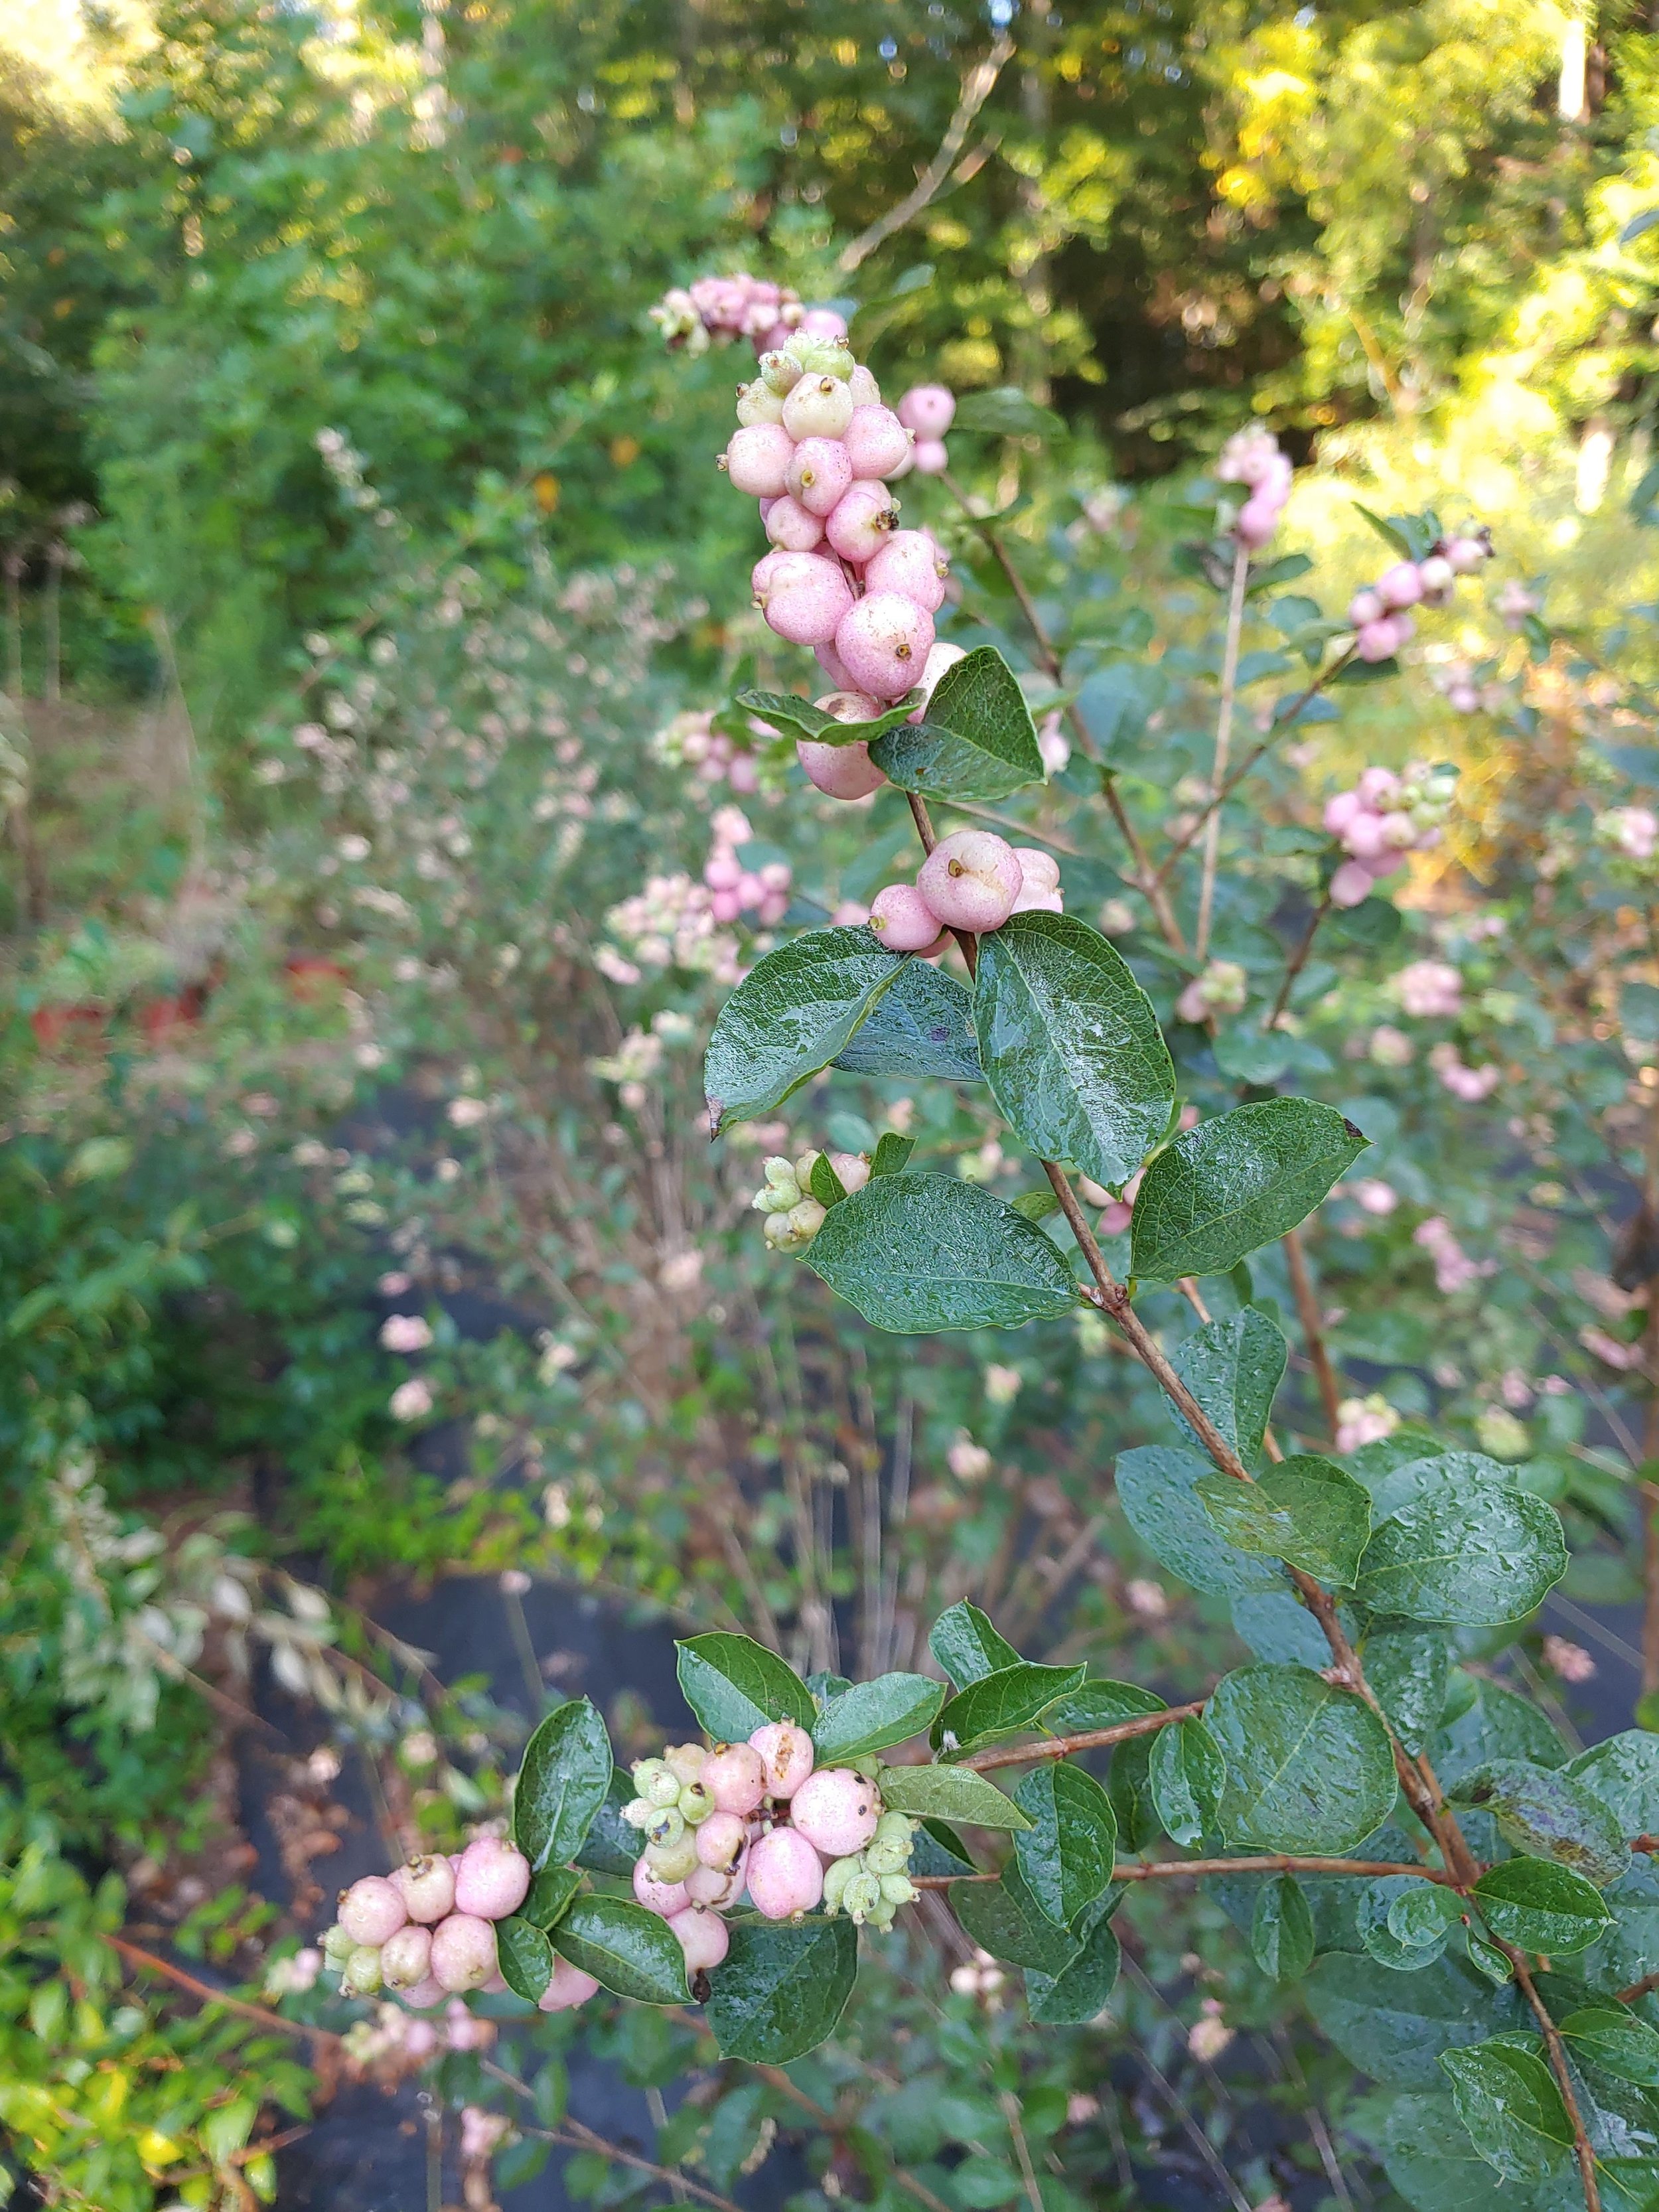
Snowberry is a new favorite for me. I had my first snowberry crop last year and I loved it. I’d plant 100 more bushes if I had room. Snowberries are a medium sized shrub that come in white and shades of pink. They flower in early summer and then those flowers fall off and begin to produce berries. They start off green and then turn either white or pink depending on variety. In my climate (7b), they are harvestable in September. This shrub is easy to grow, I was able to get a small harvest on my second year (I planted 2 year old plants) and deer don’t bother these!
Caryopteris- You’ve heard of this one I’m sure— but have you seen the new colors available? For years, caryopteris has been out there in various shades of blue/purple. But now there are white and pink versions available and even some lighter blues. Some of these new varieties are shorter so you definitely need to check flowering plant height before you buy. I grew Caryopteris Pagoda Blush two years ago and loved it! I was warned beforehand that it’s cold tolerance for our climate was marginal. And - that came true when we hit mid teens one weekend last March. So be forewarned that the newer varieties aren’t as cold hardy. But if you love blue, grab one of the older types (they are taller anyways) and add a new shrub to your garden.
Beautyberry is another great fall shrub. I can’t speak on growing it yet because we are just adding it this year.
Dusty Miller- We definitely need a perennial foliage. Dusty works great in spring and fall in my hot climate, hates the summer but always pulls it out by late fall. I grow mine in a hoop house because I’ve noticed far less disease issues if you keep the rain off it. Candicans is my favorite variety- this is the lacier type. But New Look is great too— more solid leaf type.

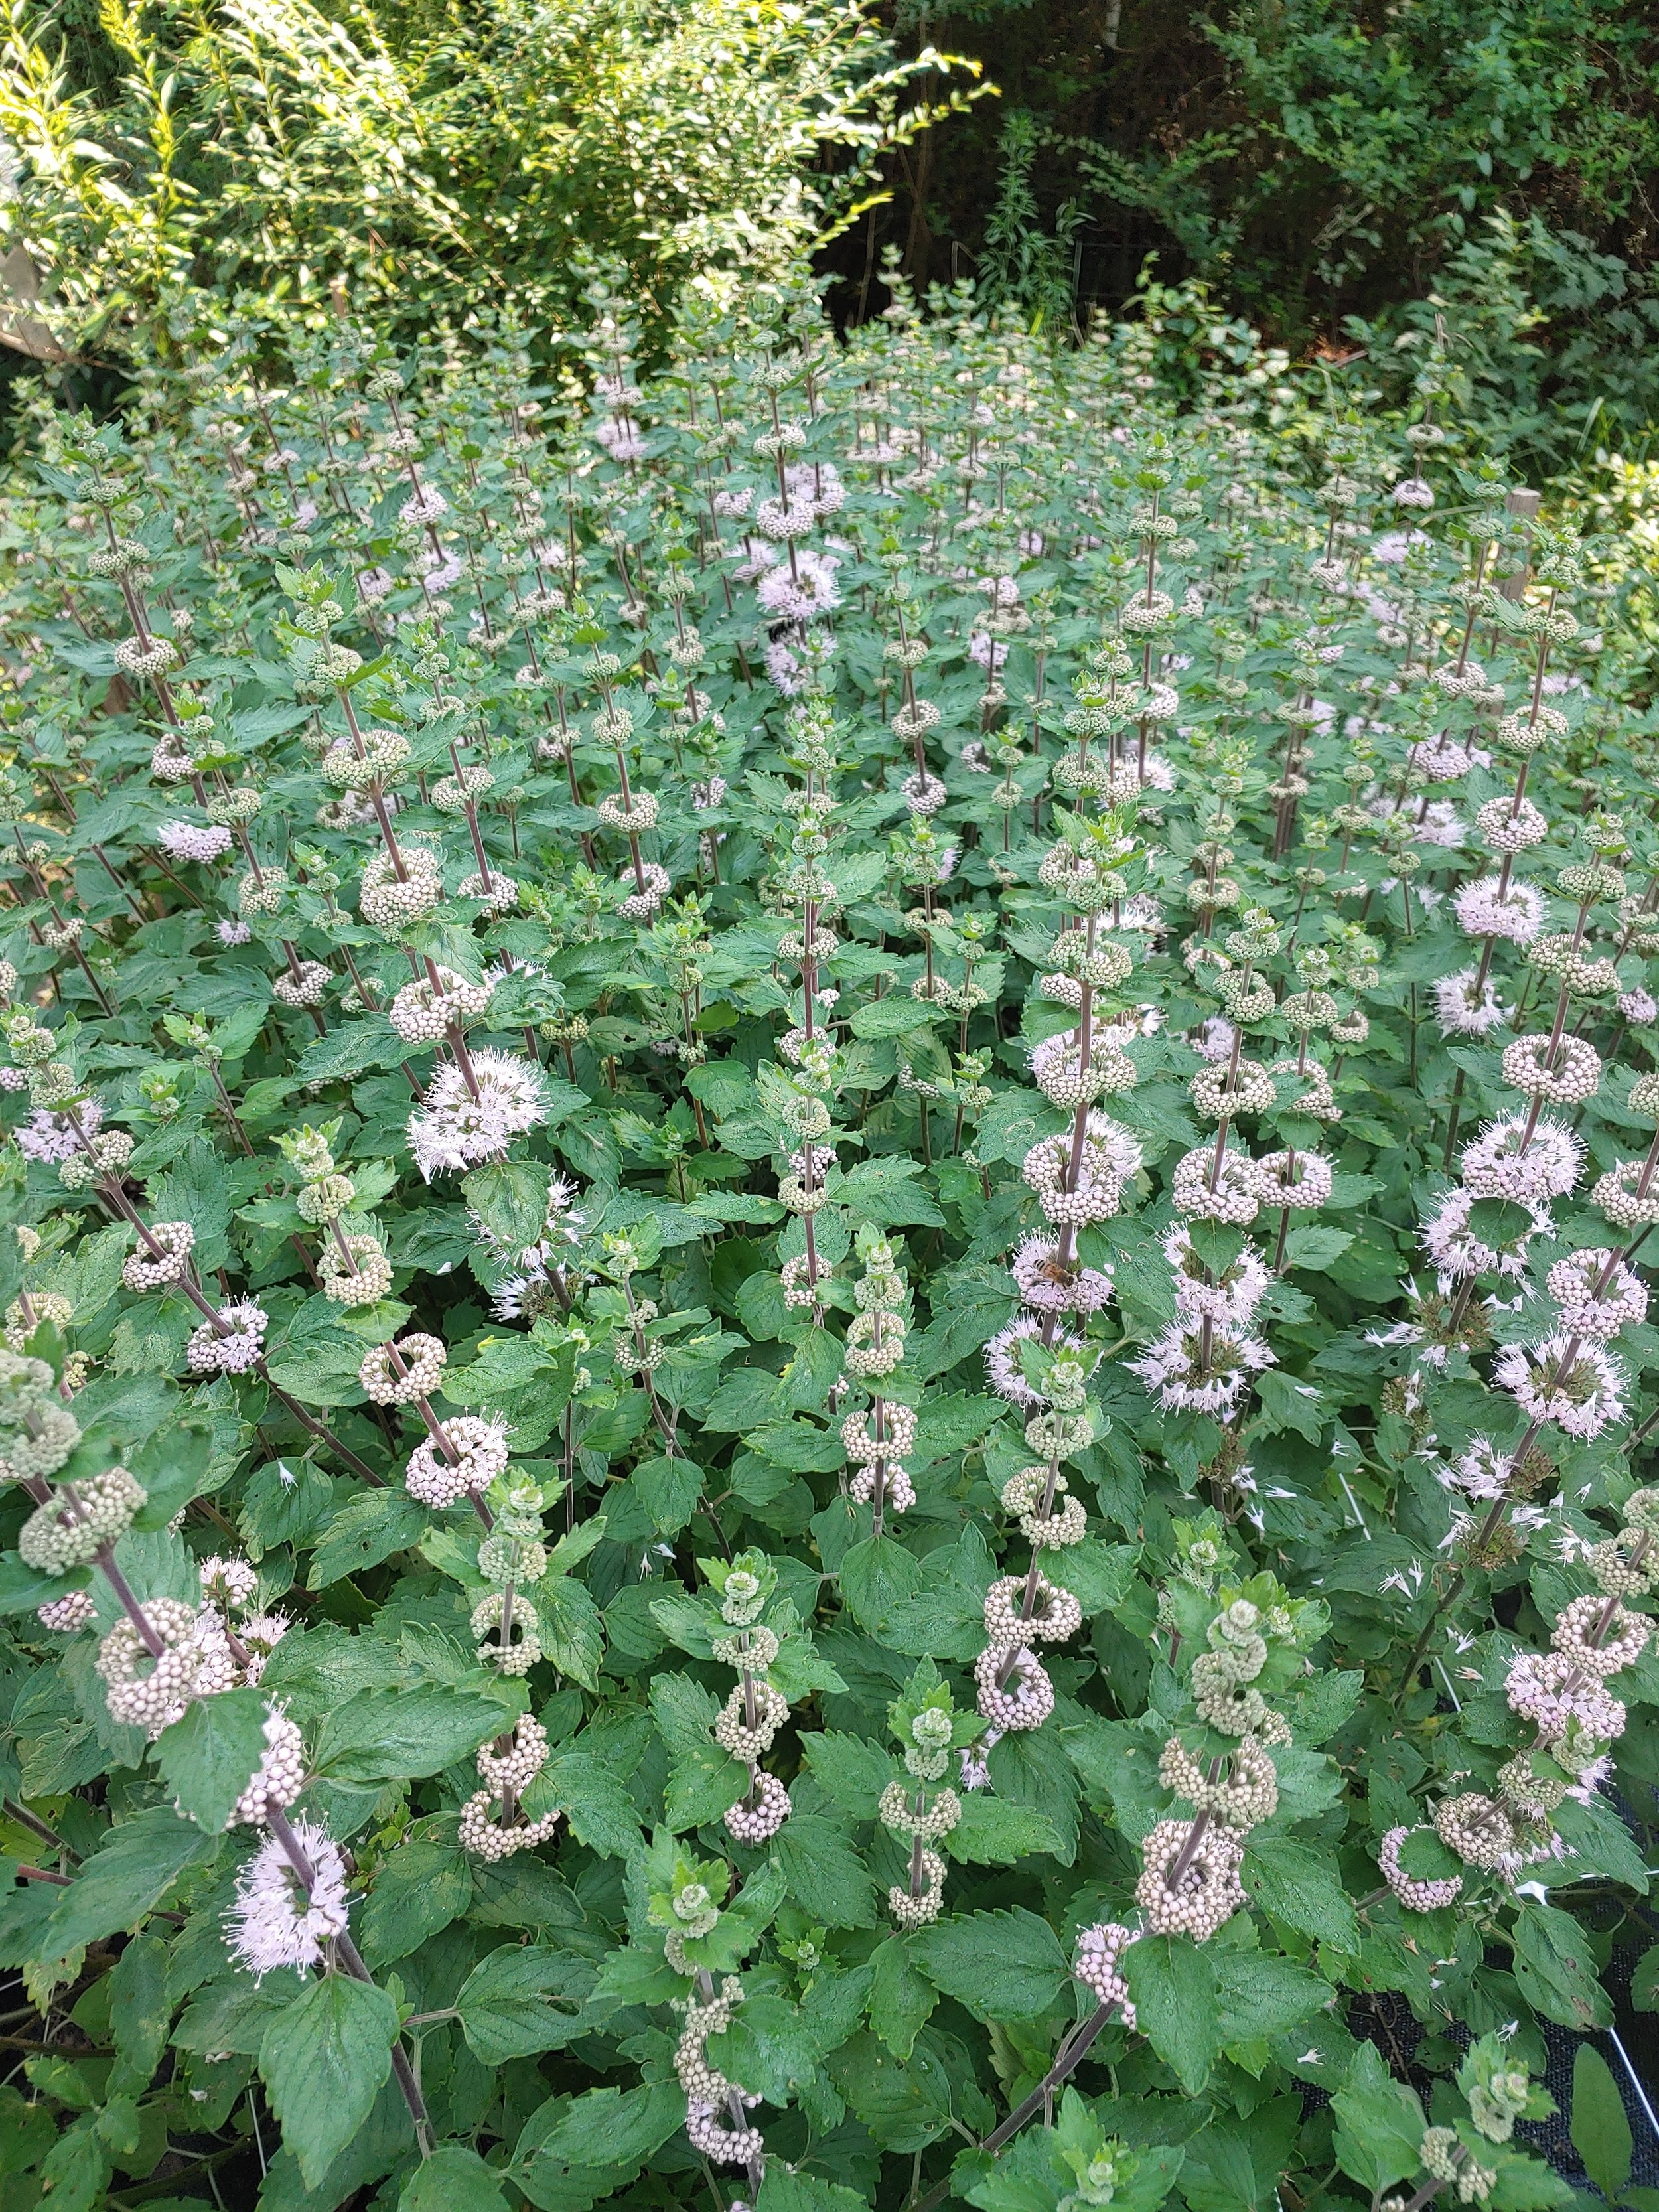
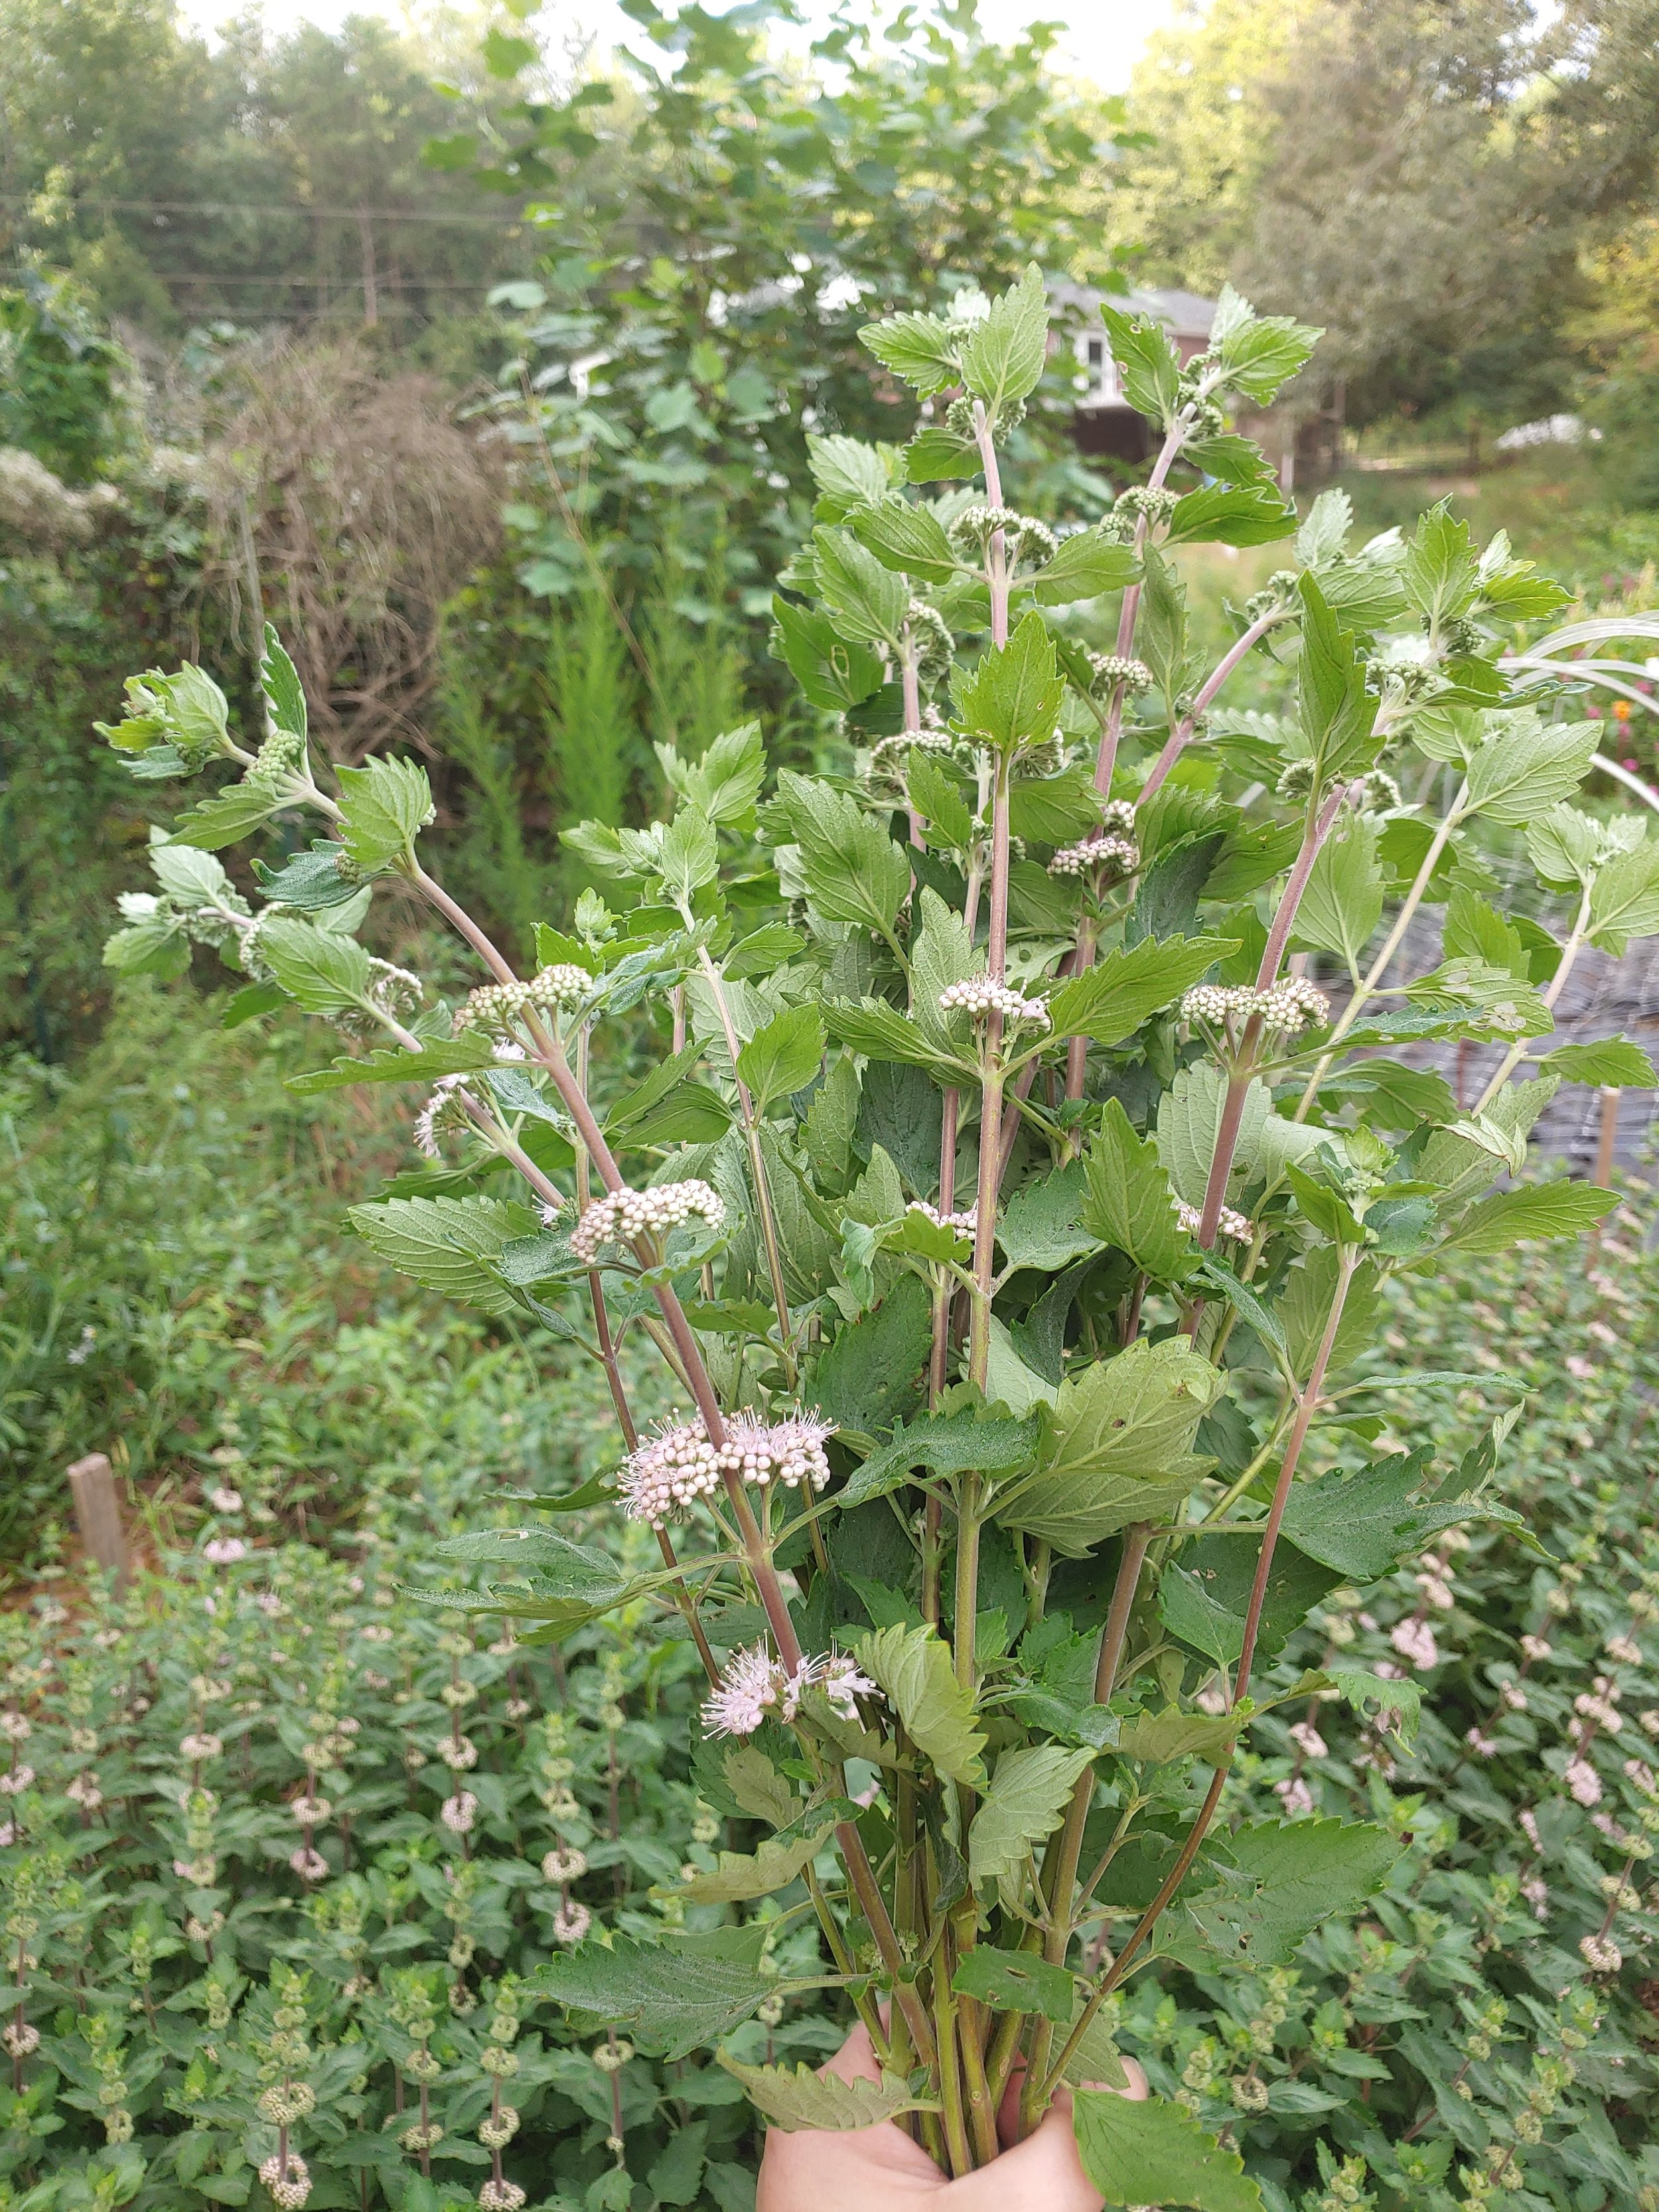
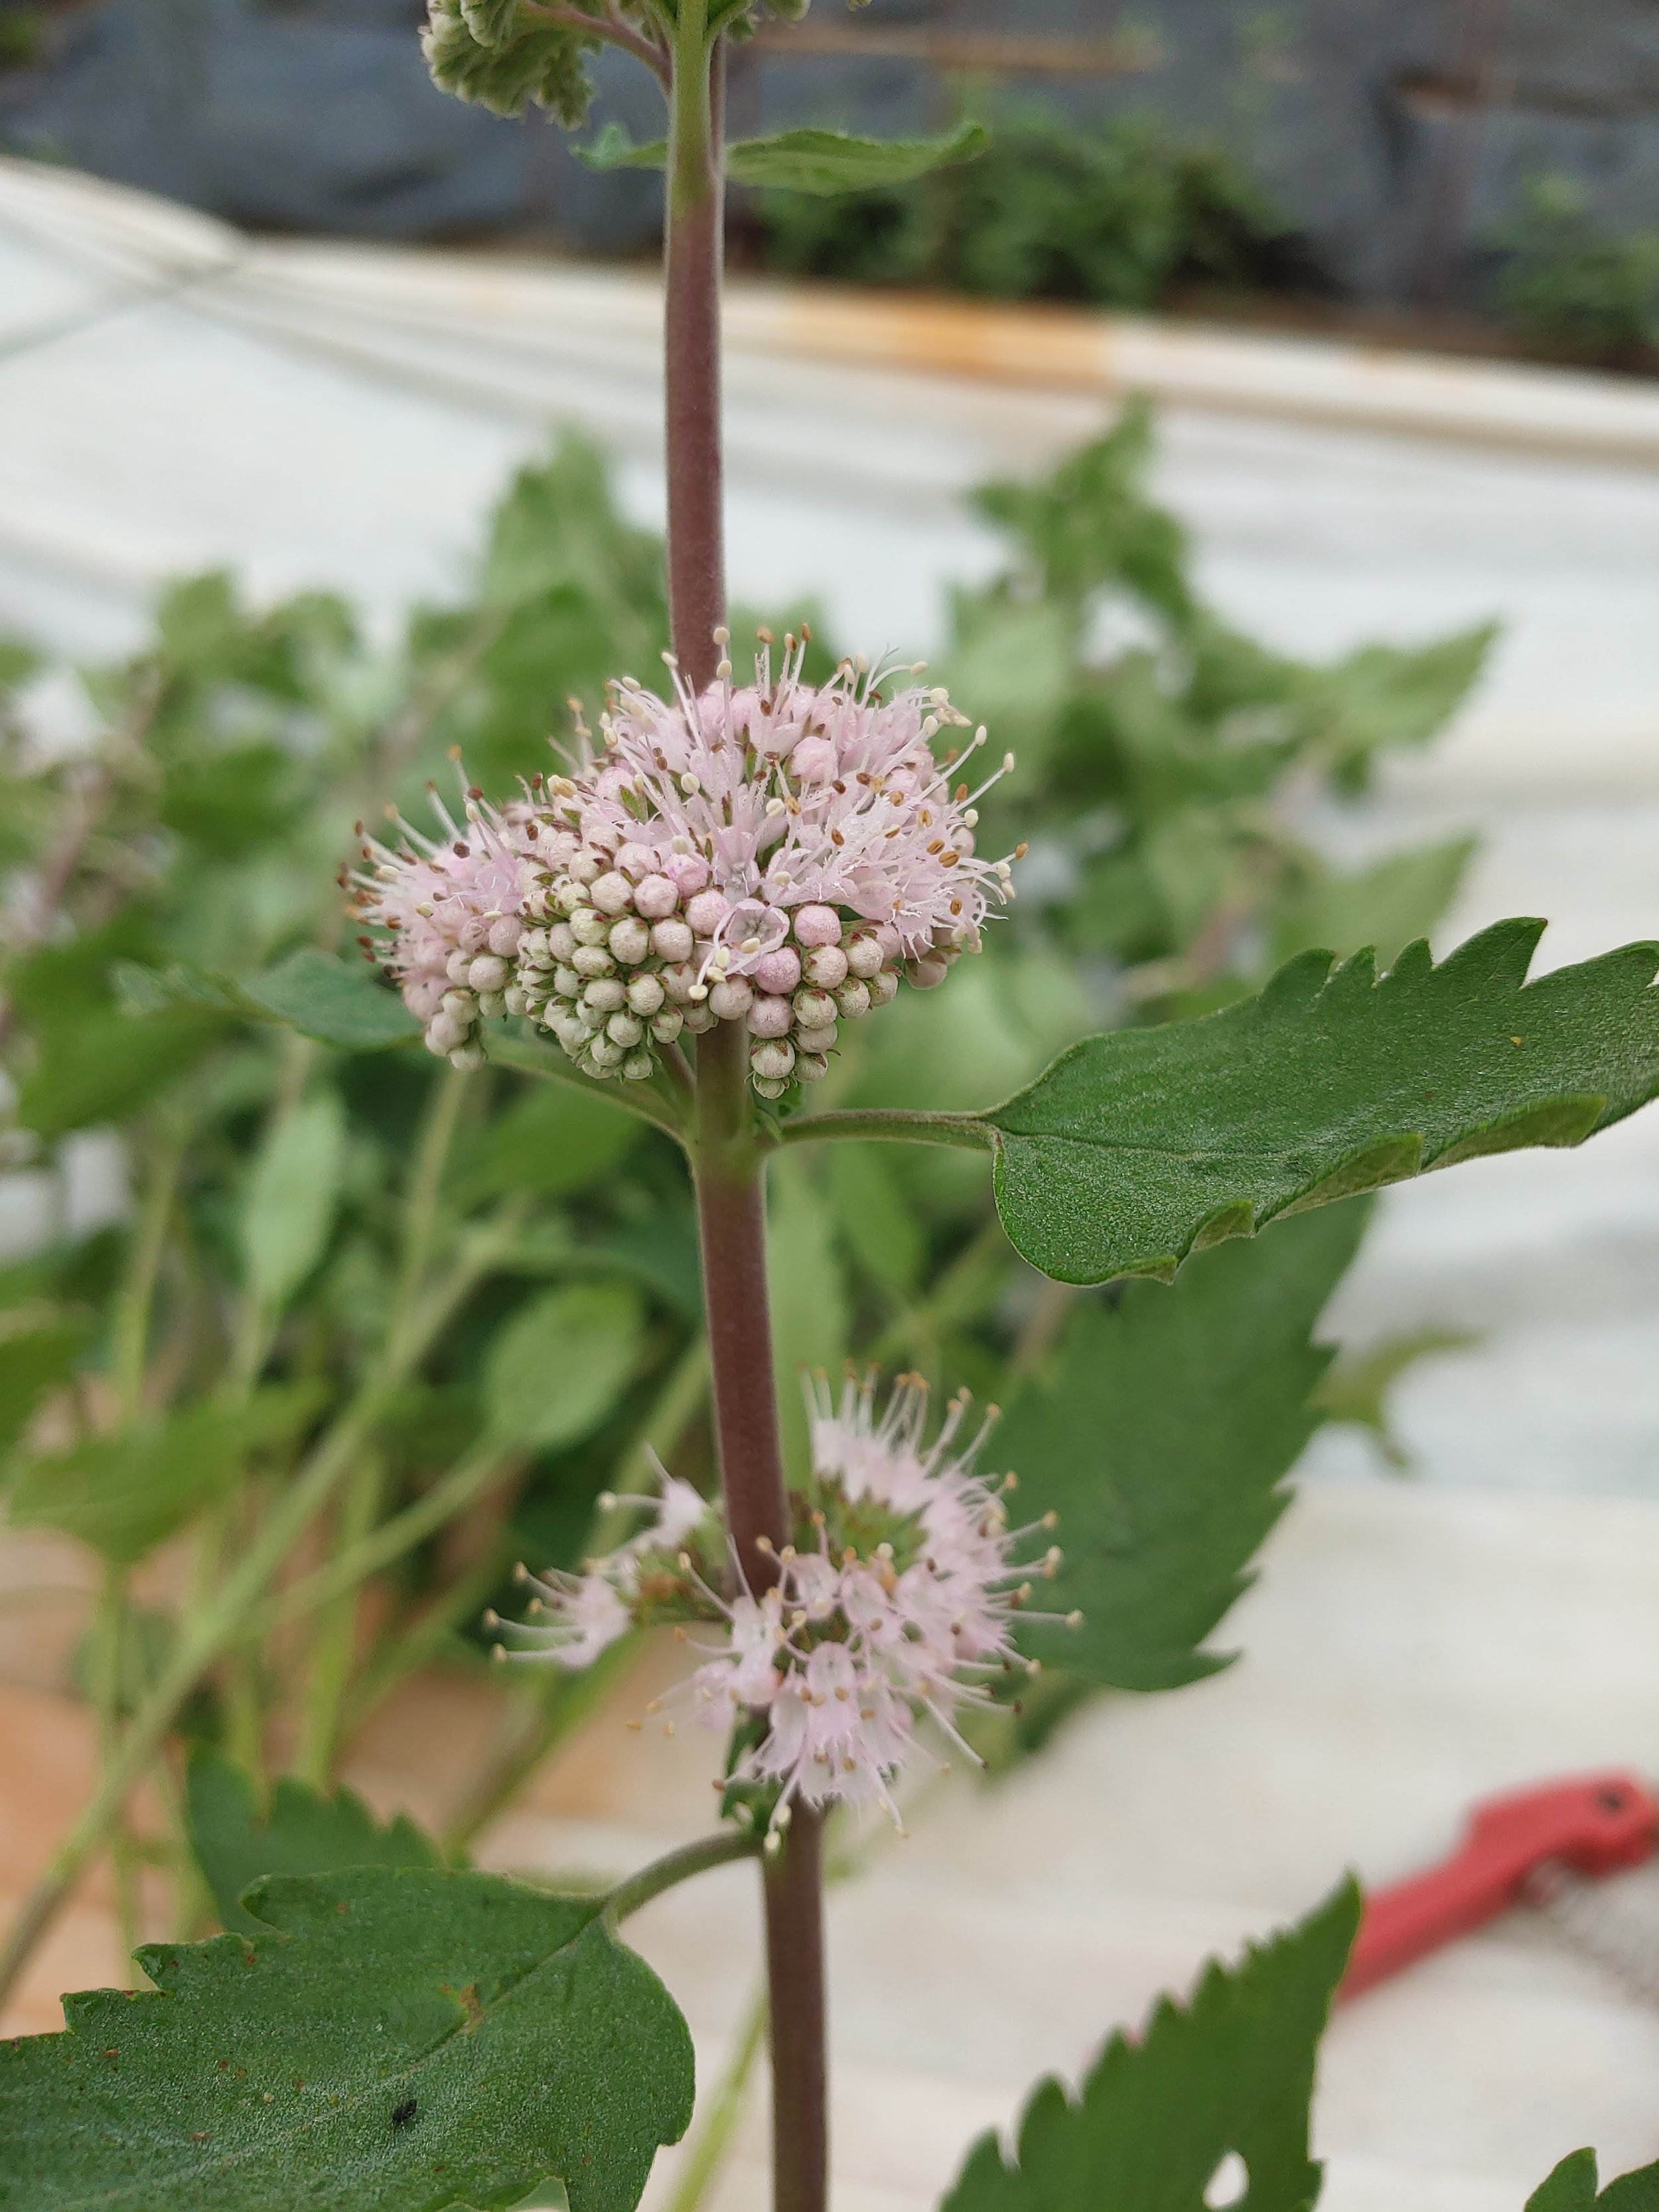
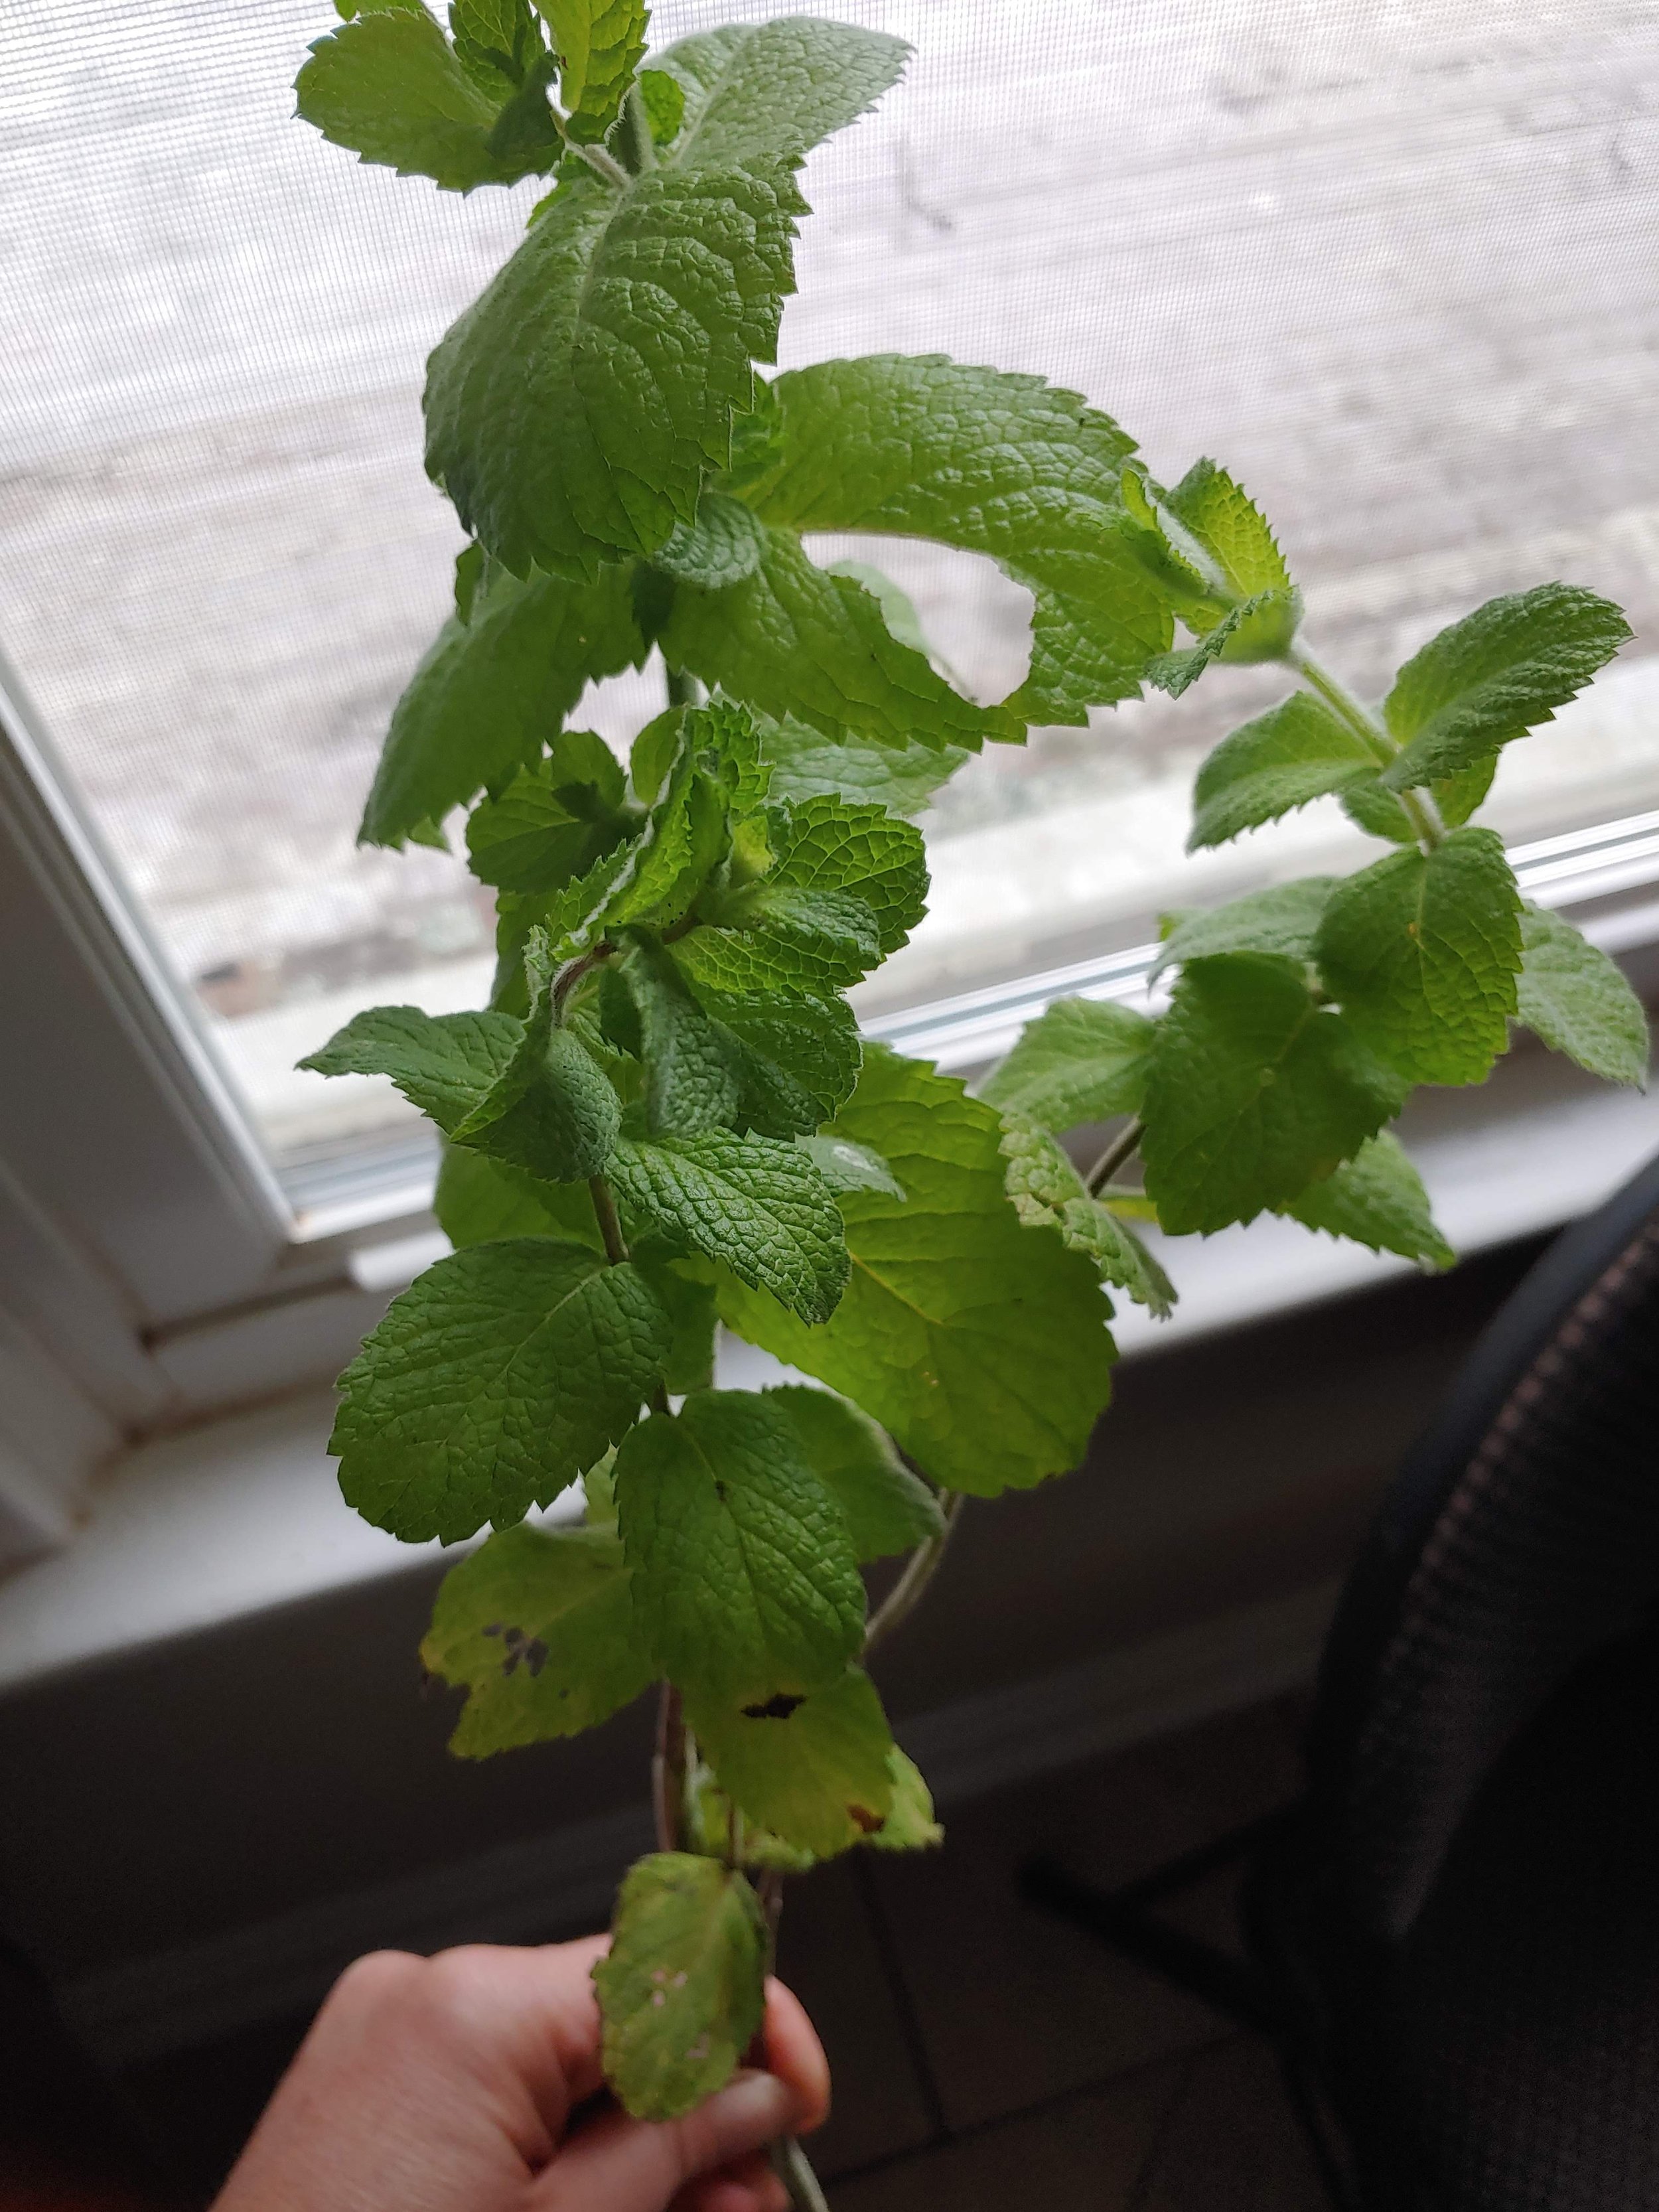
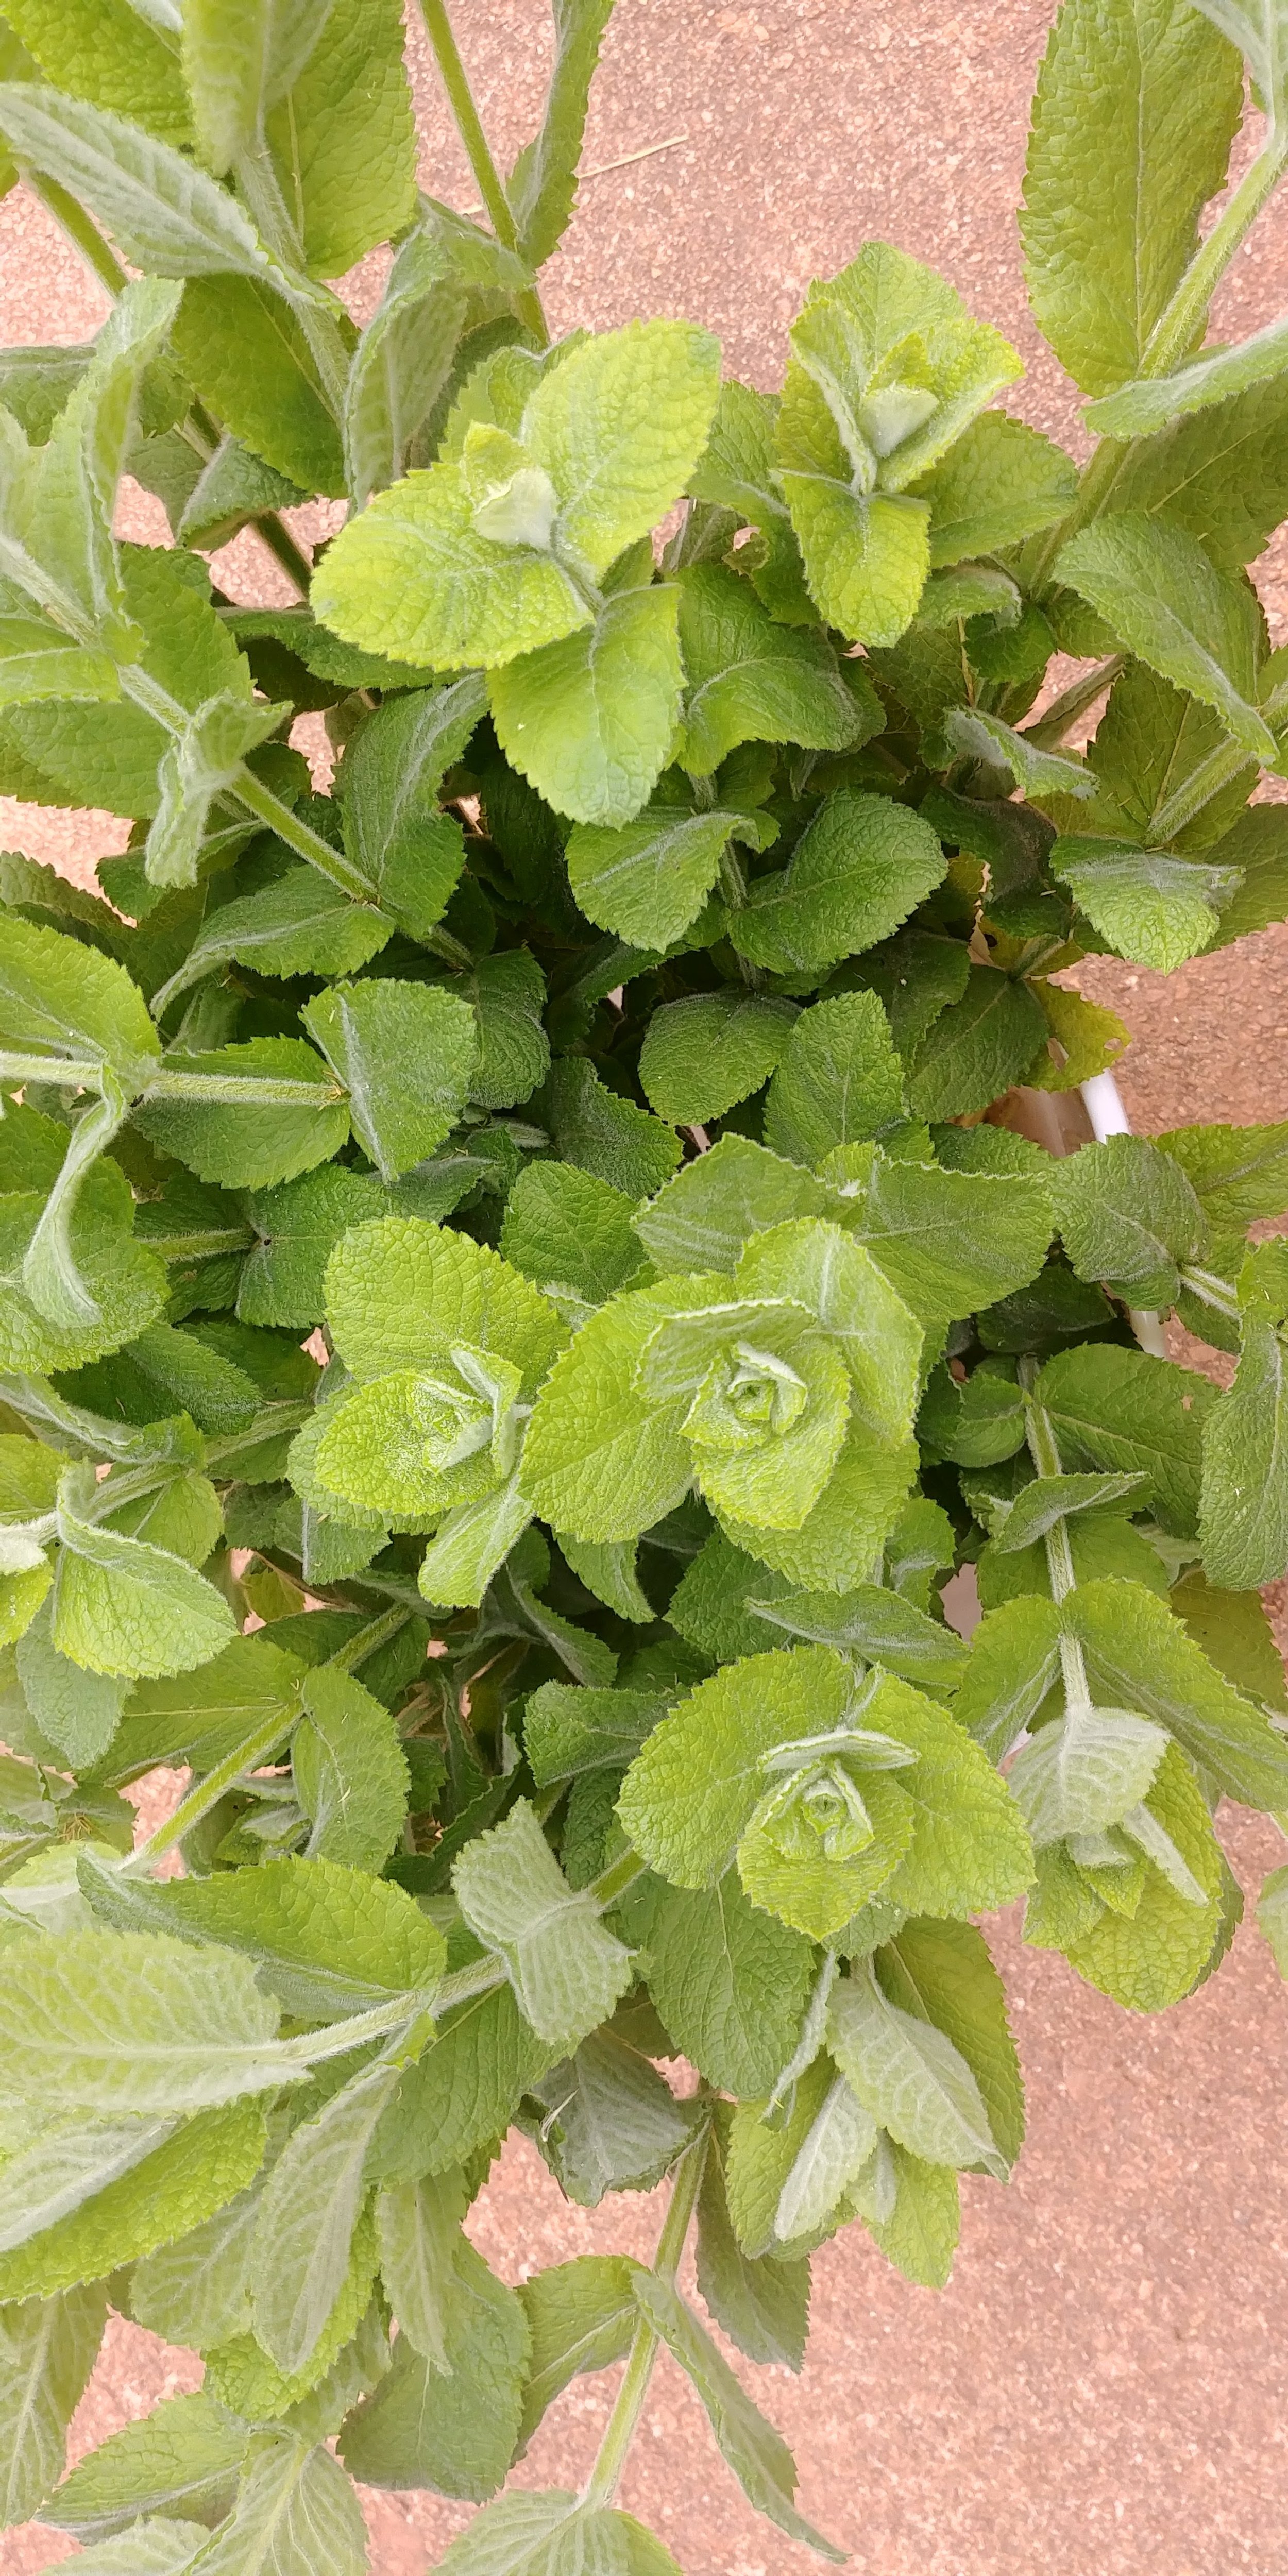
Mint- This is my other Fall favorite green (actually it works all season long). You want to make sure mint is mature when you cut it- the stem should feel fairly stiff about 5-6” from the top. It’s the type of plant you will need to trial a few times to get the harvest stage correct. Apple Mint is my personal favorite but most varieties of mint work well- just make sure they grow tall enough!
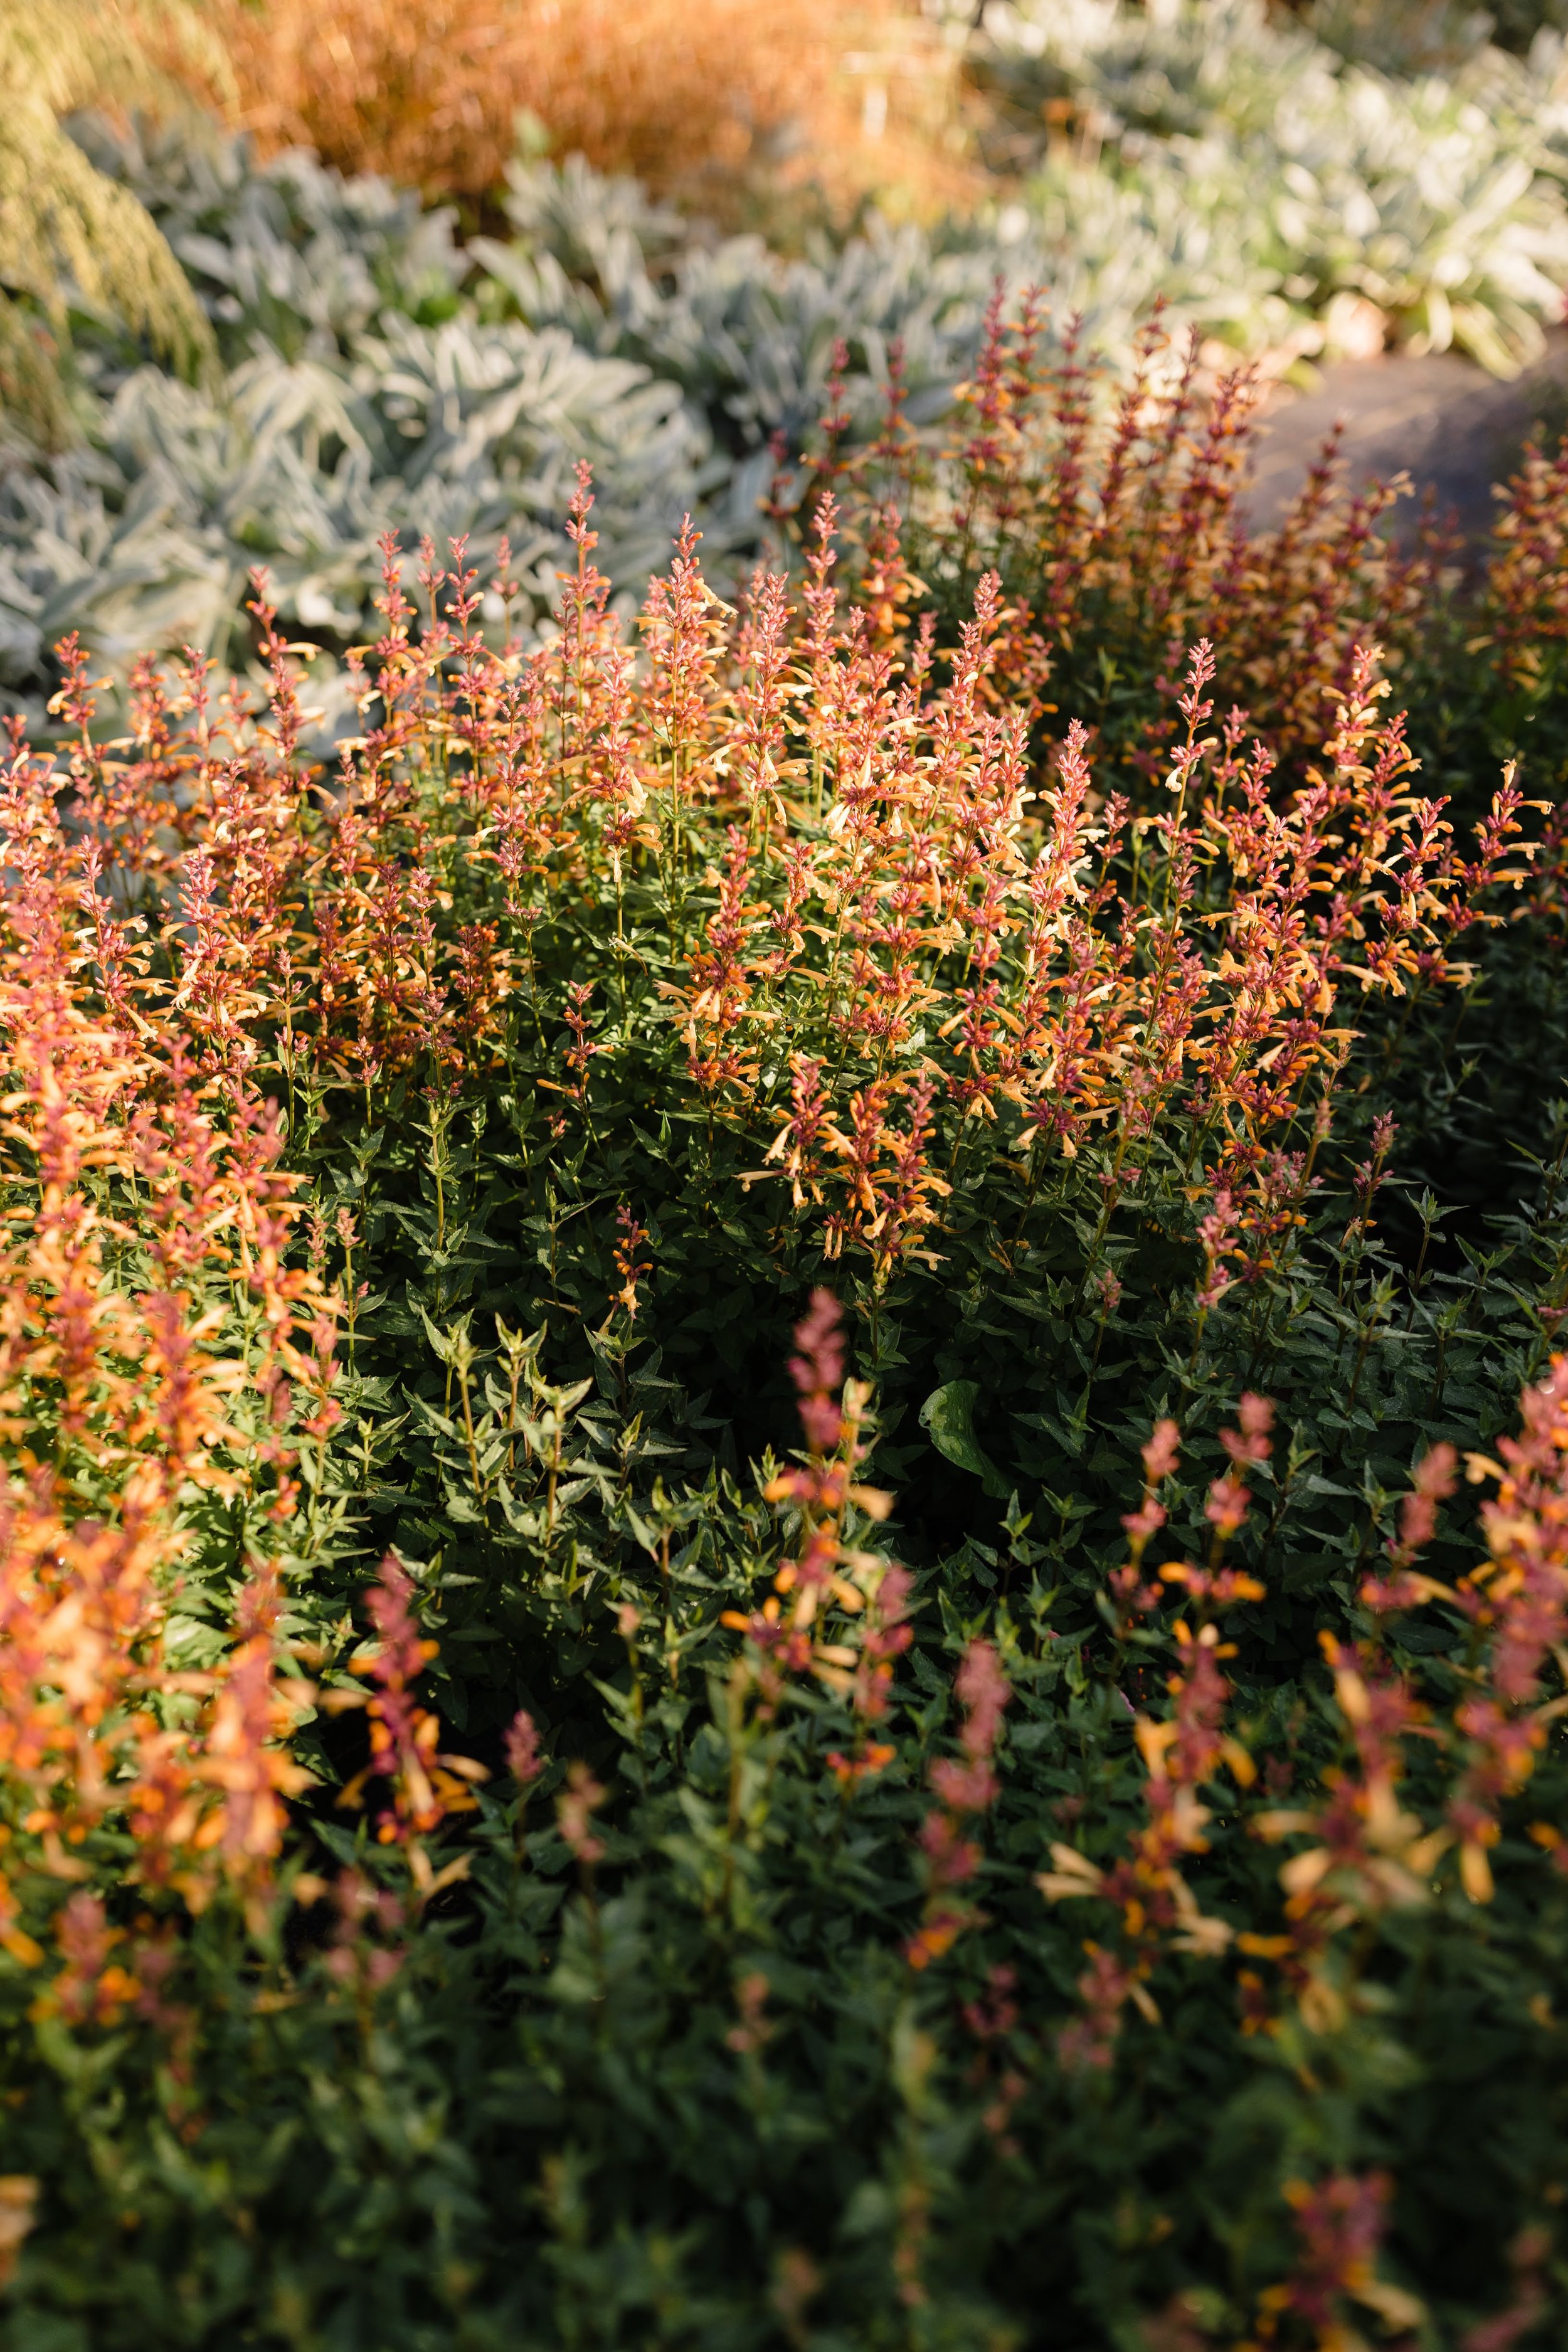
A few others that I wanted to mention- these aren’t necessarily “fall” perennials- more like all season perennials but I think they look especially good with dahlias. Agastache- comes in lots of colors now. The bold colors hold up well against the bold dahlia colors. Salvias- Same thing here- so many color choices. Agastache and Salvias work great because they will bloom once in the spring, you can cut back and sometimes get two more blooms before your first frost.
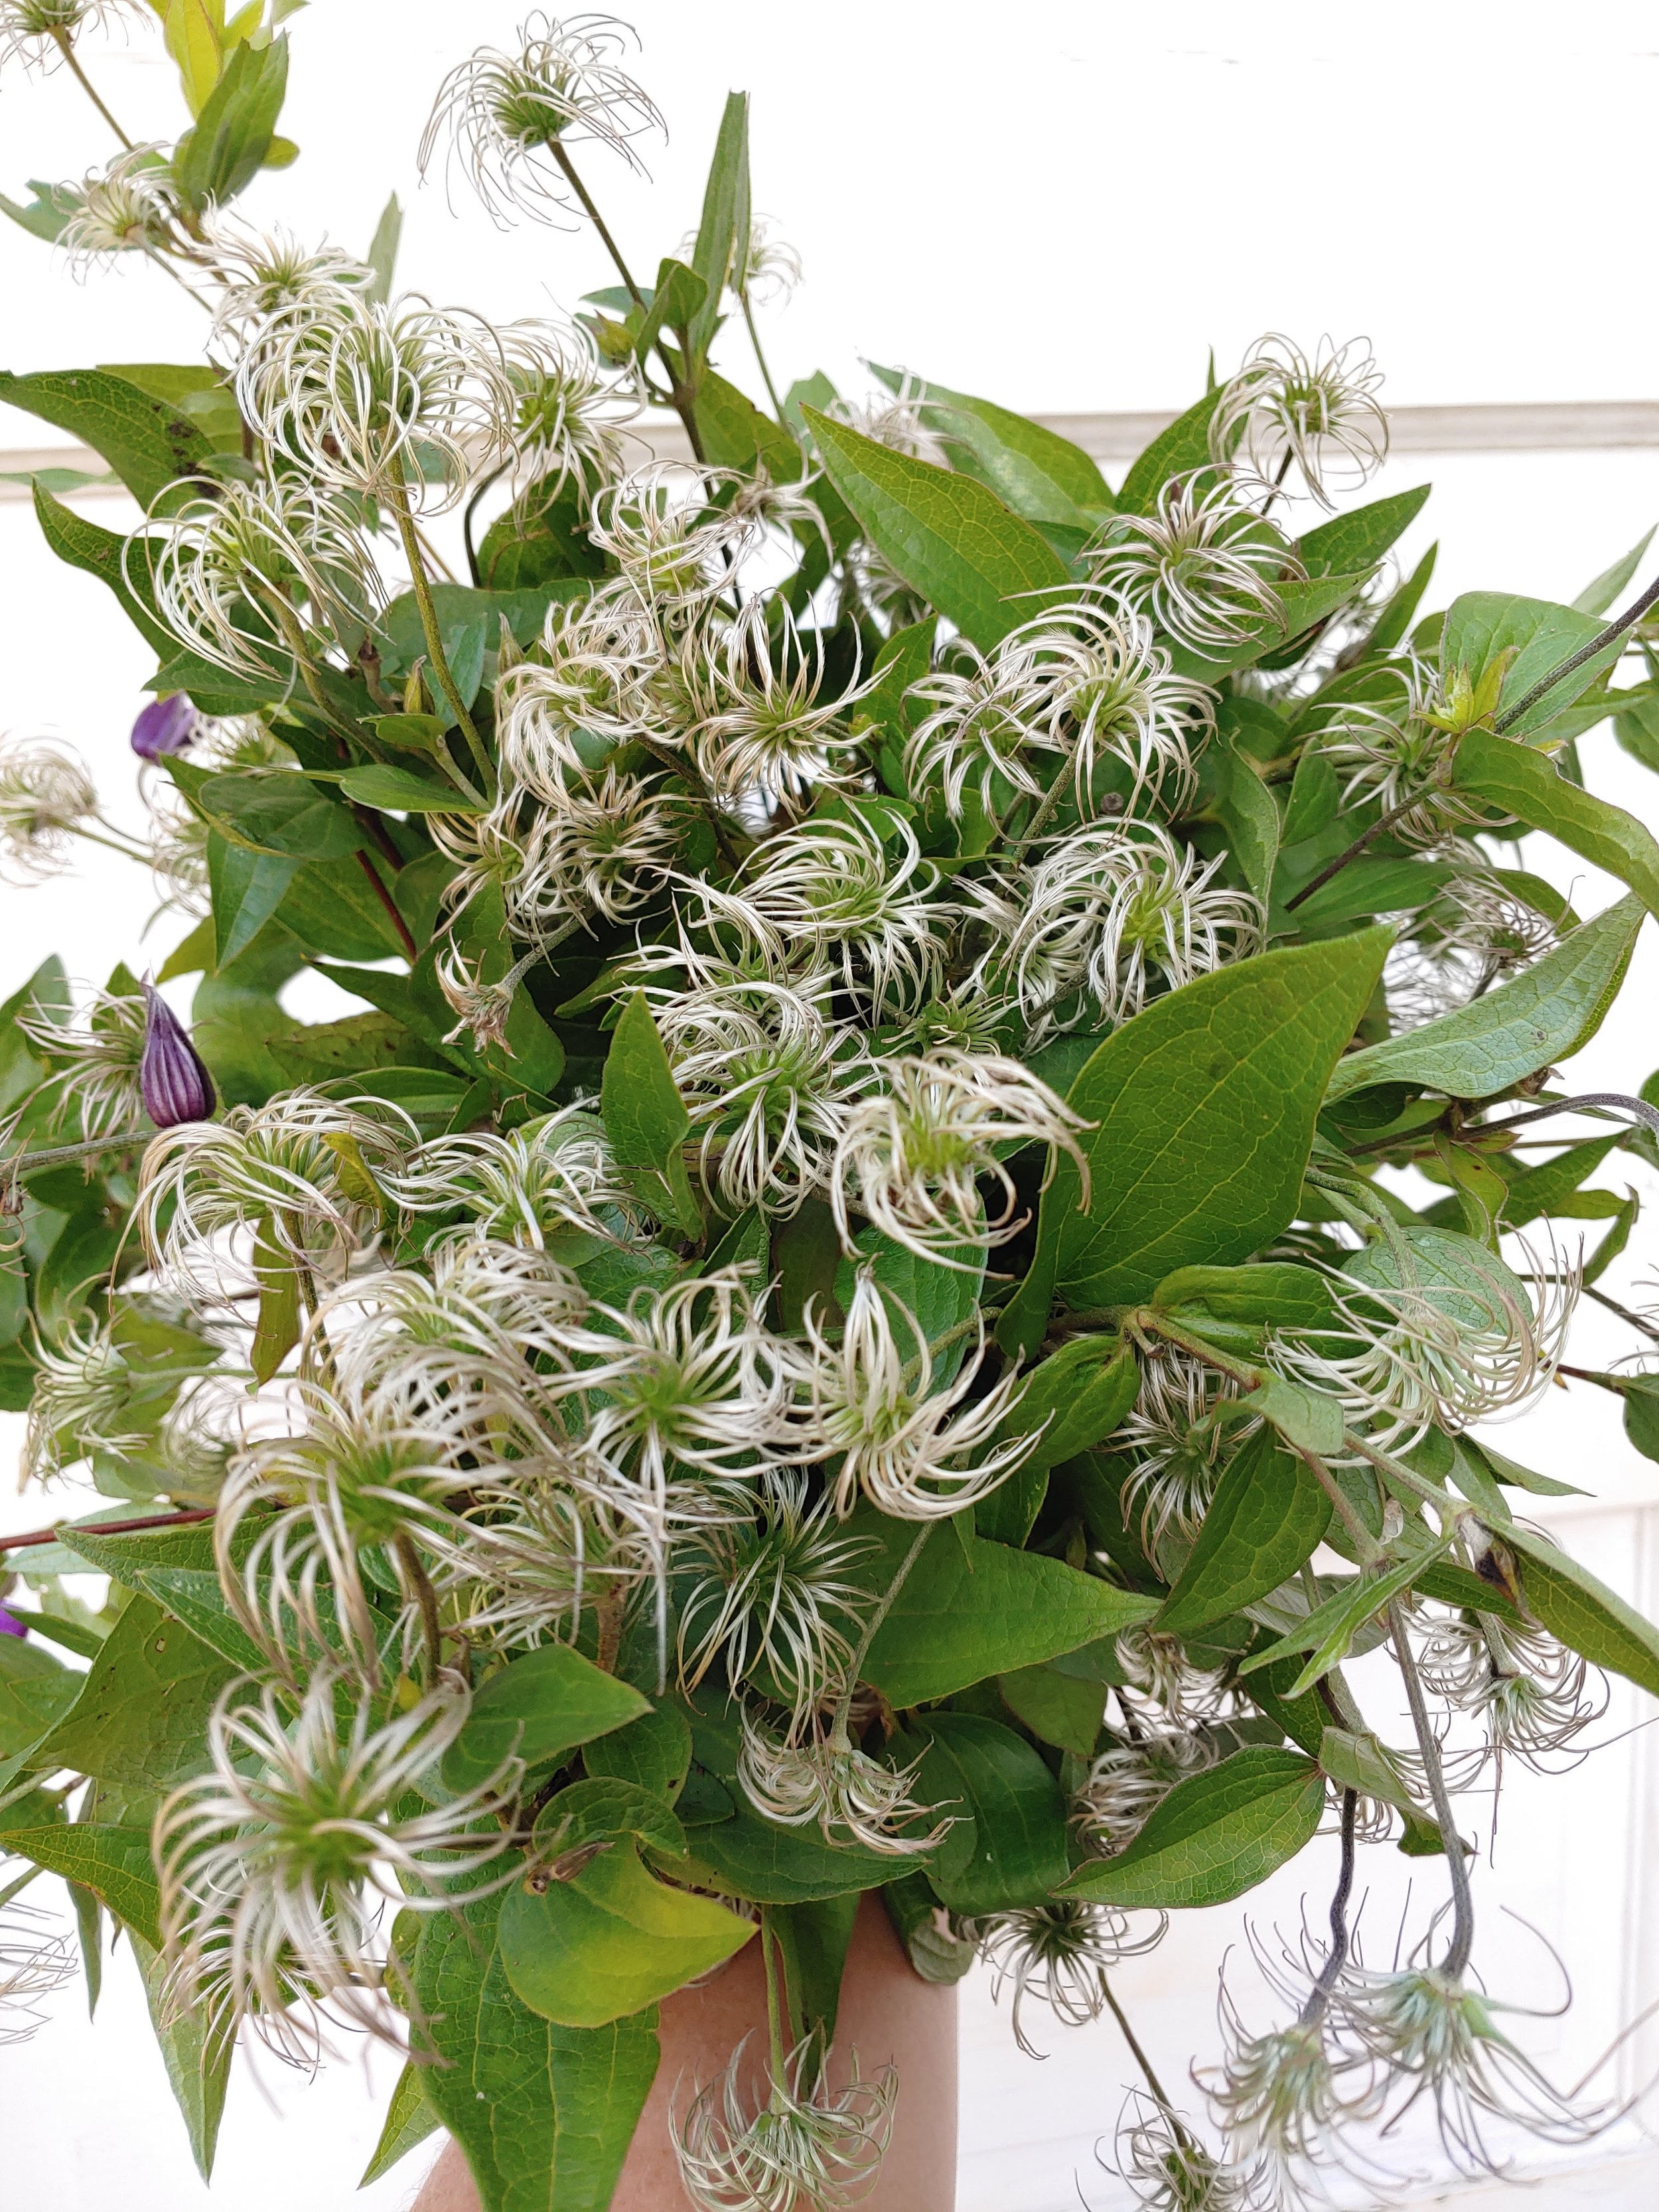
Clematis are another favorite. Most clematis bloom before dahlias but if you leave some blooms on the plant- you’ll get the awesome whirlygig seed pods. I think every fall bouquet should have some texture and these are my go to for adding texture.
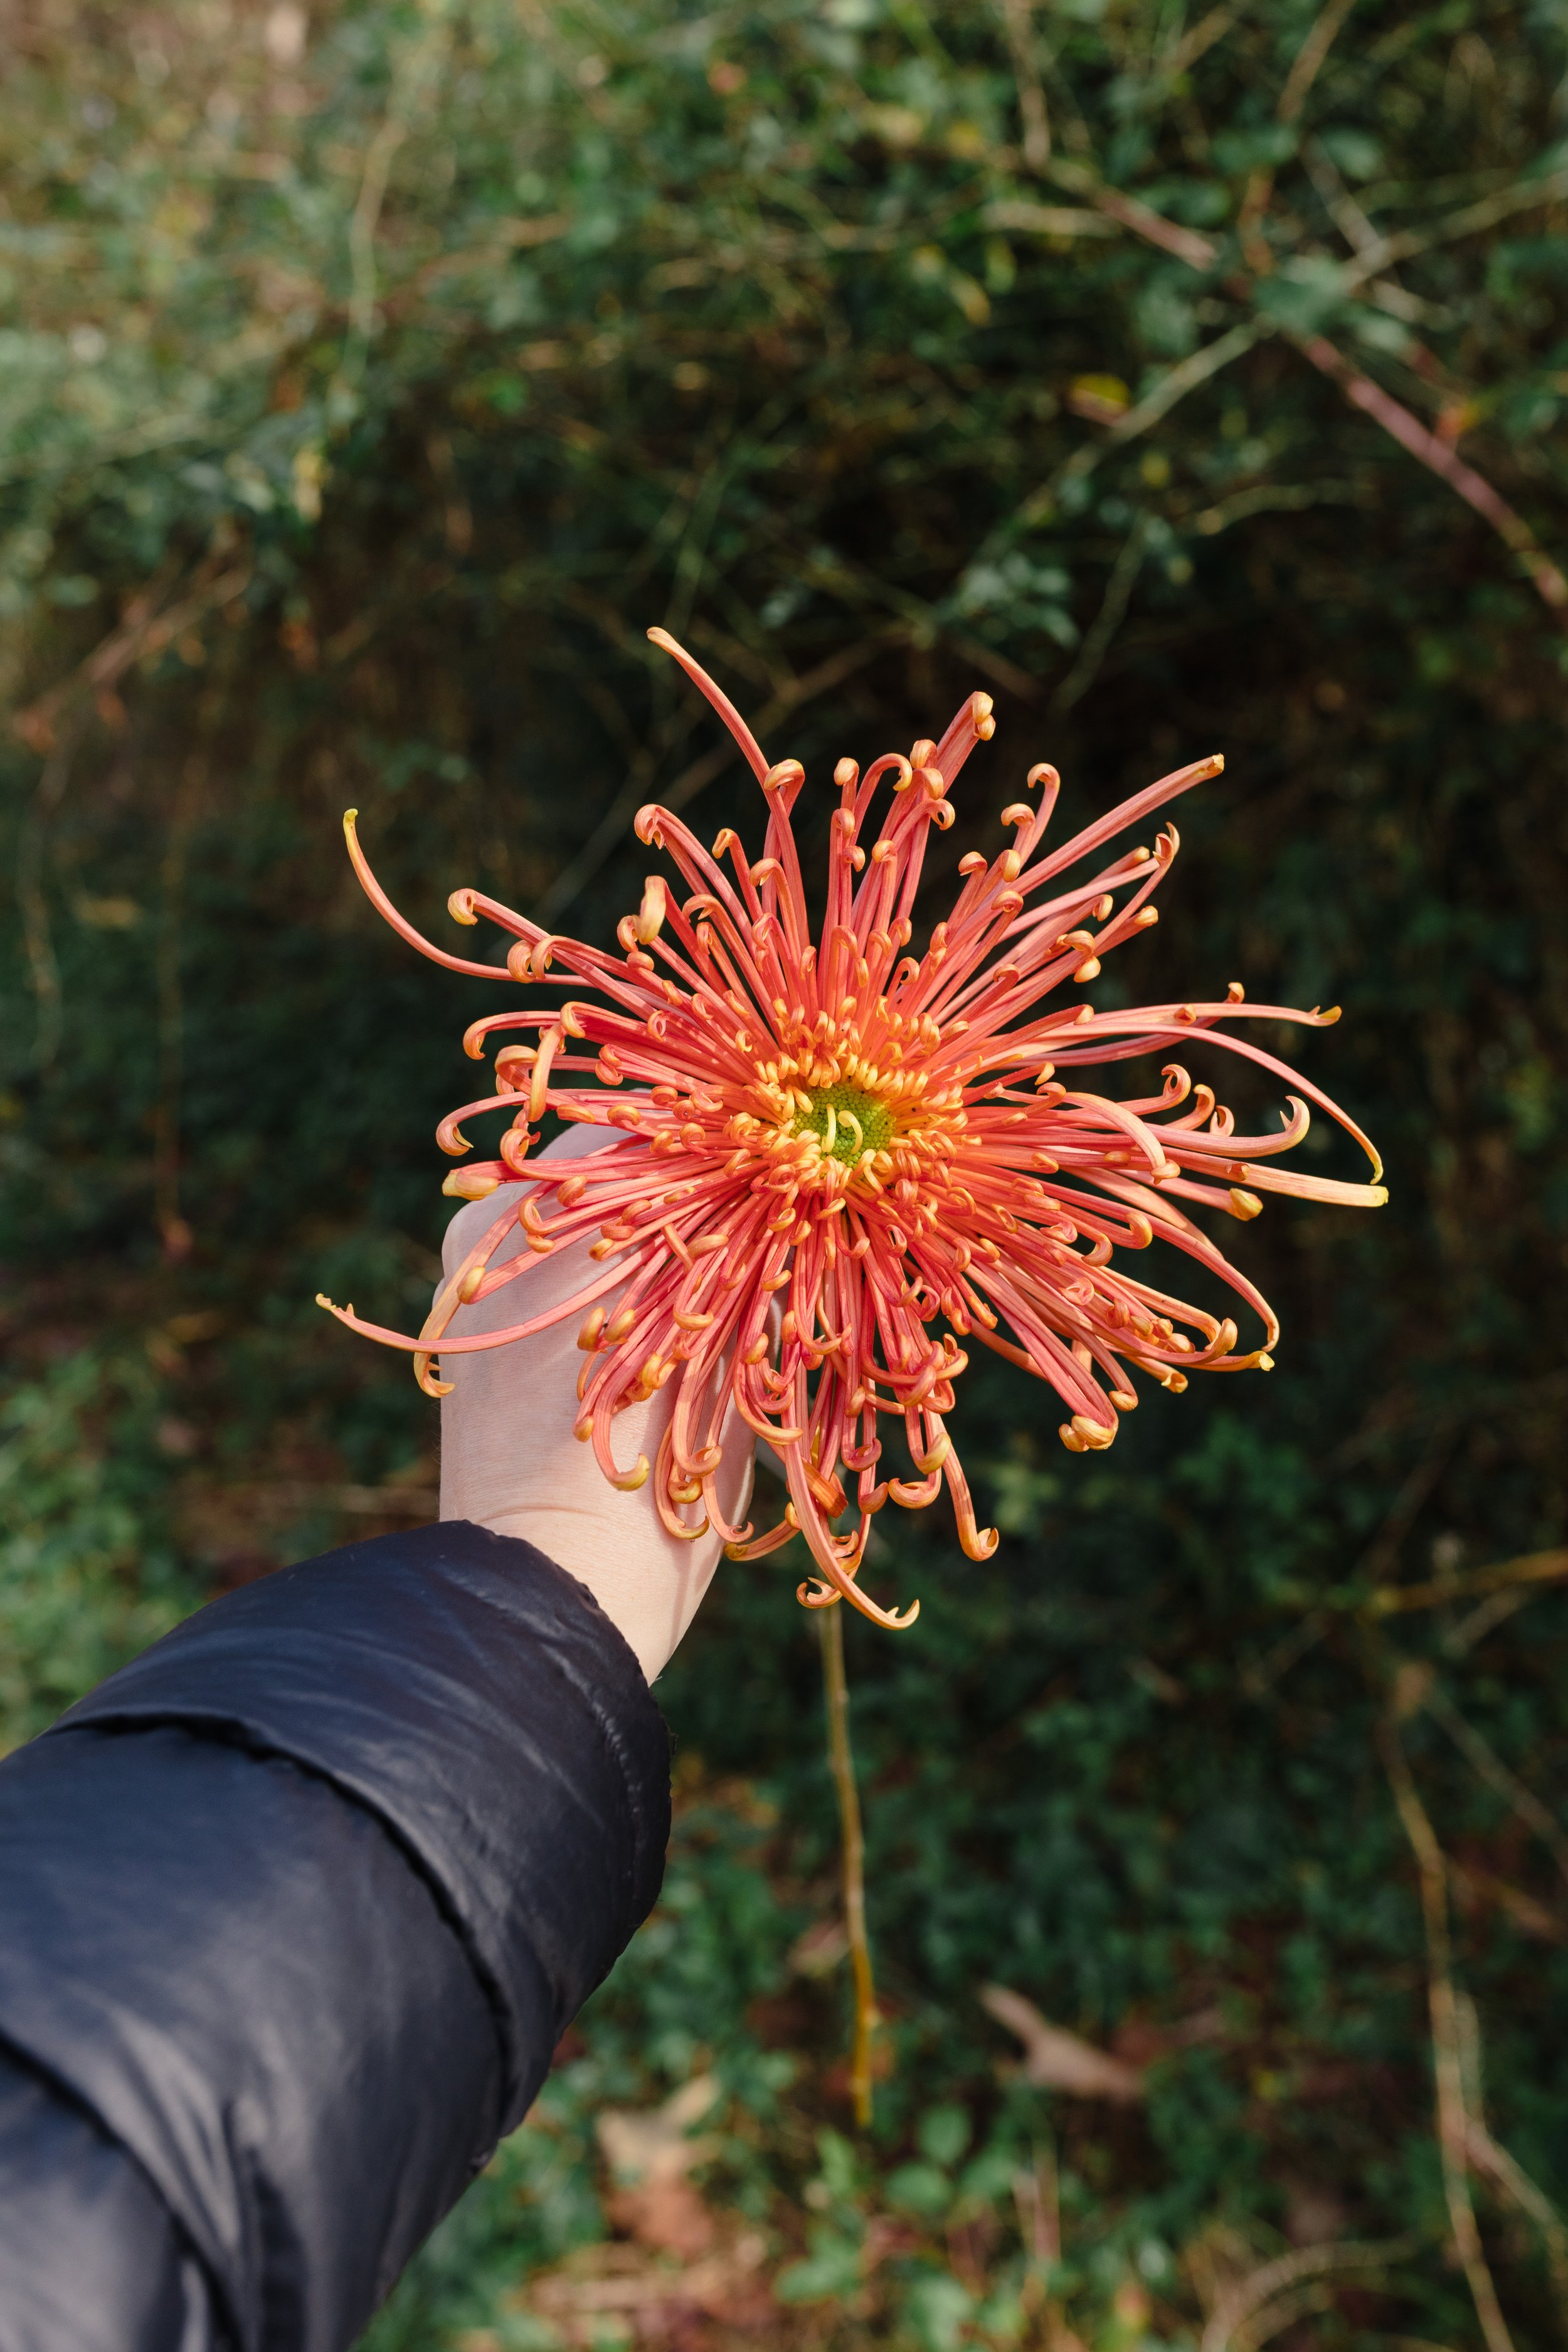
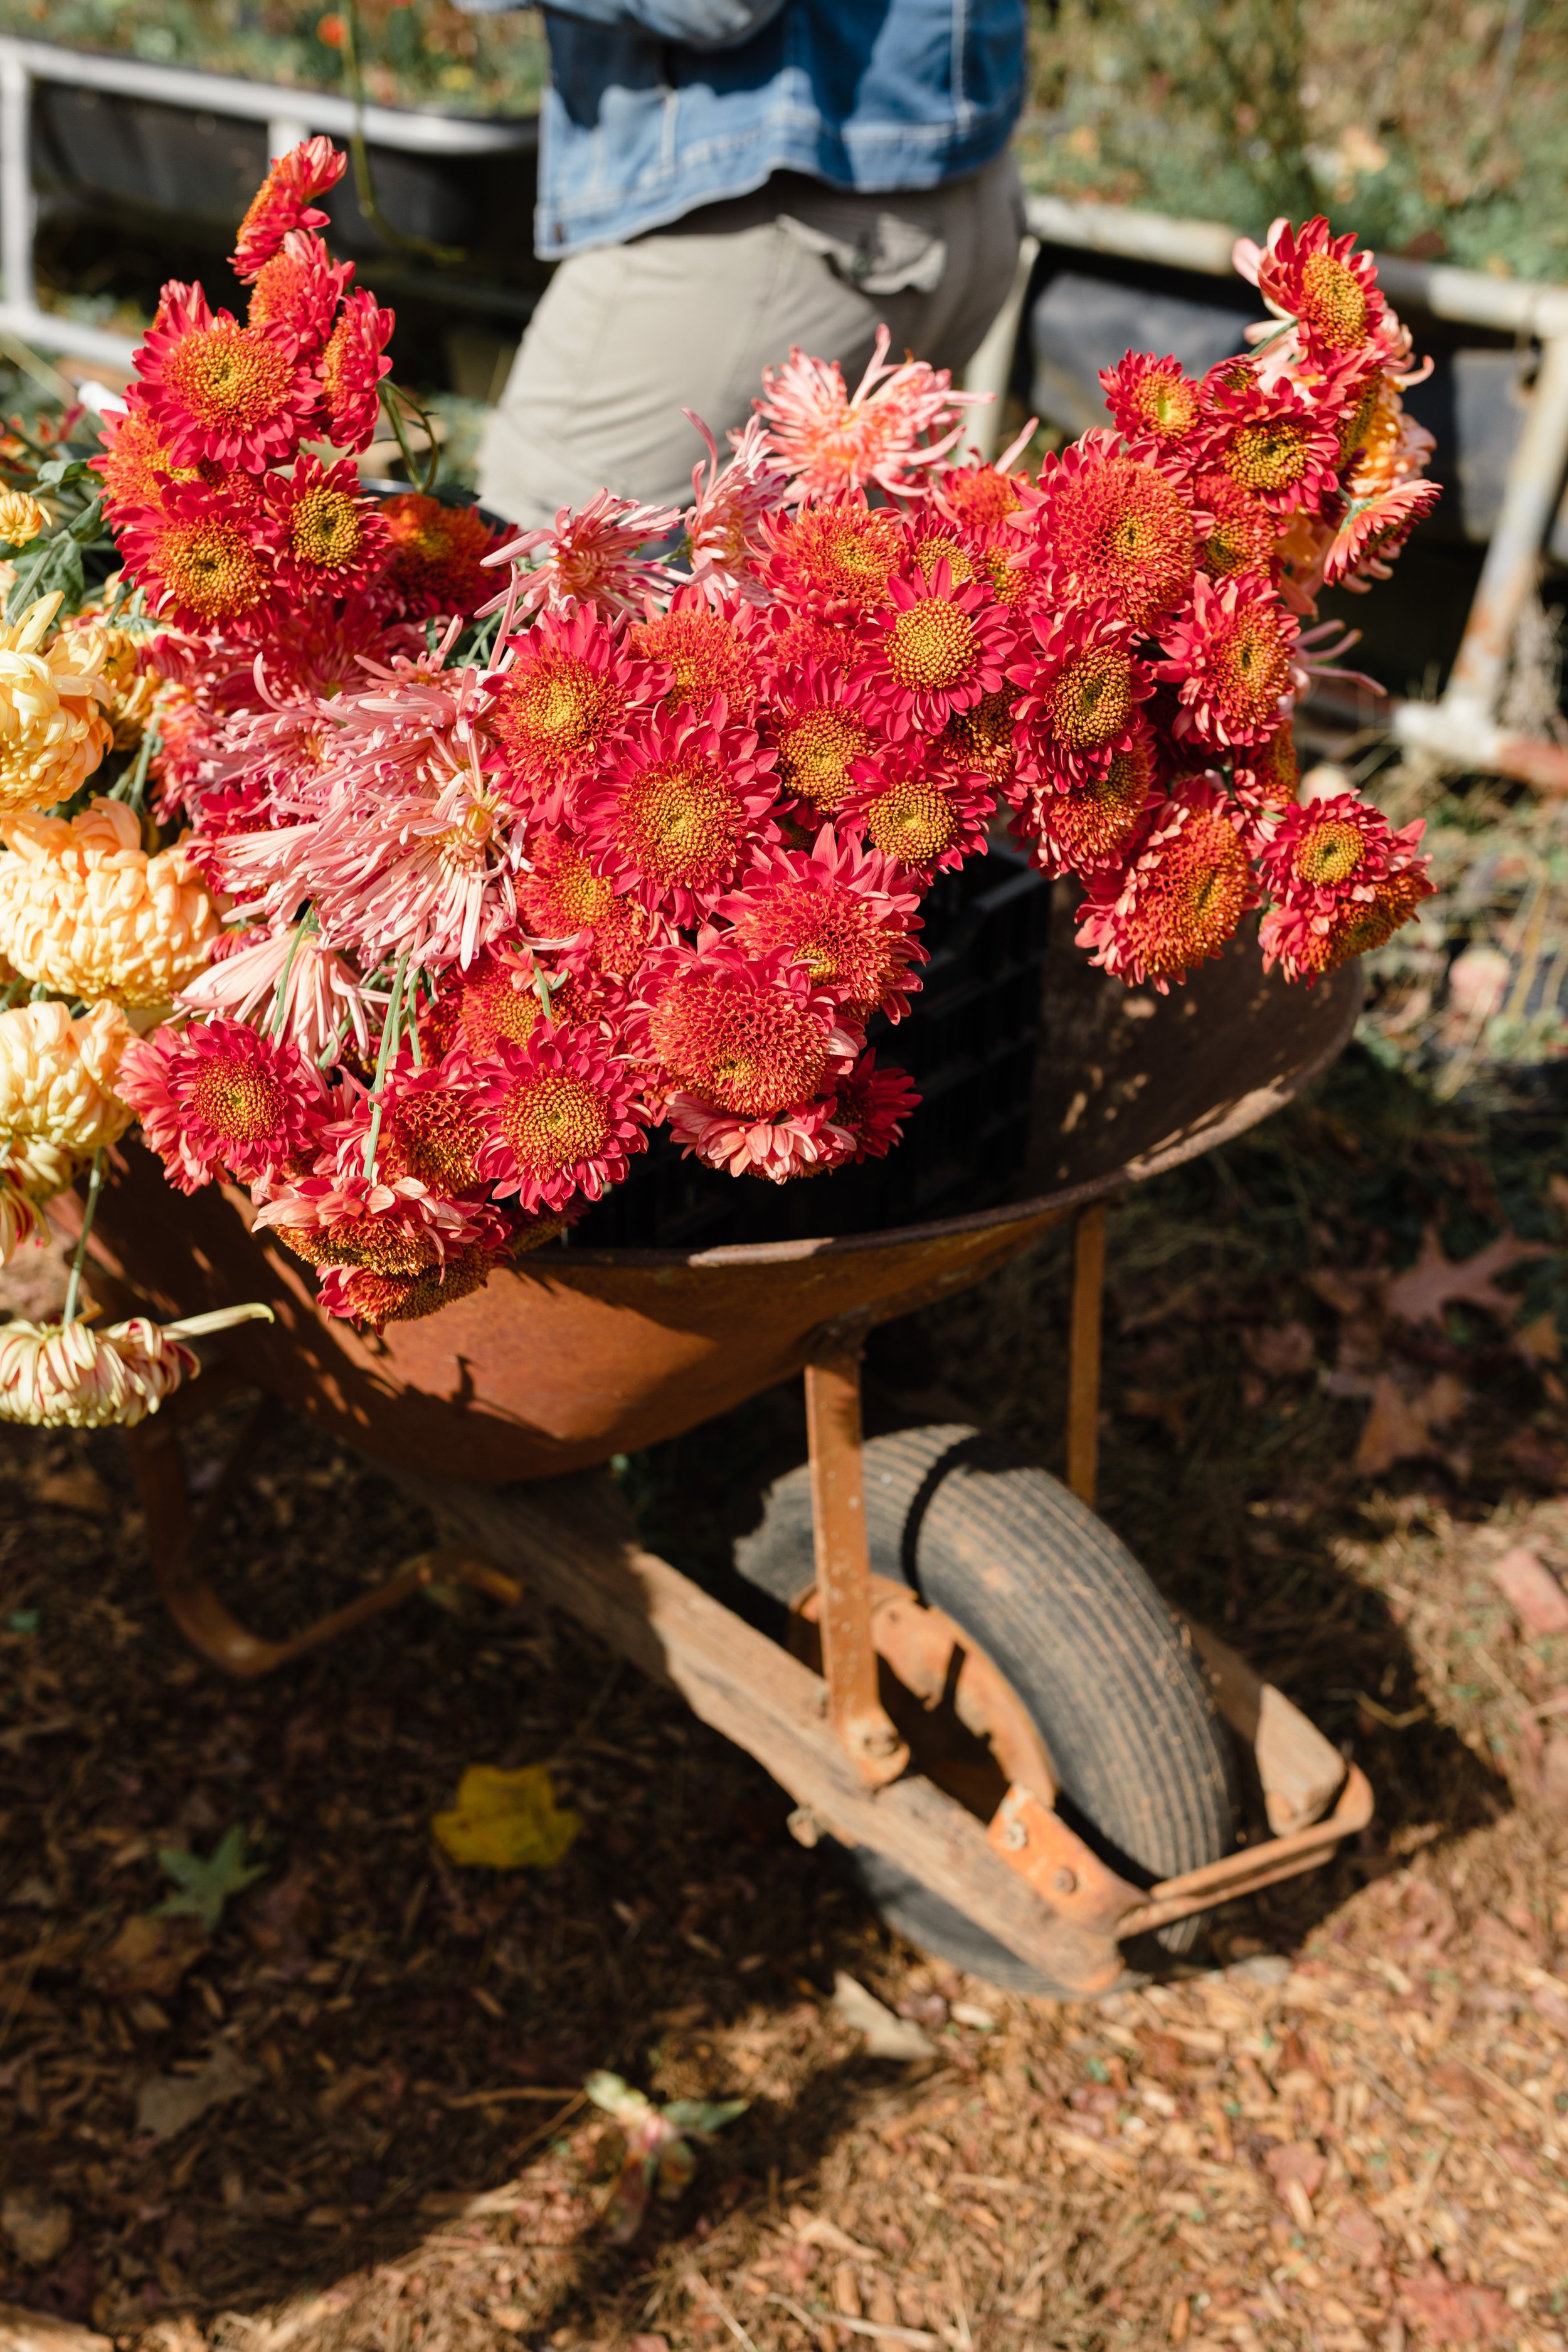
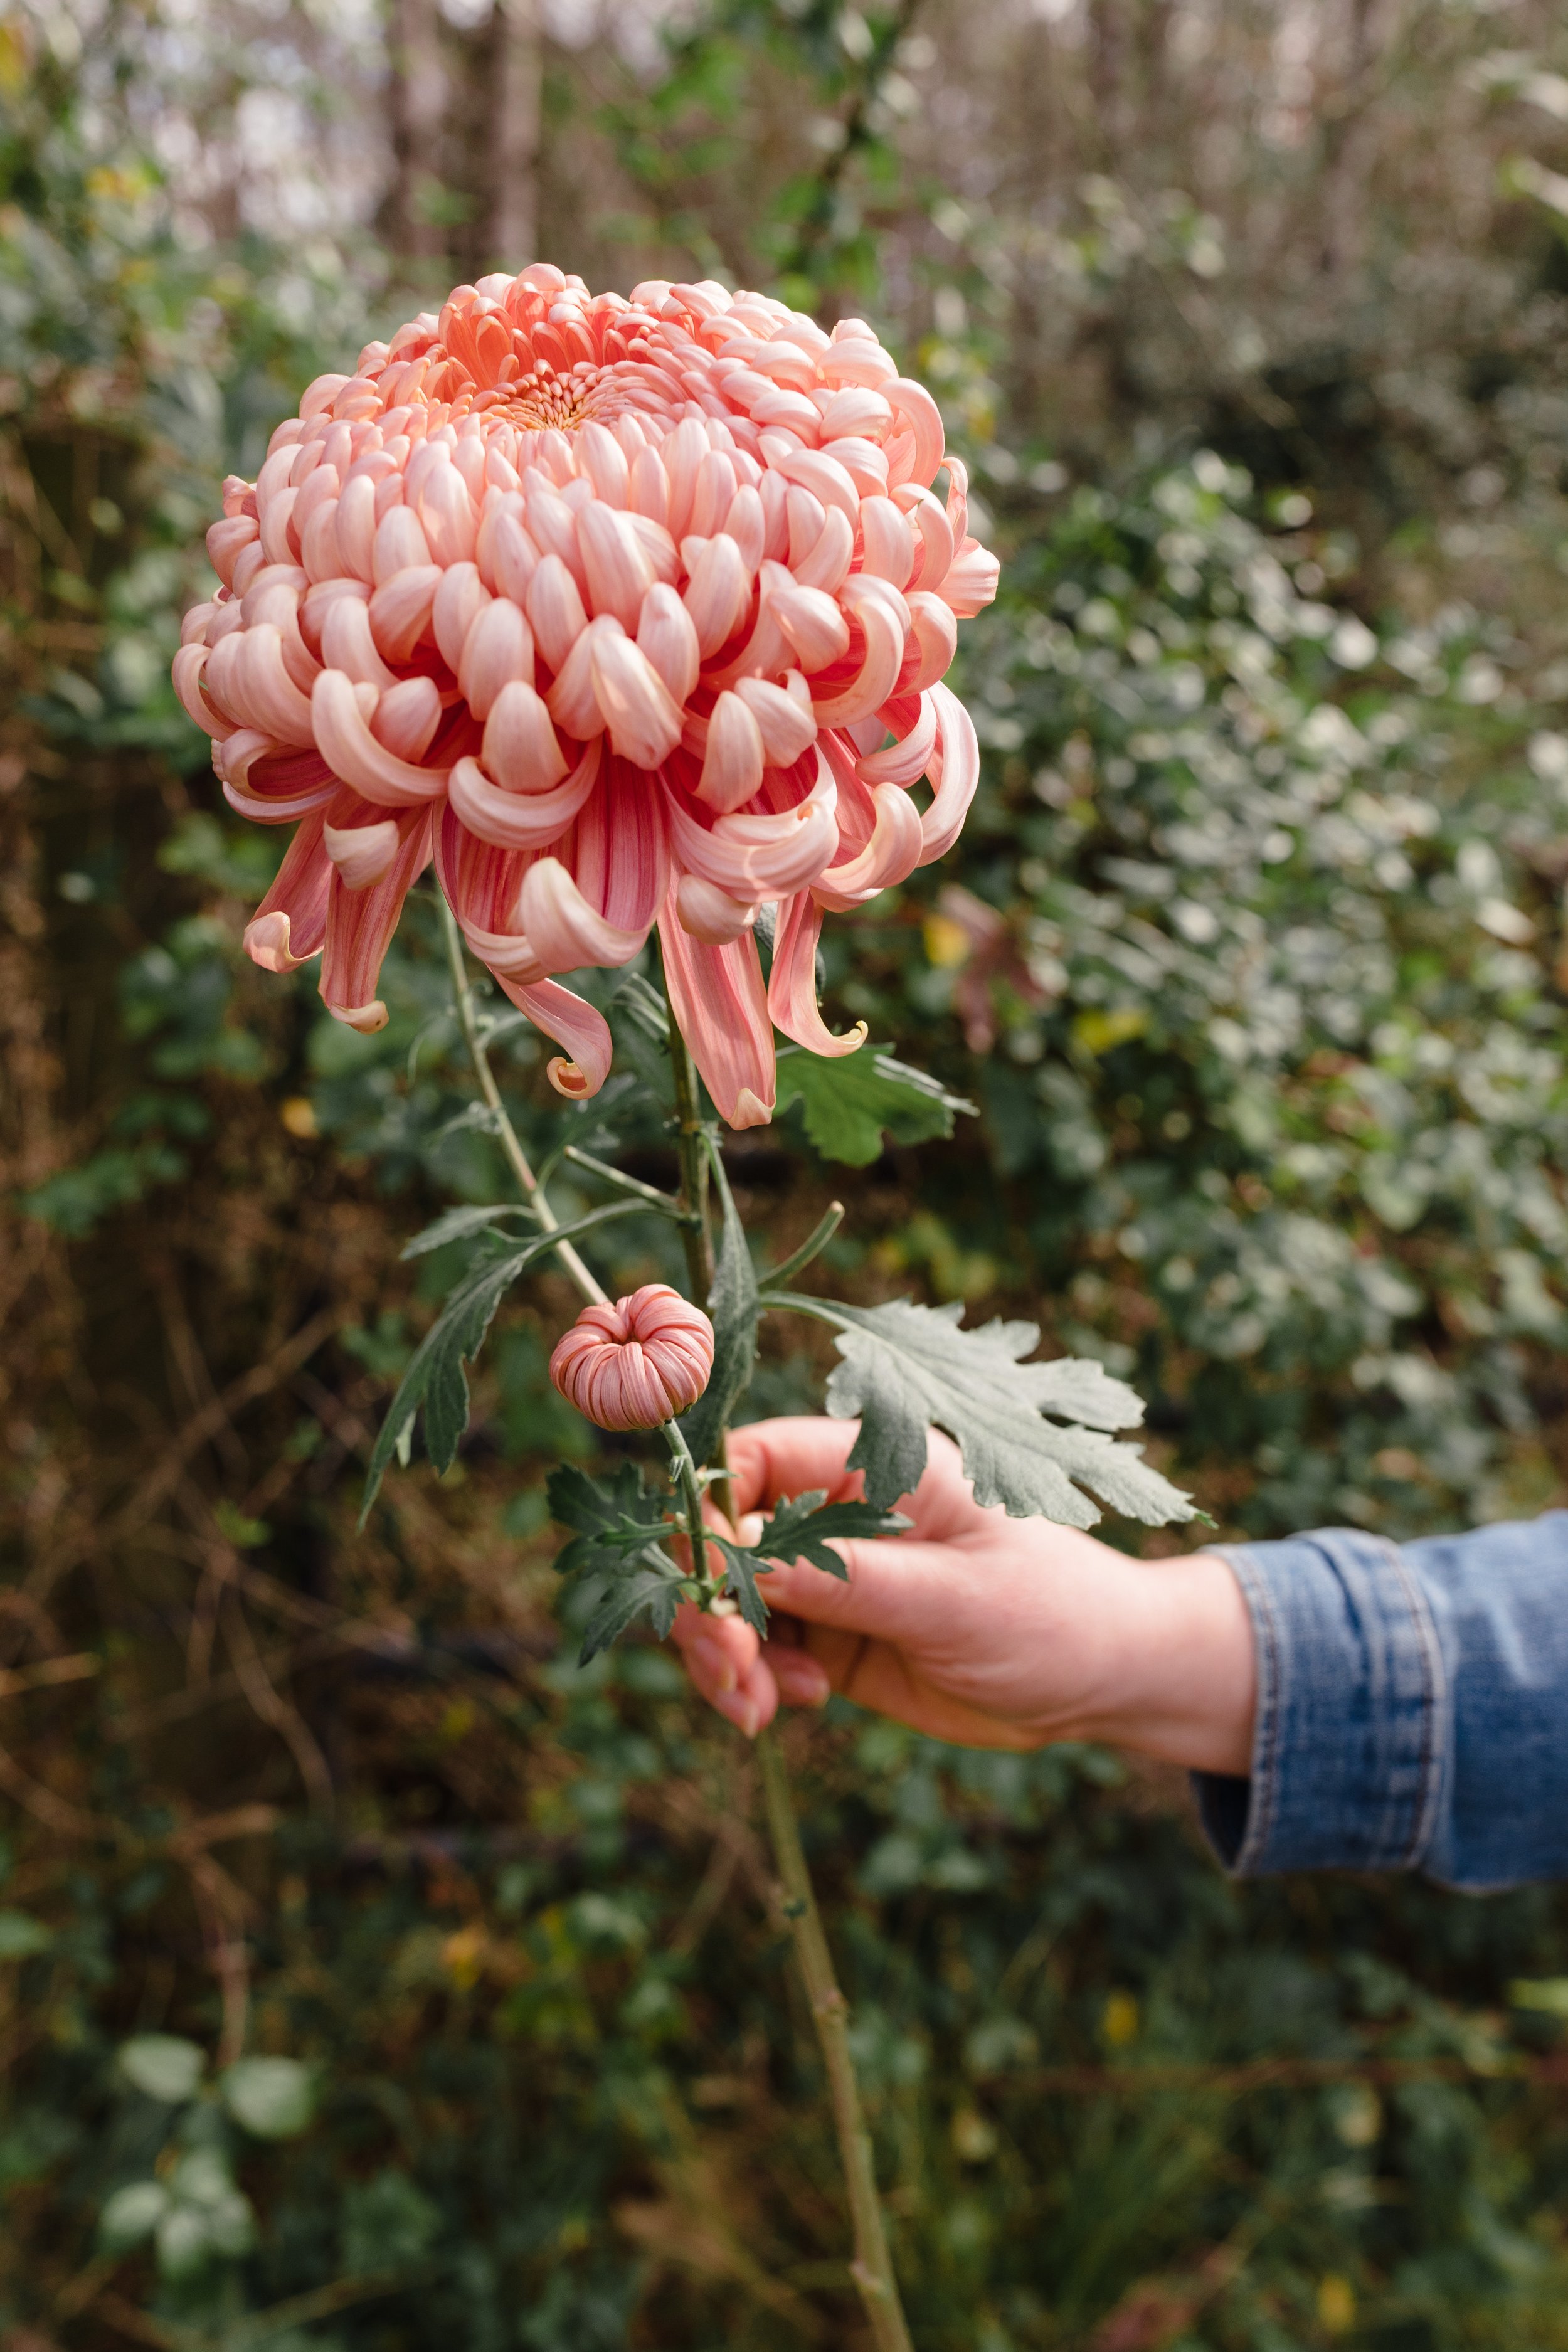
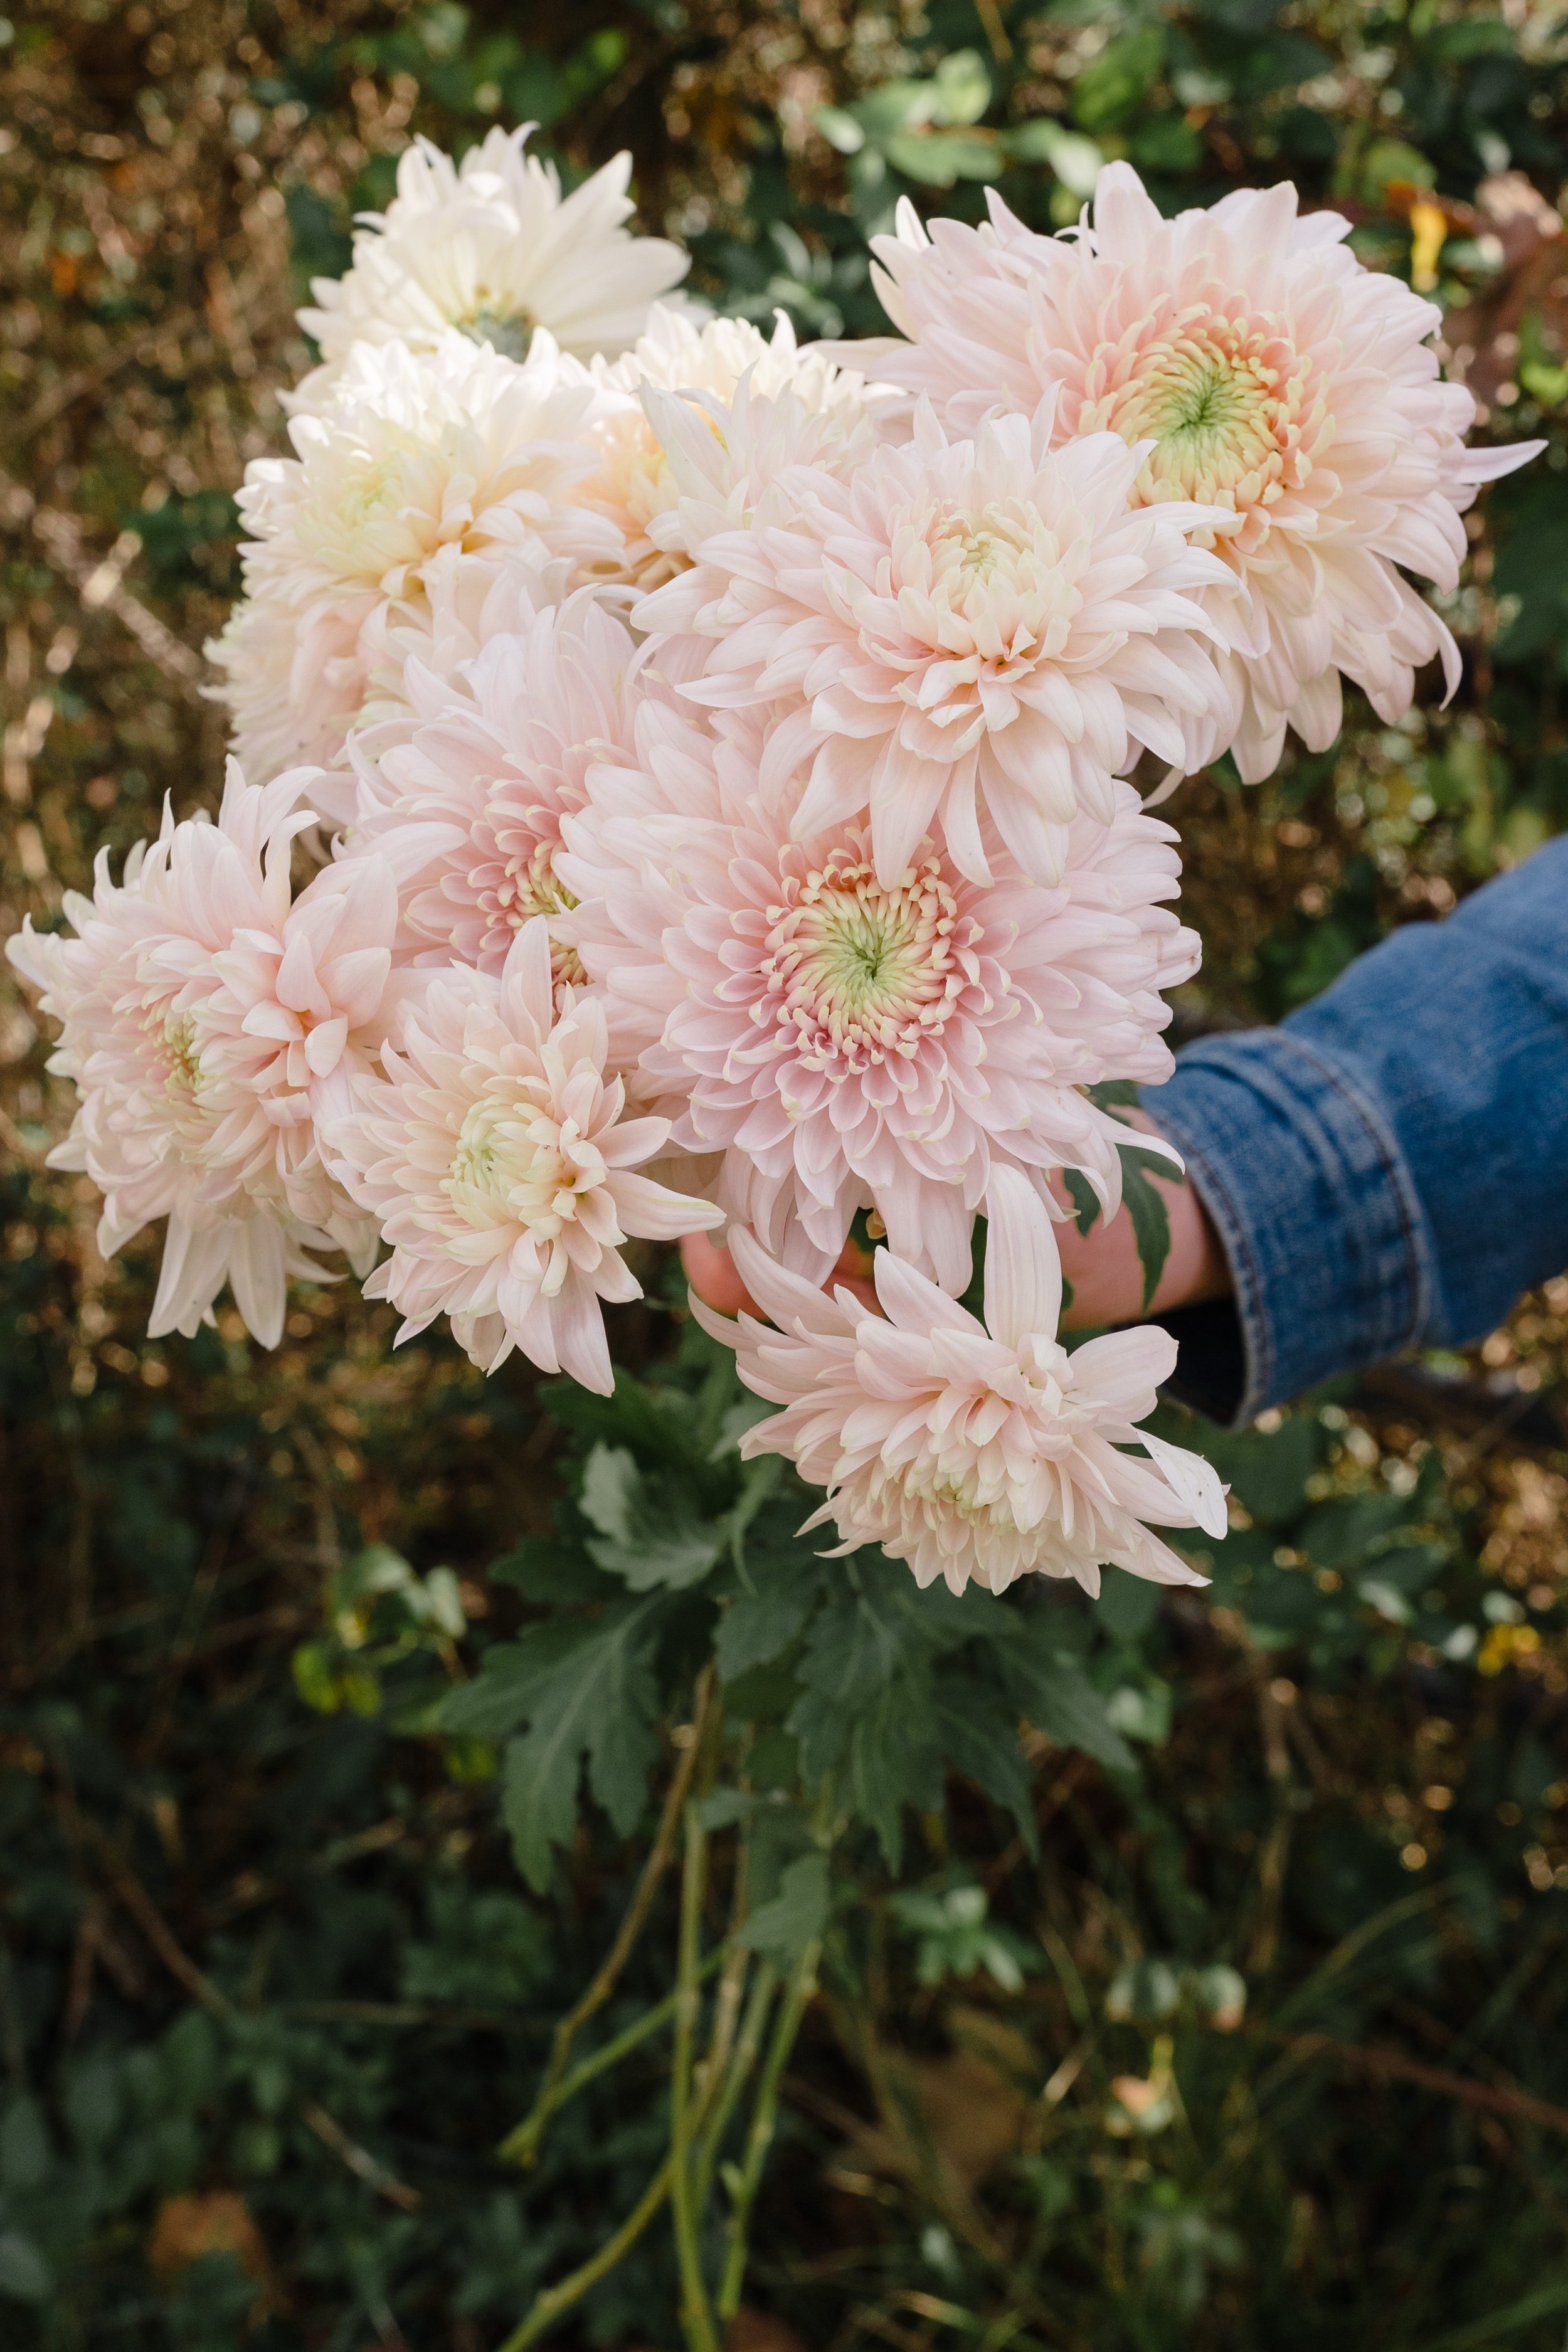
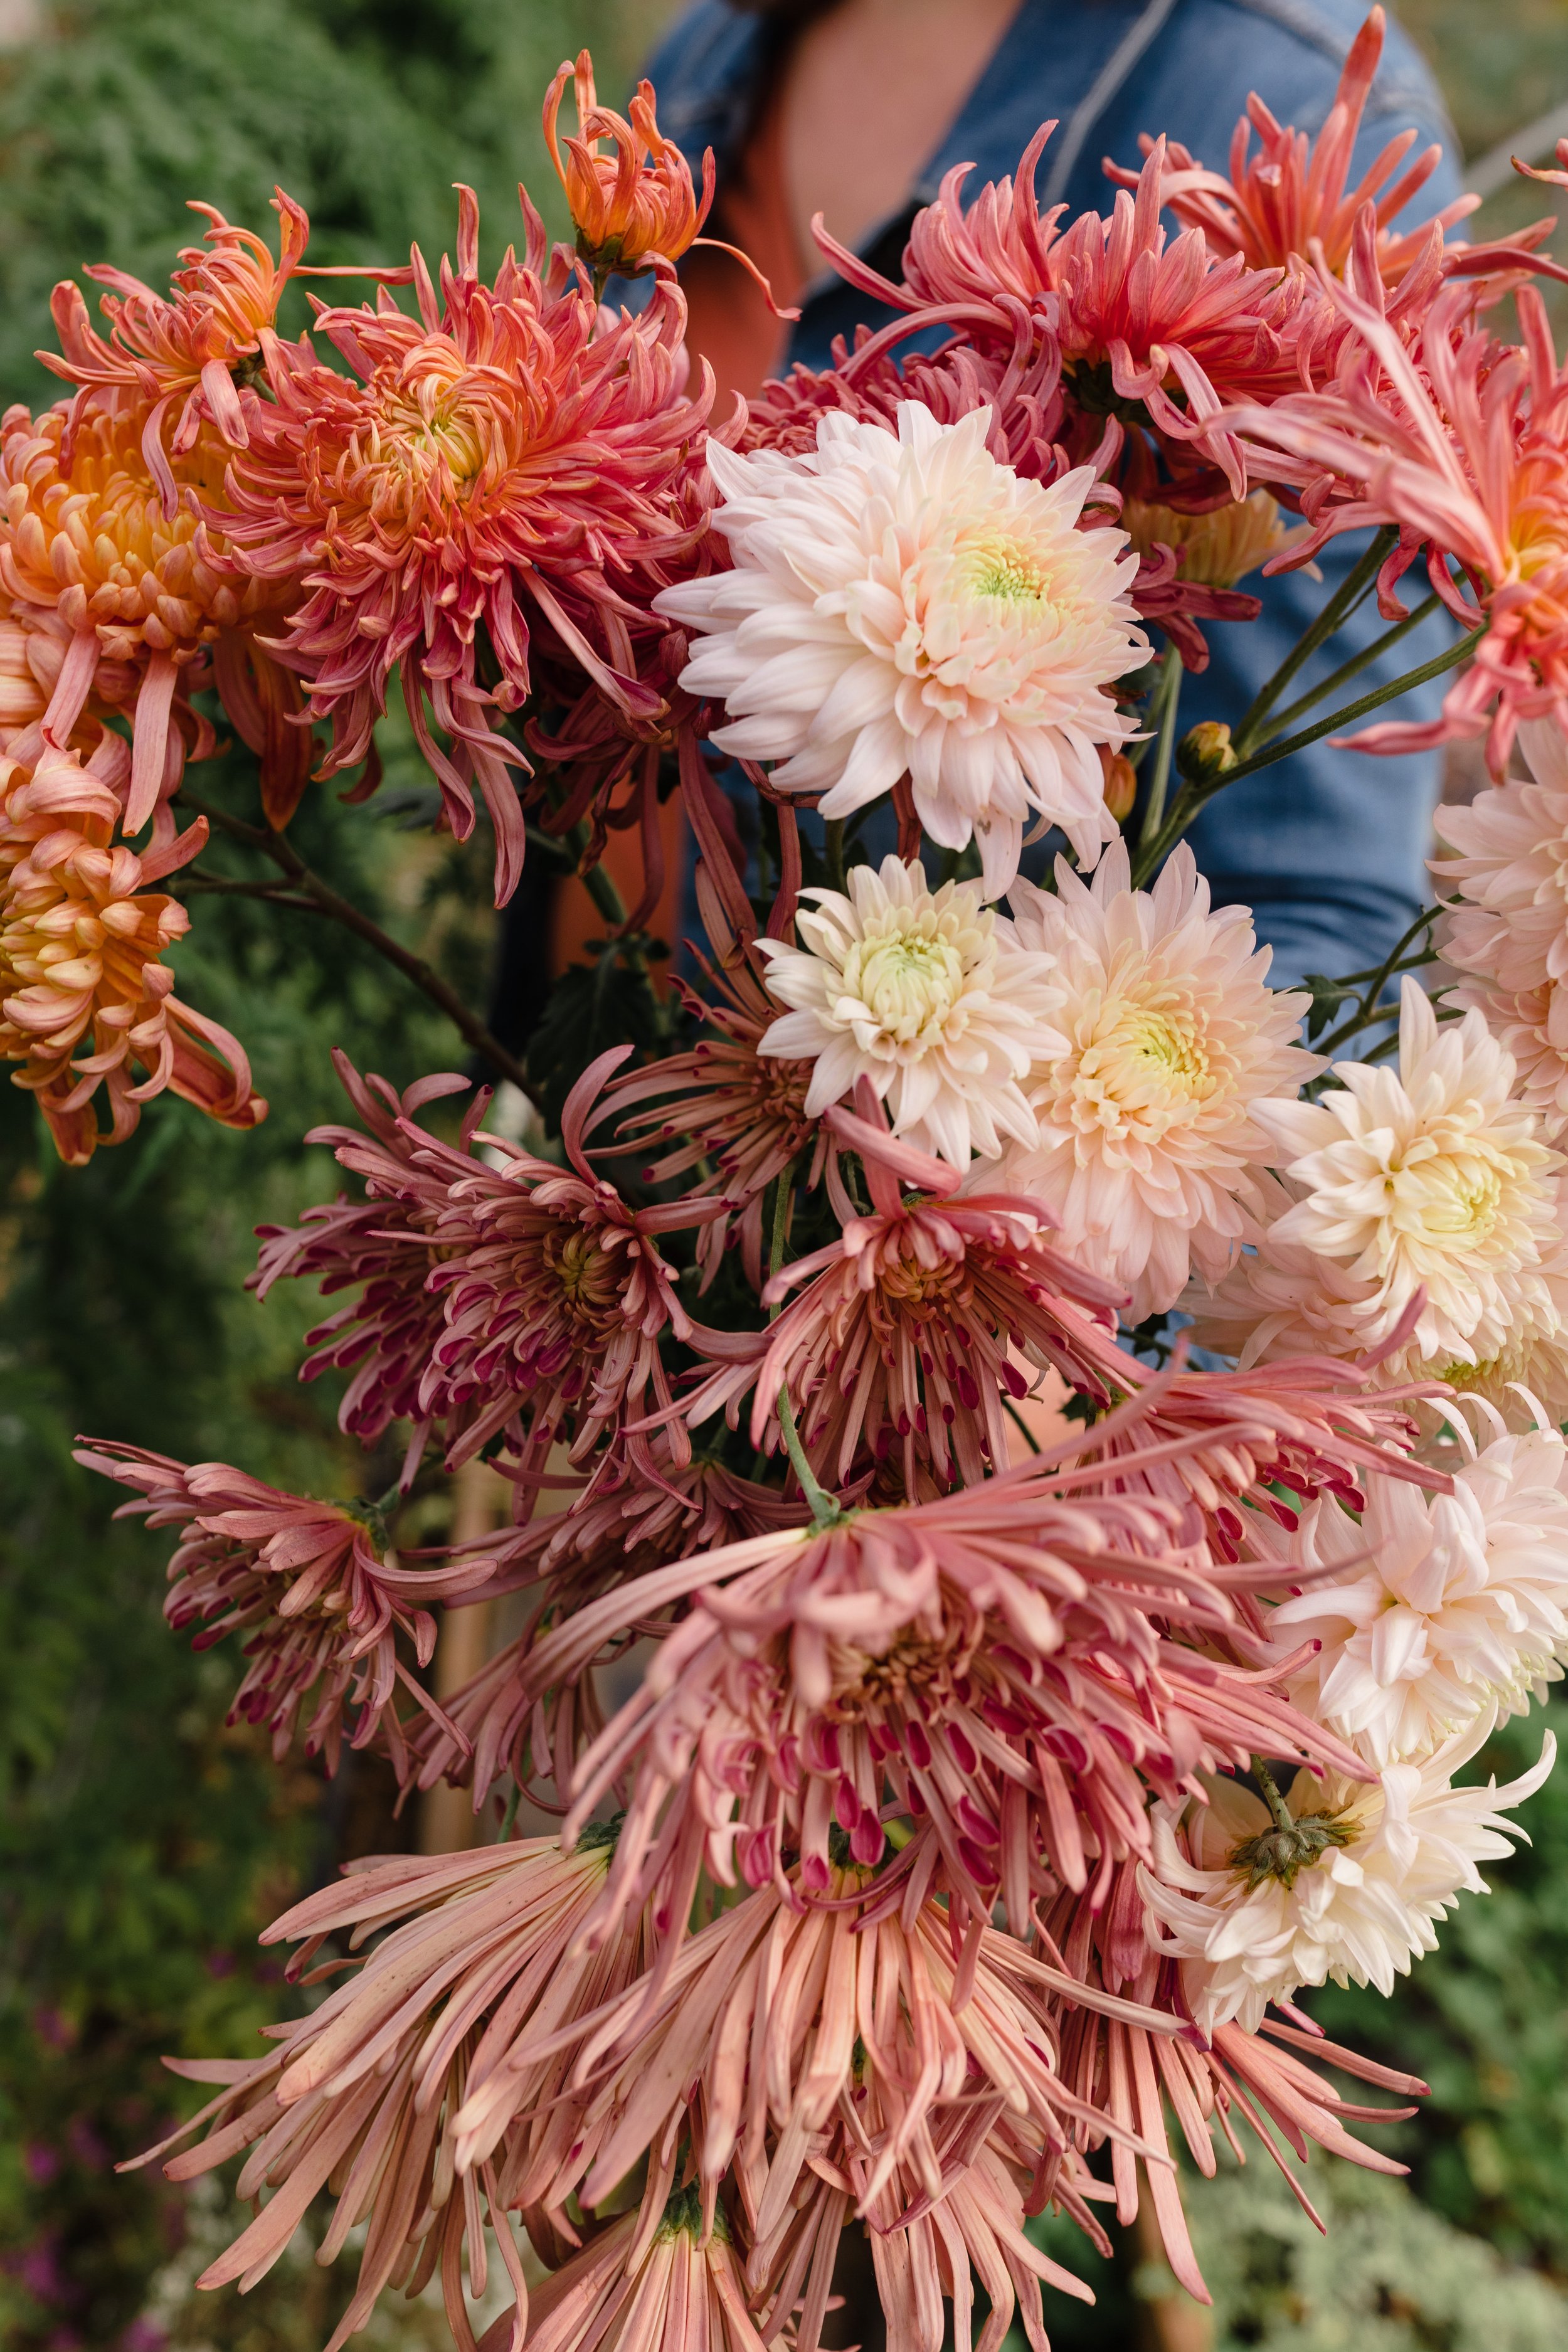
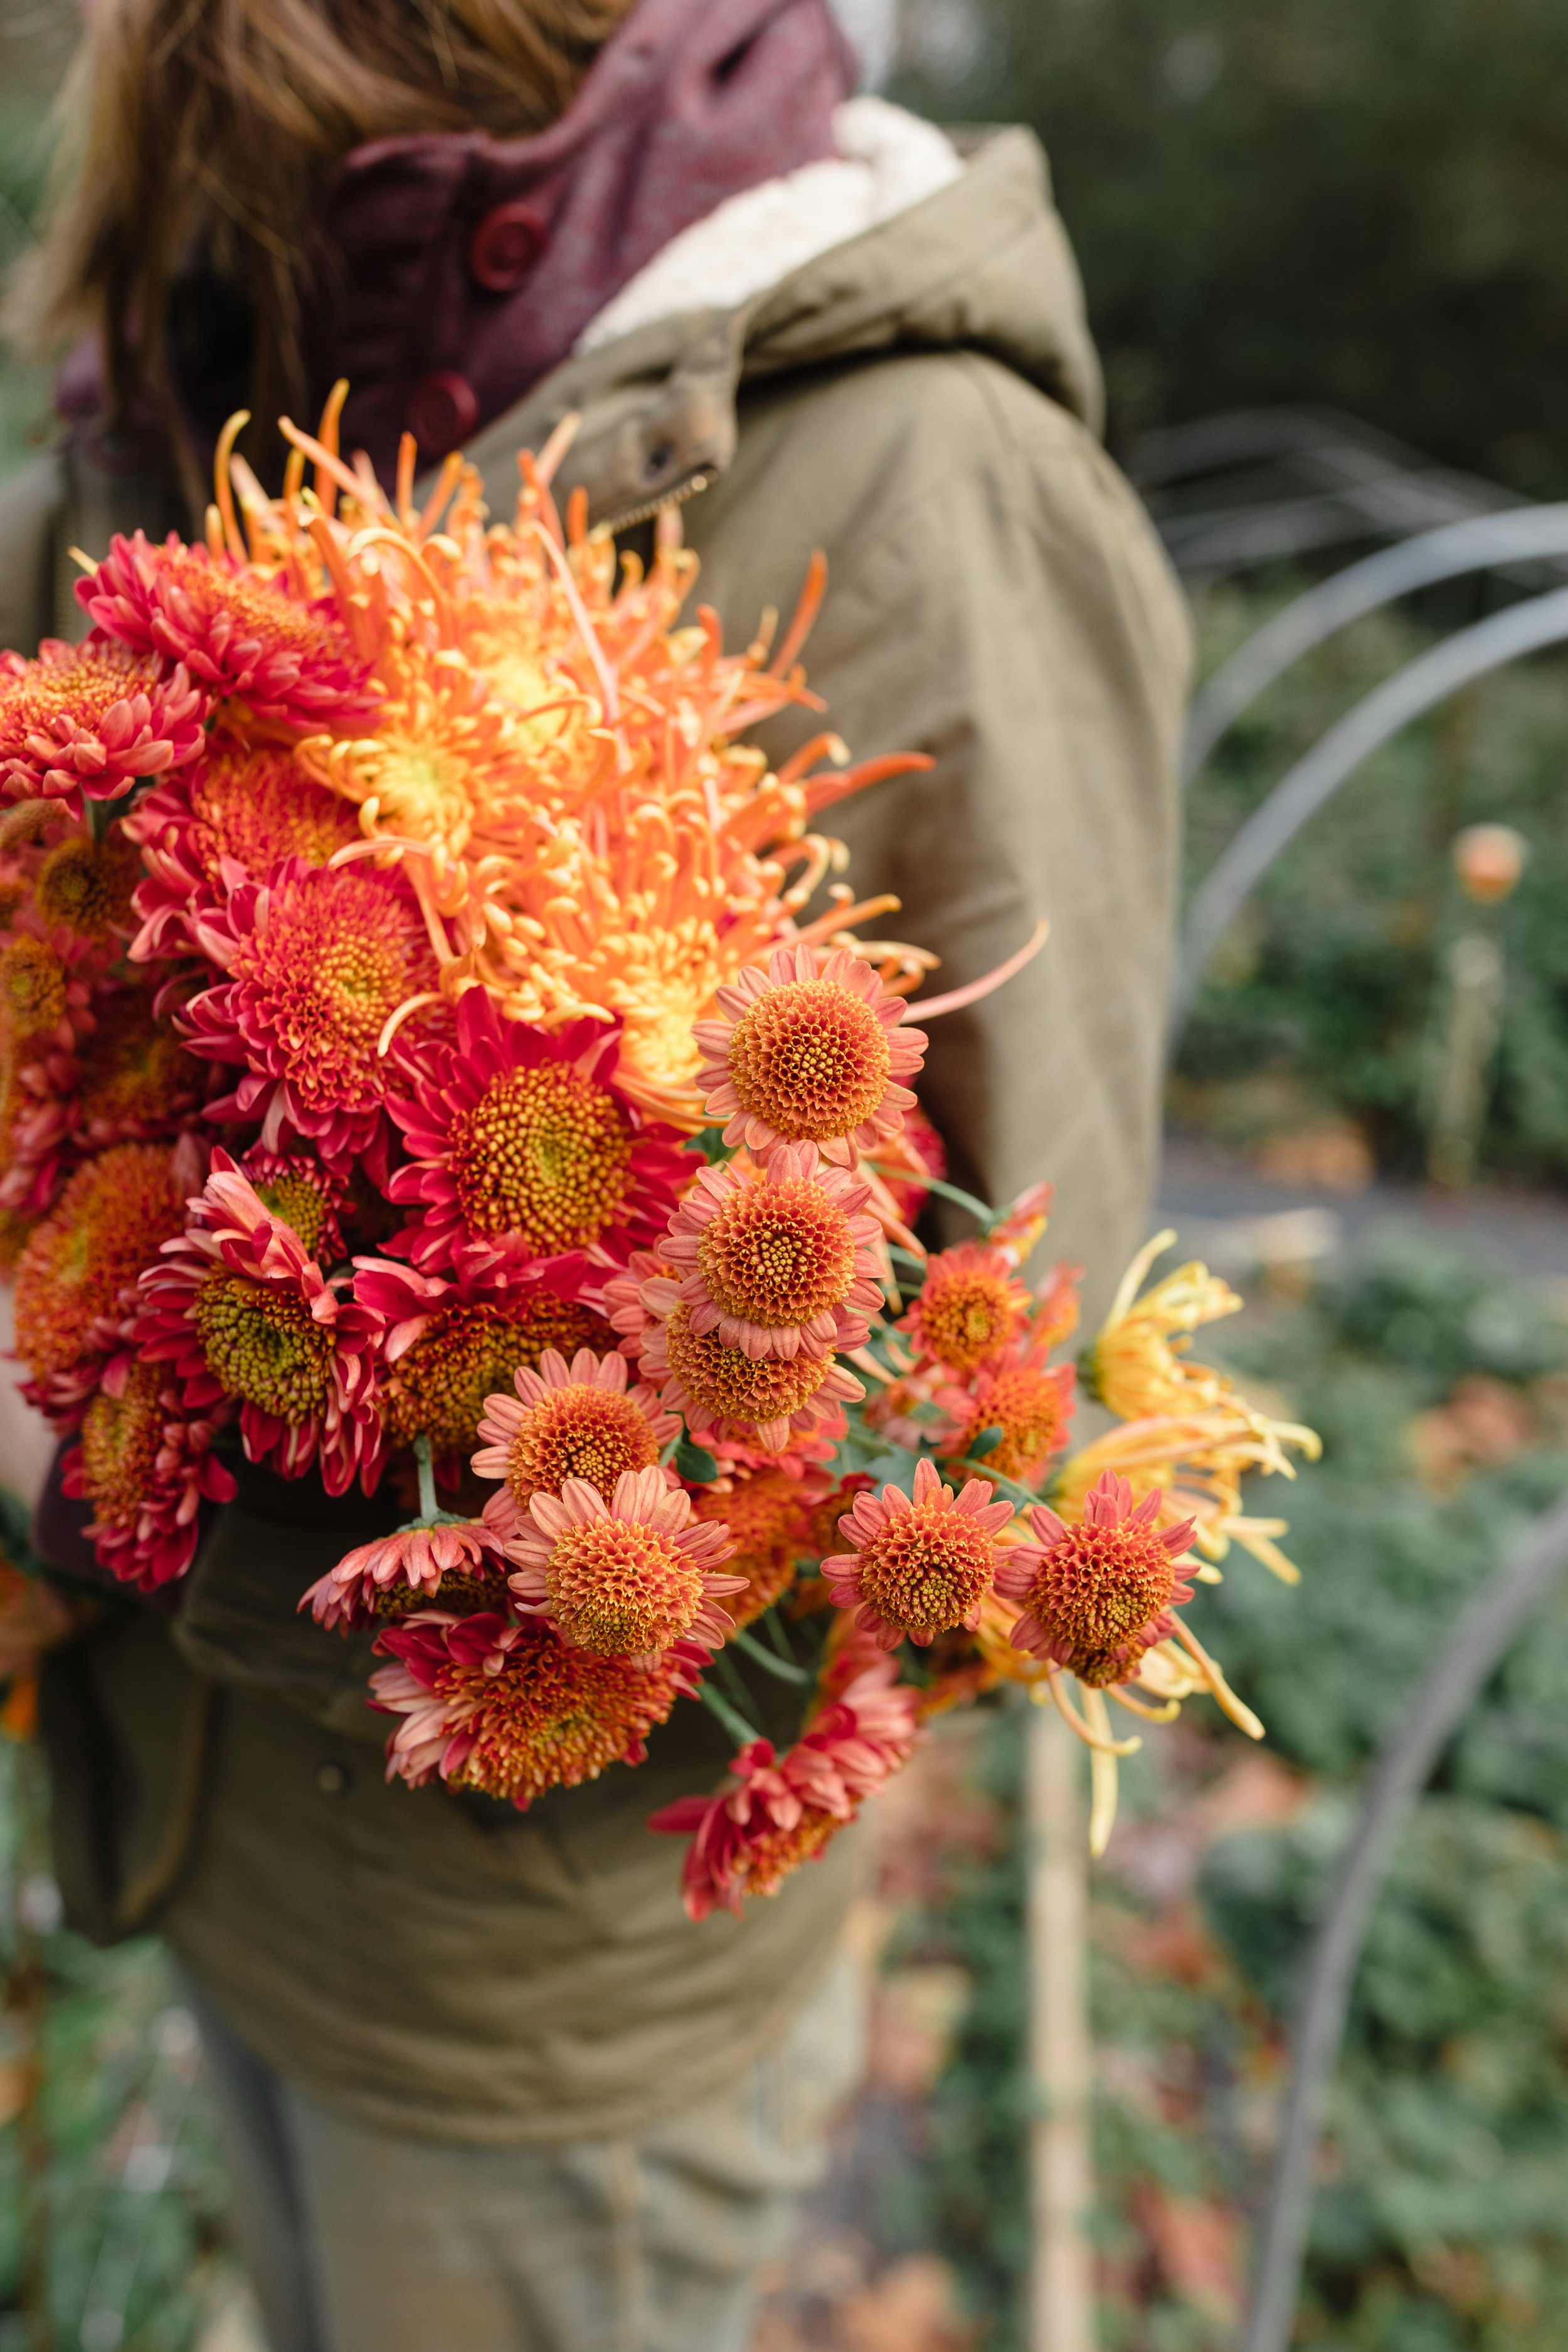
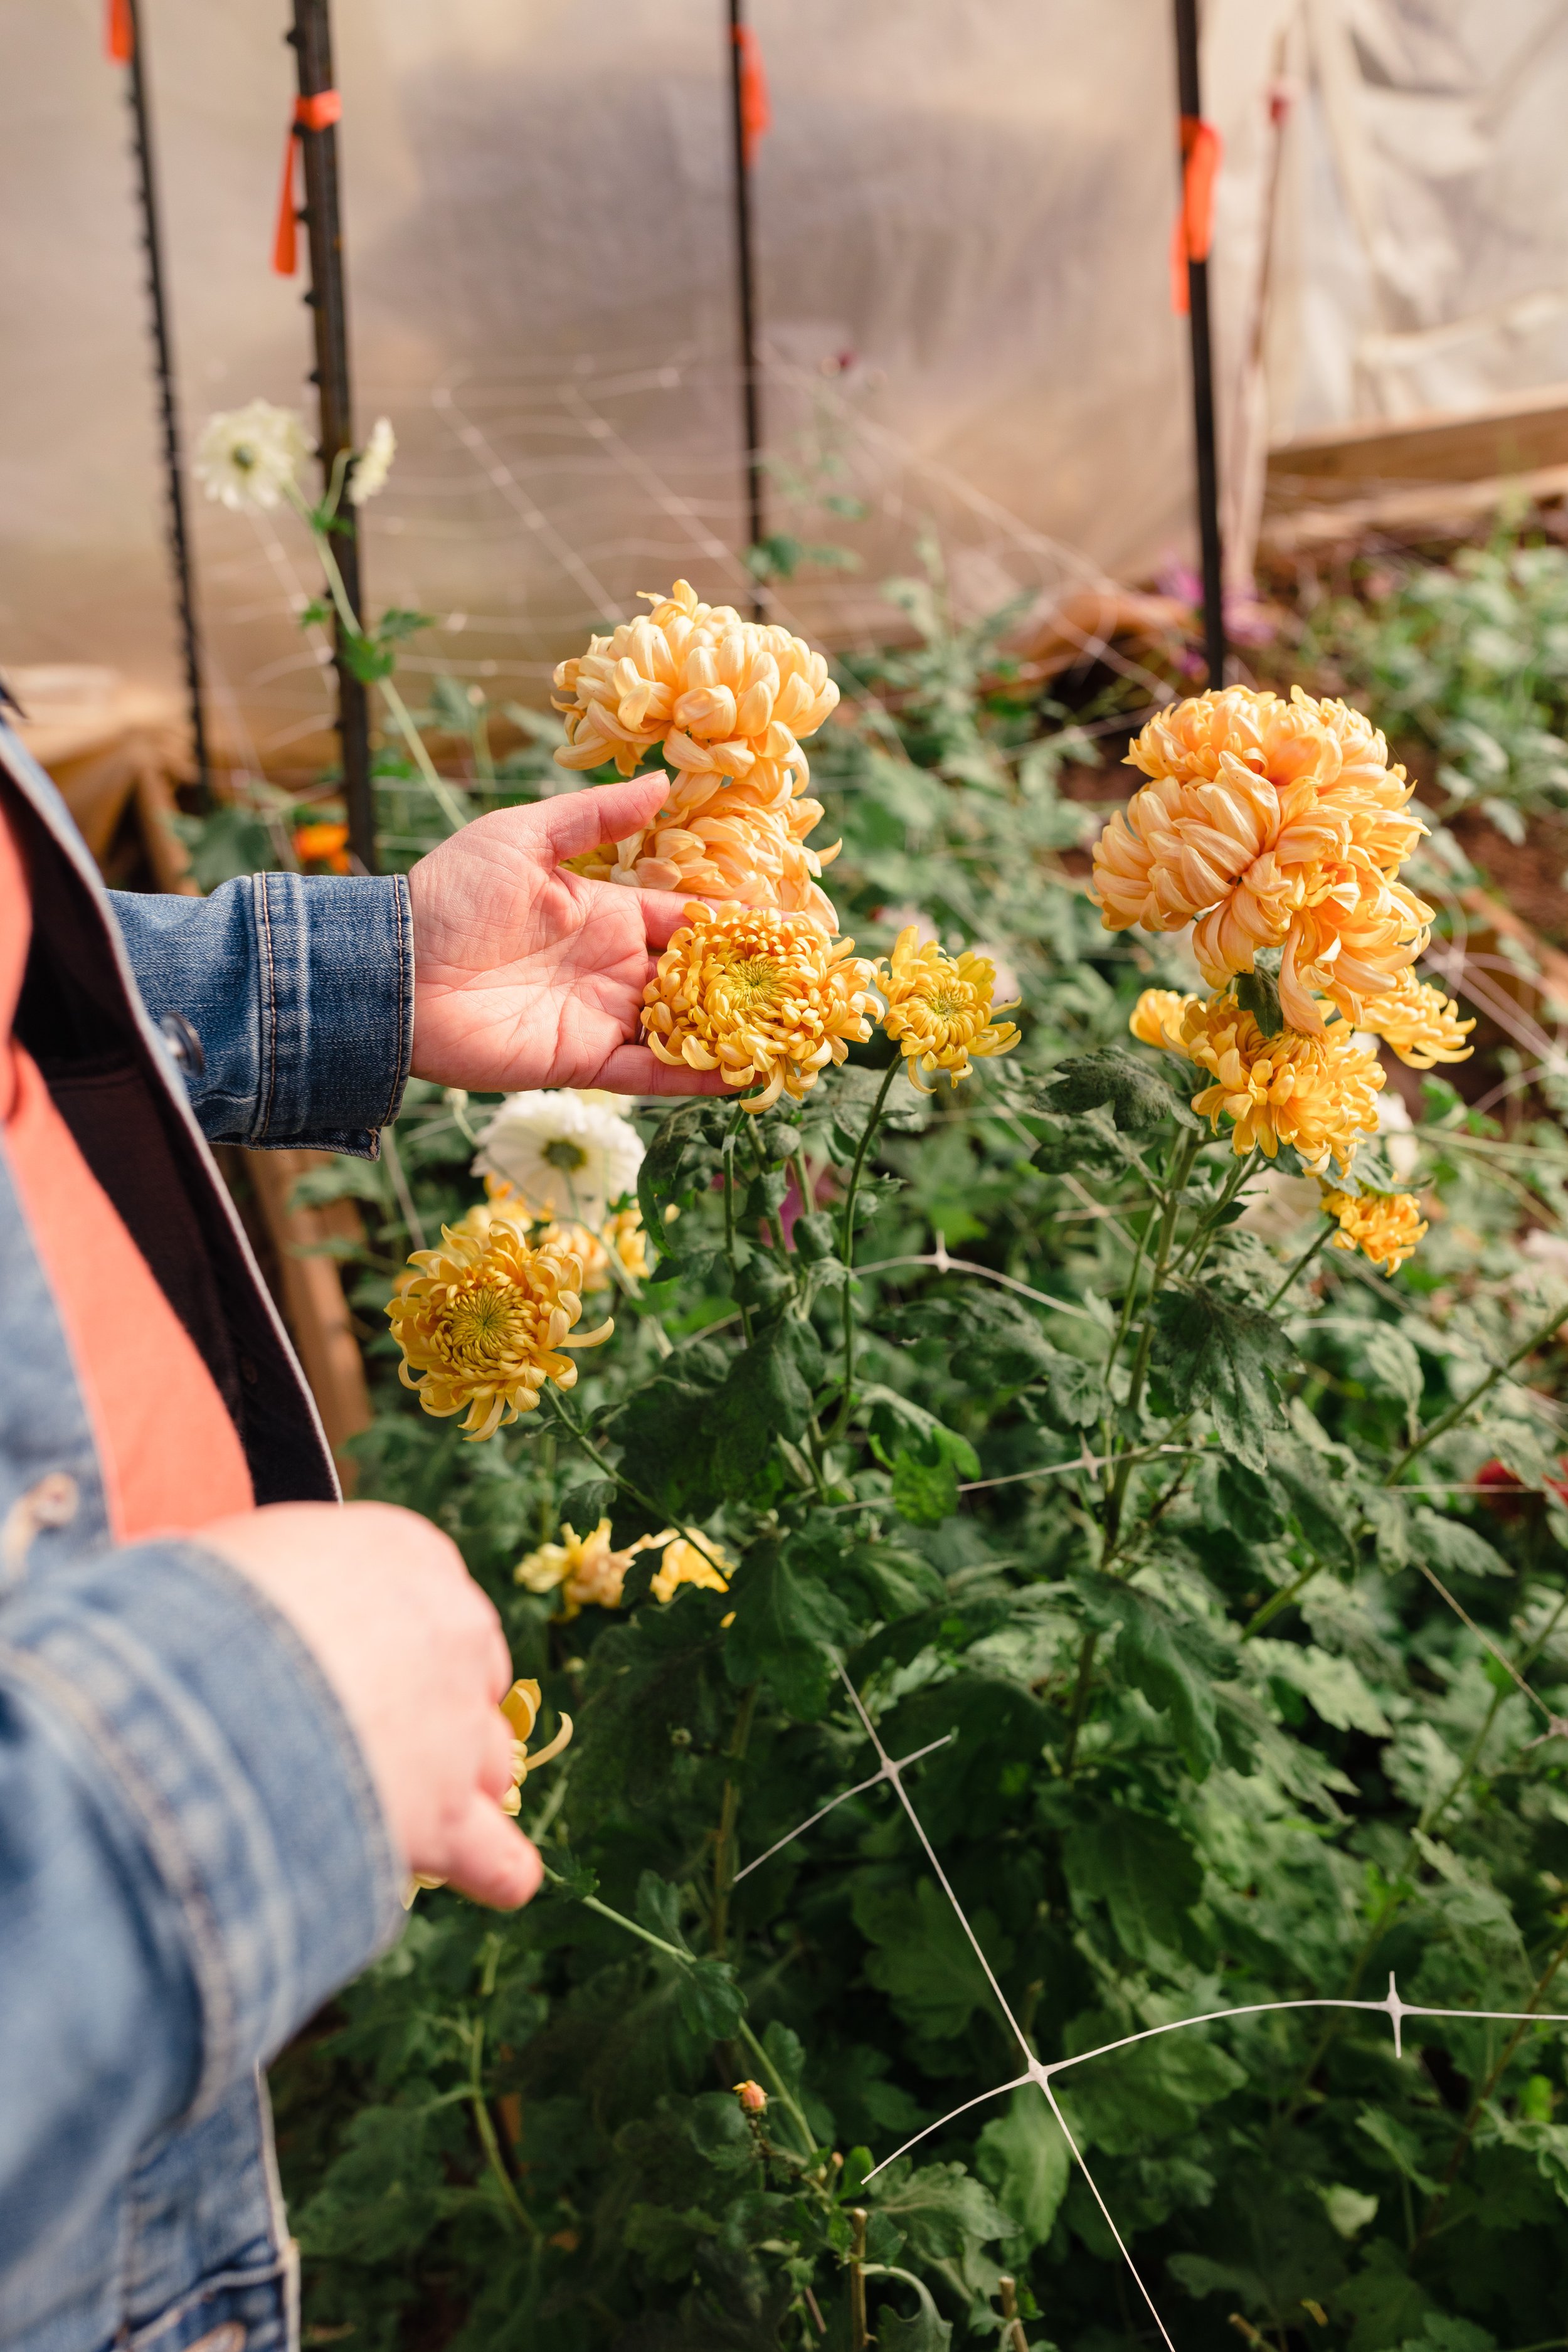
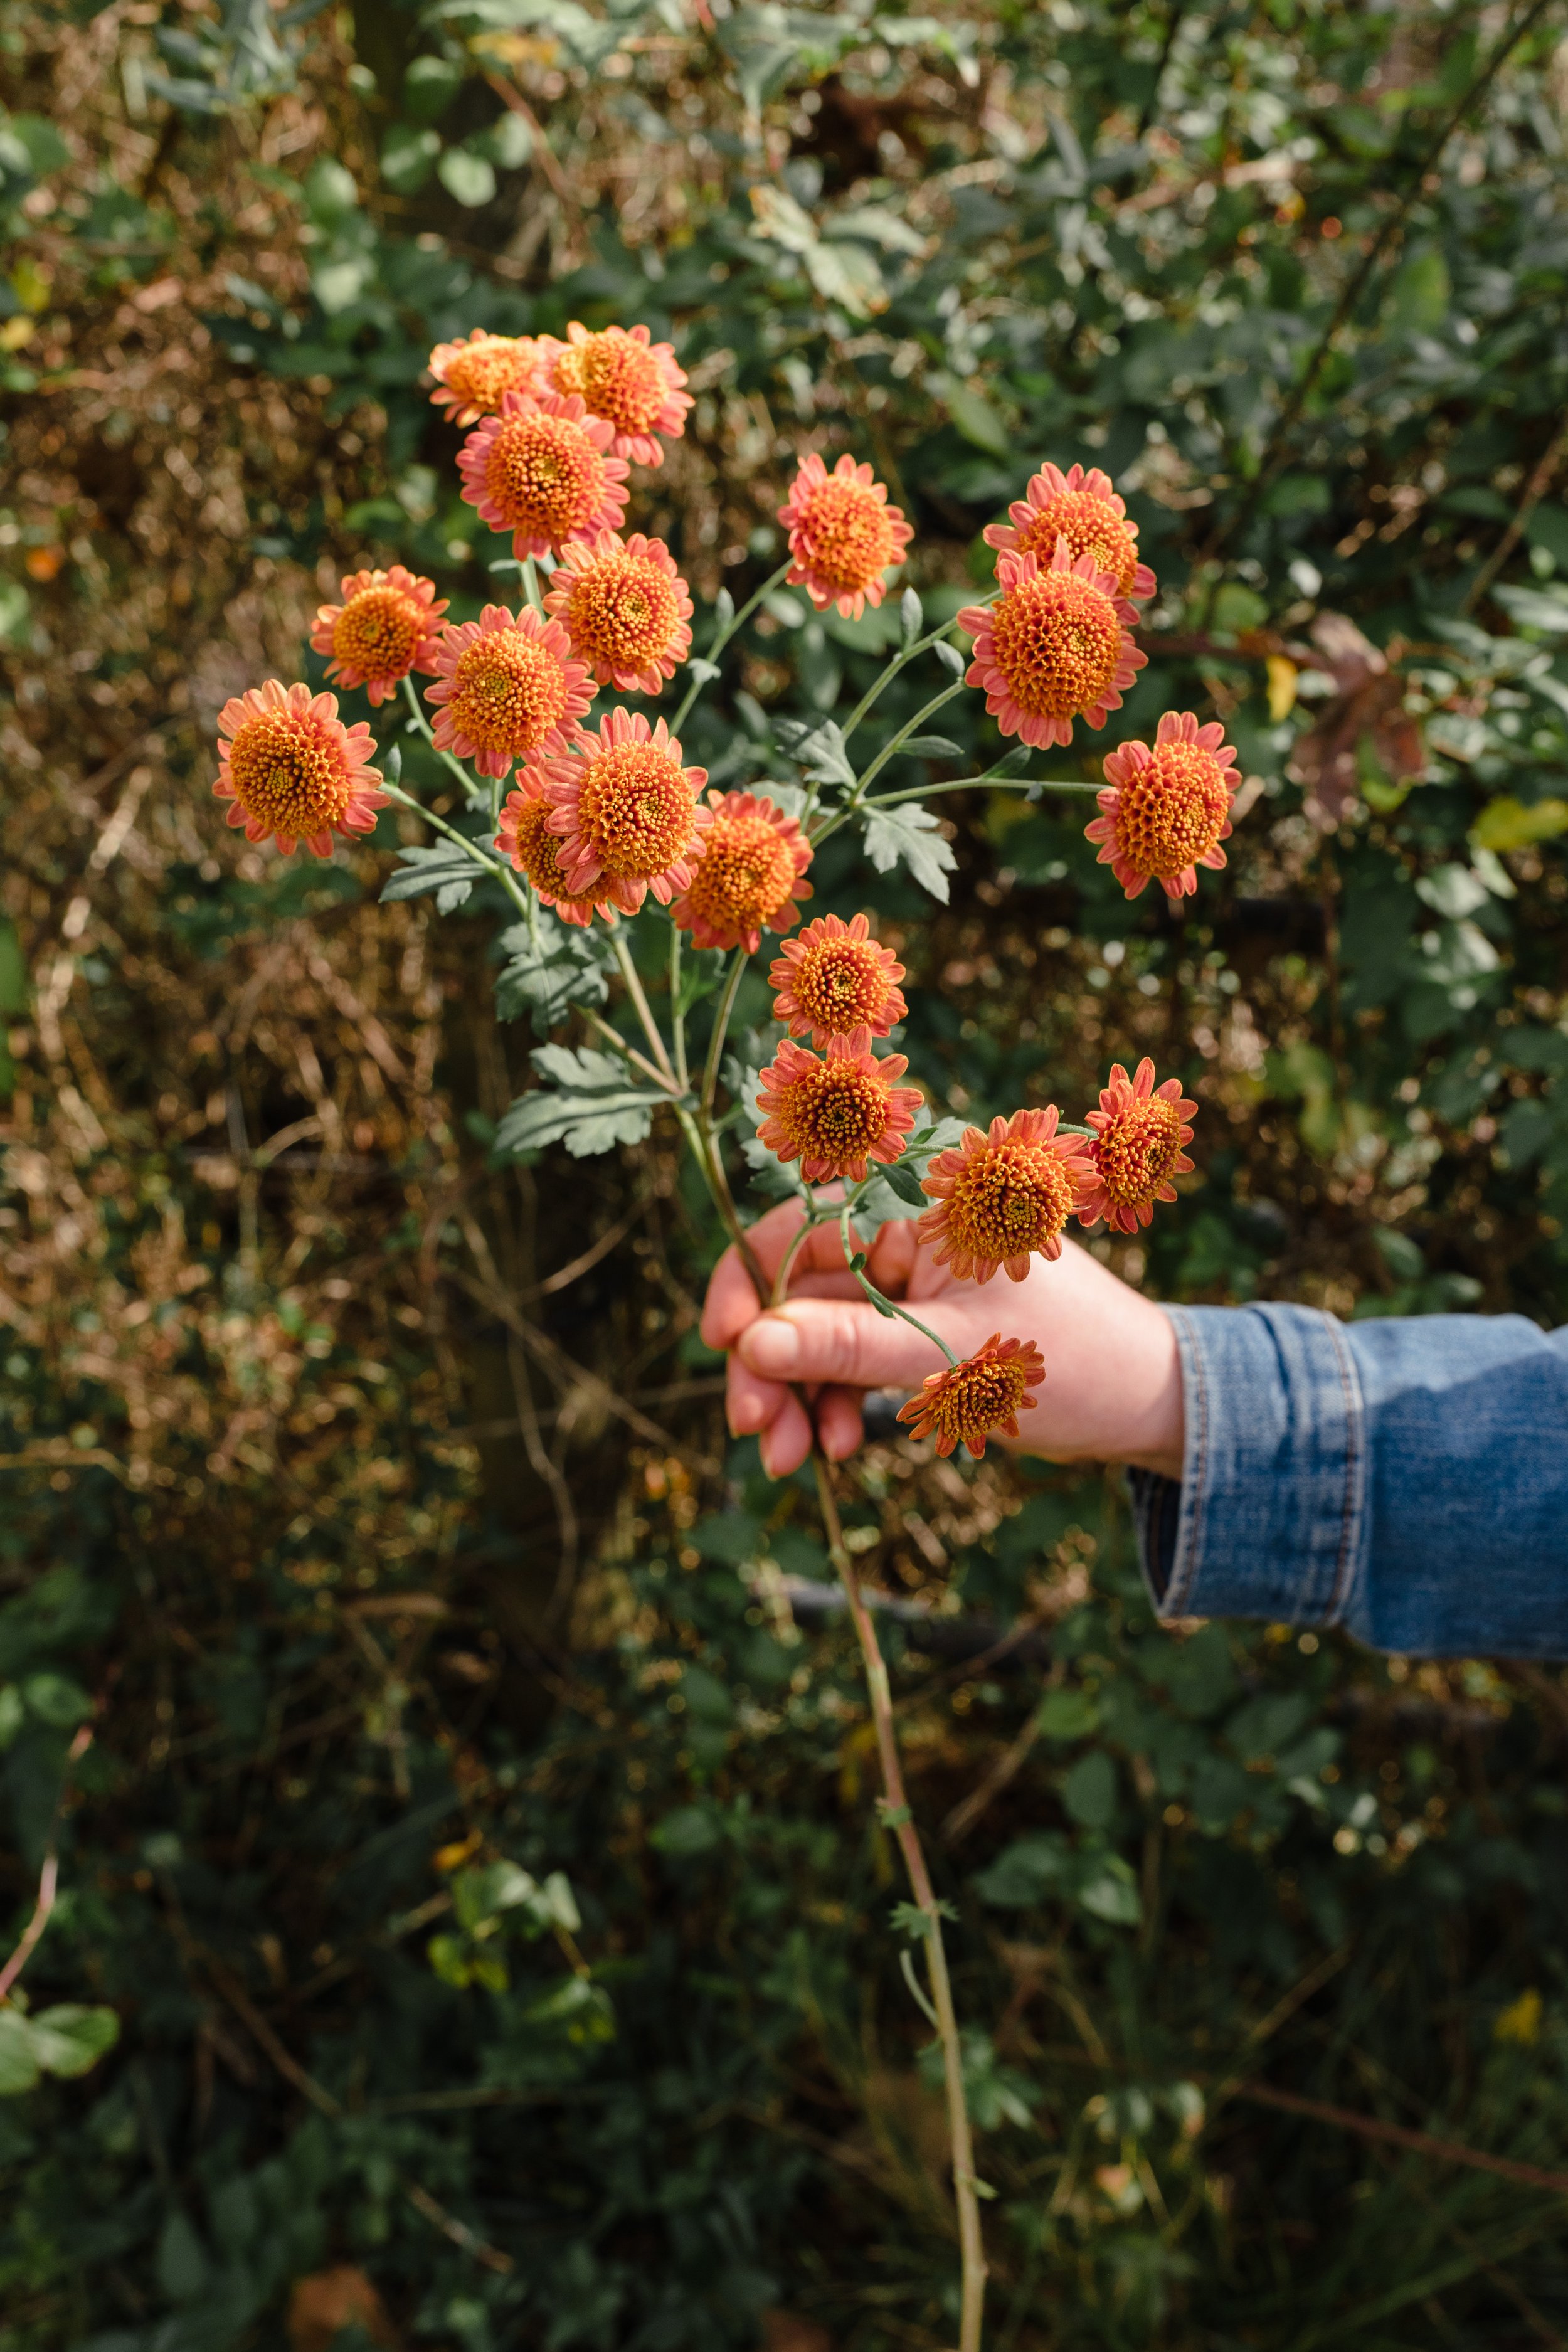
Last but definitely not least if you haven’t jumped on the heirloom mum train yet— it’s time!
Heirloom mums are quite possibly the prettiest flower you can add to your dahlias. The colors are quintessentially fall! In my climate, they are perennial so I’m listing them here. But if they aren’t cold tolerant in your area, grab some mother plants and just root out your stock once a year. I’m not going into detail here about how to grow them because that’s another 10 blog posts probably. But you can’t have a list of fall perennials for dahlias without mums!