

How to Grow Sweet Peas in the South
**Note- This post is geared towards the home gardener growing sweetpeas in a backyard type of setting.

Sweet peas- once you get a whiff, you’ll never be without them in your garden again. Sweet peas in the South aren’t super common. However with the rise of cut flower gardens over the past few years, they are getting more popular. But it’s not all sweet smelling purfume. Growing them in the South requires a few tricks that are different from the common sweet pea knowledge you’ll find on the interwebs.
Let’s start from the beginning: Seeding
Sweet pea seeds look like brown or occasionally white dried peas. They are in the legume family but all parts of the plant are poisonous. Smells only on these! ( They’ve always been fine to grow around my animals- I think you have to ingest quite a quantity to be dangerous but always a helpful thing to know about any plant. )

A lot of sweet pea seed is bred in England and New Zealand. You can import the seeds in small quantities fairly easily or you can buy it from some new breeders that are popping up in the US. Ardelia Farm in Vermont and Sweet Pea Gardens in California are two sources I’ve used with good success. Fresh high quality seed is the most important factor in getting good germination. You’ll see recommendations for soaking or nicking seeds but it’s not necessary. Store your seeds in the freezer once you received them until you are ready to plant.

There are early and late flowering sweet peas. Look for varieties that say they are a spencer type as these are the late types and are better for growing outside. The early types are bred for greenhouse growing and are not as cold tolerant. Some of my favorites are Nimbus, Oban Bay, Mollie Rilstone, Charlie’s Angel, and Strawberry Fields.
It’s best to start sweet pea seeds in containers and plant out a transplant versus direct sowing. Sweet pea seed is not cheap (around 50 cents a seed) and I’ve often seen seed rot or get eaten by rodents when direct seeded. You’ll want to wait until the temps are just right before sowing- daytime temps of average 60’s and nights at 45-55 degrees. So don’t fret if you haven’t started yet, you’ve got plenty of time.
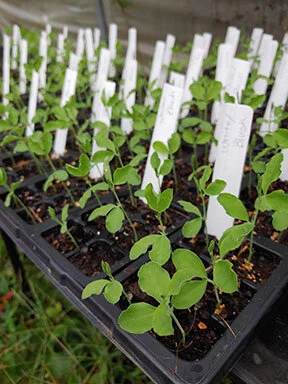
Sow into containers around 2” deep and around 1” in diameter. You don’t need a super big or deep container. NOW—- any northern grower who just read that is saying- “You’re wrong!” Here's one of the instances that Southern growing is different: in the South, we get a small window where we get the correct temps to sow sweet peas. Sow too early and you get leggy plants due to the heat, too late and they don’t get established well before the cold. So the goal is to get the seed started in a controlled environment and have it ready to plant within 3 weeks from sowing. Northern growers will plant into deep pots with lots of room for the transplants to develop as they grow in a very cold environment and then get planted in early spring. I’ve used the sow it and transplant it quickly method for years and it works really well in the South. Fall planting seedlings in the South will give the same slow growth and root development in the ground that Northern growers get in a pot.
Growing out and Planting your seedlings:
Once your seeds have sprouted, keep them in a cool place with bright light. Usually our temps towards the end of October are perfect. I don’t recommend starting sweet peas inside under grow lights because most houses are too warm. Sweet peas like it cool! This is counterintuitive to how most seeds are started but if you keep them too hot, they get too tall too fast and they fall over and break.
Once the seedlings are 4ish inches tall, they should be ready for transplant. You want to make sure they have at least once set of true leaves on them.
Plant into a well composted bed, preferably with the soil raked up to raise it a bit for good drainage. You don’t want to rot them out. Sweet peas are hungry little plants so make sure your bed is well amended with a good organic fertilizer and lots of compost. Space them 6-9” apart. 9” is preferable if you have the room because it will make it easier to harvest come Spring.
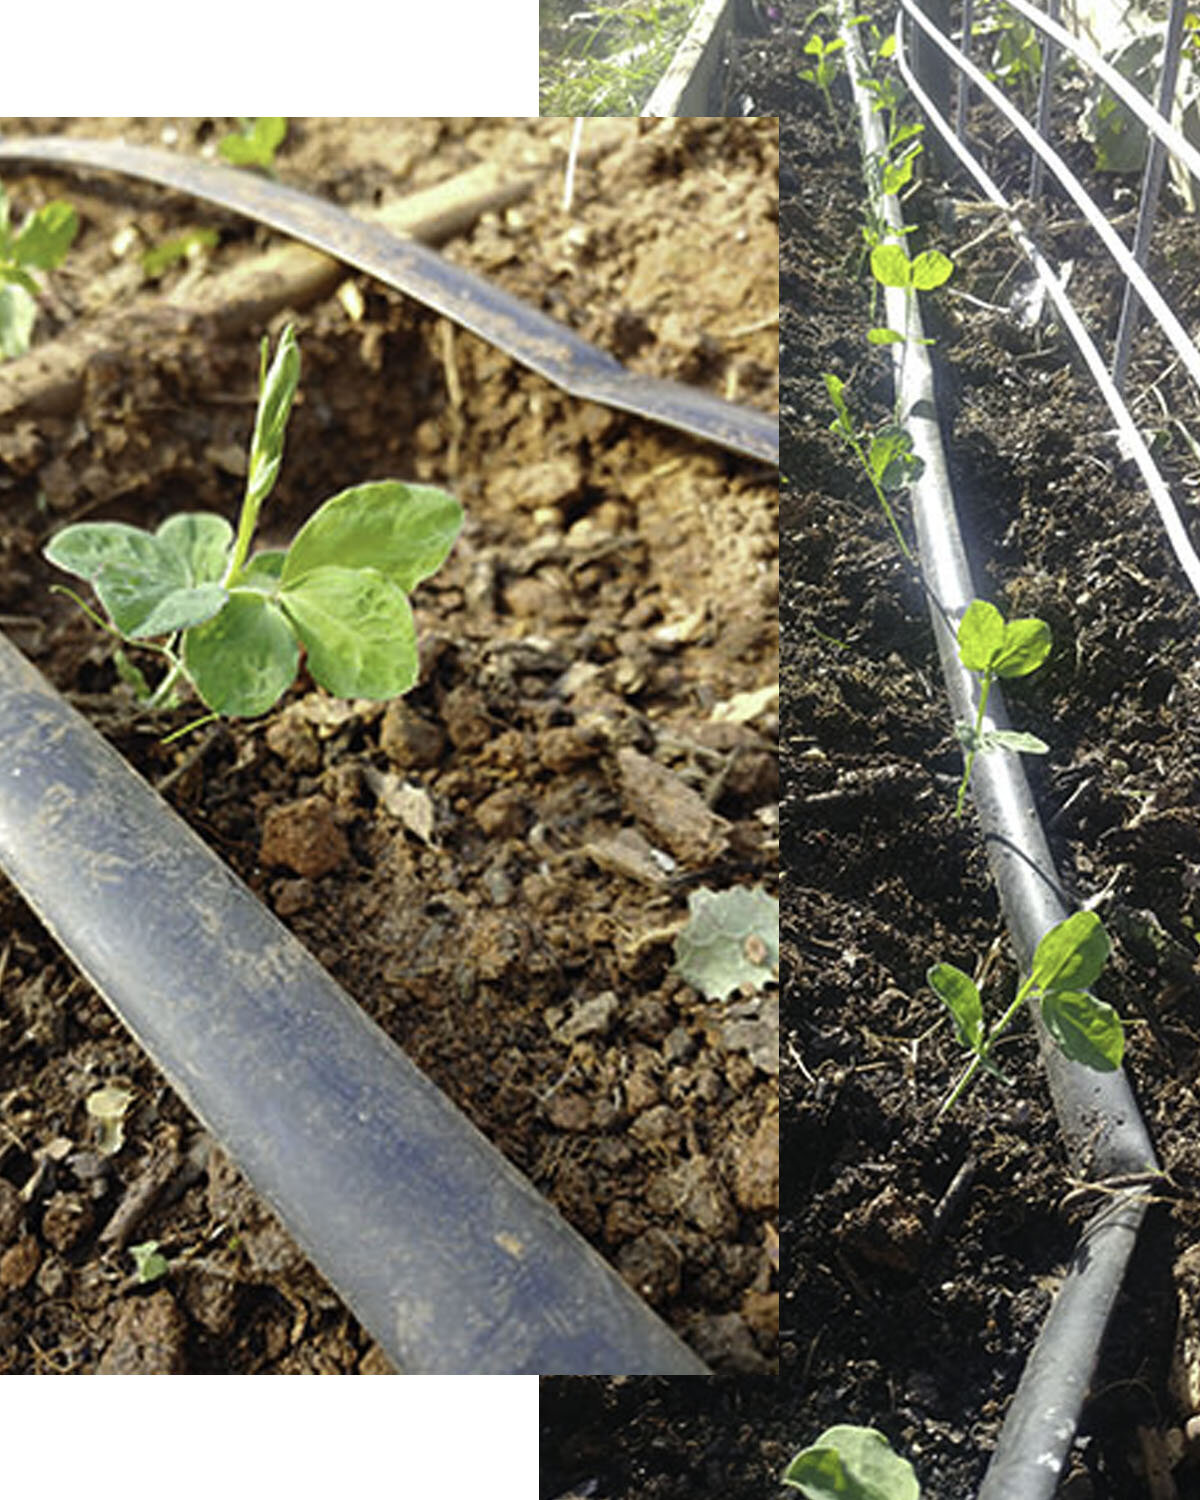
Keep the plants watered until established. During the winter, water if the soil becomes dry. Over the winter the plants will begin to branch out from the center and each branch will be around 8-12” long laying on the ground. This is fine for now— Don’t put up your trellis until late February/early March. When you see the plants start to turn upwards and try to climb, then it’s trellis time.

During the winter when it warms a little, 60+ degree days, you can apply a water soluble fertilizer such as fish emulsion.
Sweet peas are very cold hardy. They can take temps down to low 20’s before they need cover. I cover mine once or twice a season and I’m usually playing it safe rather than sorry.

Trellising and Harvesting:
I use a netting called Hortanova Tenax netting. It comes in different widths and the 6’ wide is really good for sweet peas. The vines will grow pretty tall but I never put up a trellis taller than 8’ because I know I couldn’t reach any higher and I don’t want to get out a ladder. Once they start getting tall, you just have to cut harder to control the growth. Use a t-post about every 6’ if growing in a row. Stretch your netting very tight and secure it with zip ties to the t-posts. You can also make a tripod style trellis from bamboo canes or other tough supports. To encourage the sweet peas to grow upwards and not out, I take bailing twine and run it laterally about 3” off the ground and use it to scoop the sweet peas up. Then I add a row about every 6” for the first 2 feet, then 1’ apart after that. I usually stop around 4-5’ because if you add too much after that, it gets hard to harvest.

Sweet peas will begin to grow stems with buds in April usually. They will look droopy at first but will straighten out as they grow. The correct harvest stage is when 2/3 of the buds on a the stem are open. You can cut at the base of the flowering stem or you can cut down the vine if you need a longer stem. To ensure you are getting fresh stems, cut 2-3X per week. The more you cut, the more they flower.

There is a phenomenon called bud blast that can affect sweet peas in the spring. Sweet peas are very sensitive to climate/environmental changes. For example, if the temperatures swing dramatically or we get a ton of rain, it can cause the buds to turn brown and drop off. The buds will reform, usually takes about 2 weeks. I see this happen usually every year. It’s just a fact of growing sweet peas in a climate that fluctuates a lot during the Spring.

Aphids can also be common on sweet pea flowers and they can even show up before flowering begins. So keep an eye out for them. Shower them off with a spray of water or use a insecticidal soap.
Sweet peas have a vase life of about 5 days on average. If it’s a cool spring, then they may last longer in the vase. If it’s hot, then maybe only 3-4 days. Mine usually keep flowering until late May/early June. Keep watering them and harvesting to keep the blooms coming!

But most of all — Enjoy your Sweet Peas! I don’t know of a better flower that is such a treat for the senses- smell, touch, sight!
**Sweet pea transplants still available in the online store.
Cold Hardy Annuals
My box of anemone and ranunculus corms arrived today! I’m always excited to see it, yet it also feels confusing at the same time. I’m completely immersed in daily dahlia harvests yet I’ve got to start soaking my corms within a few weeks. The constant battle of managing multiple seasons at once is an every day occurrence in the mind of a farmer. How you are ever supposed to just be present I’ll never know?!

I had a consultation this past weekend with a new flower grower and it led me to reflecting on some of the things I just know intuitively now. Things I’ve done for so long that they are second nature. Yet they were learned by long periods of trial, error, and observation. We had a long talk about cold hardy annuals and what were the toughest, how to space them, care for them, etc. So I decided to make a chart highlighting a few of the aspects that I get the most questions about. (Hint: If you click on it, it gets bigger and easier to read. Also if you right click, you can download it.)
Few Notes:
Cold Hardiness:
- 5 - Plants can go to low 20’s with no/little damage
- 4 - Plants can go to mid 20’s with no/little damage
- 3 - Plants can go to high 20’s with no/little damageEase of Growing
- I rated these from the view point of someone who has done some basic gardening and knows the basics of how to care for a plantBloom Season- these are when the flowers usually bloom in Zone 7b, Upstate area of South Carolina
Plant spacing- if you are planting in a raised bed style situation with plants bordering each other. You can plant these as stand alone plants in a landscape style bed.
Cold hardy annuals are really fun plants to try because they will amaze you with how much cold they can take. They are also the best way to have early season color in your yard. You’ll have bouquets long before anyone else in the neighborhood.
Getting the most out of your Dahlias
The weather has finally turned to Fall here in the South. Let’s talk about the queens of Fall— Dahlias!

Miss Amara in the greenhouse
Vase Life
If you’ve ever cut a dahlia and put it in a vase, you know they can be short lived beauties. However they have such a jaw dropping beauty that I don’t mind their lesson in appreciating all beautiful things no matter how fleeting. If you are growing your own, cut early in the morning for best results, late evening if you aren’t an early bird. The sugars in the plant are at their highest in the morning. Never cut in the heat of the day. Place in a cool container of water (make sure your vase is squeaky clean— think “would I drink out of this?”) Then add a bit of flower food. You can buy flower food online from places like Amazon or floral supply sites. Chrysal and Floralife are two popular brands. It comes in liquid or powder form— both work well. You are looking for the one that says “flower food”, not quick dip or holding solution. Maybe that sounds obvious but there are a lot of choices out there.
**After writing this blog post, I got a few questions from other growers and wanted to note that this blog was written for the home grower. Commercial growers have other tools (flower coolers, etc. ) available to them for conditioning. Conditioning dahlias for sale to a wholesaler or florists as a commercial flower grower would be a whole other blog post.

When receiving a bouquet of dahlias, you follow the same procedure. Recut about a 1/2” off the bottom of the stem, place in clean cool water in a clean vase. Dirty vases and dirty water are the enemy of making your flowers last. Change the water every day if you can, at least every other day. Also, recut the stems and add more flower food each time. If your bouquet contains a packet of flower food— you can split it in half if your vase isn’t too big.
Growing Dahlias
A few tips for this time of year if you are growing dahlias. It’s time to stop fertilizing them. You don’t want to generate a lot of new growth. We are mid way through September and from now on out, the plants won’t produce too many new buds. The already formed buds will develop and bloom. You’ll start to see the blooms taper off by mid October. The plant will also be putting a lot of energy into developing tubers. This time of year is when you really want to watch the amount of rain we get. Extreme heavy rains can cause tuber rot and also produce softer tubers that don’t store well. We’ll have a frost by early November most years but as long as your dahlias have been in the ground and growing for at least 120 days, you can dig the tubers before frost. The tubers will be fully formed. So if you don’t relish digging tubers in the cold, you can go for it by late October usually. I’ll post a blog in a few weeks about digging, dividing, and storing tubers.

***If you are a commercial grower, you can do one last fertilization about 6 weeks before your last frost which would be about now in South Carolina. The intense production required by commercially grown plants requires more nutrients than the average backyard dahlia plant.
After the vase
There are a few options for your blooms after you’ve enjoyed them in the vase. You can hang them upside down to dry— the fuller the bloom and brighter the color, the better it dries. Dahlia petals are edible (although I don’t think they taste that great!) But you could style your food for your latest Instagram post with dahlia petal sprinkles. You can also pull the petals off the bloom and make art. I like to deconstruct the flowers and make mandalas, flower quilts or abstract designs. It’s very relaxing!

I hope this helps you to get the most out of your dahlias. If you haven’t gotten a dahlia bouquet from us this year, it’s the perfect time for it. The dahlias will be at their absolute best in the next few weeks. Check out our website for more information.

All the Pretty Dahlias
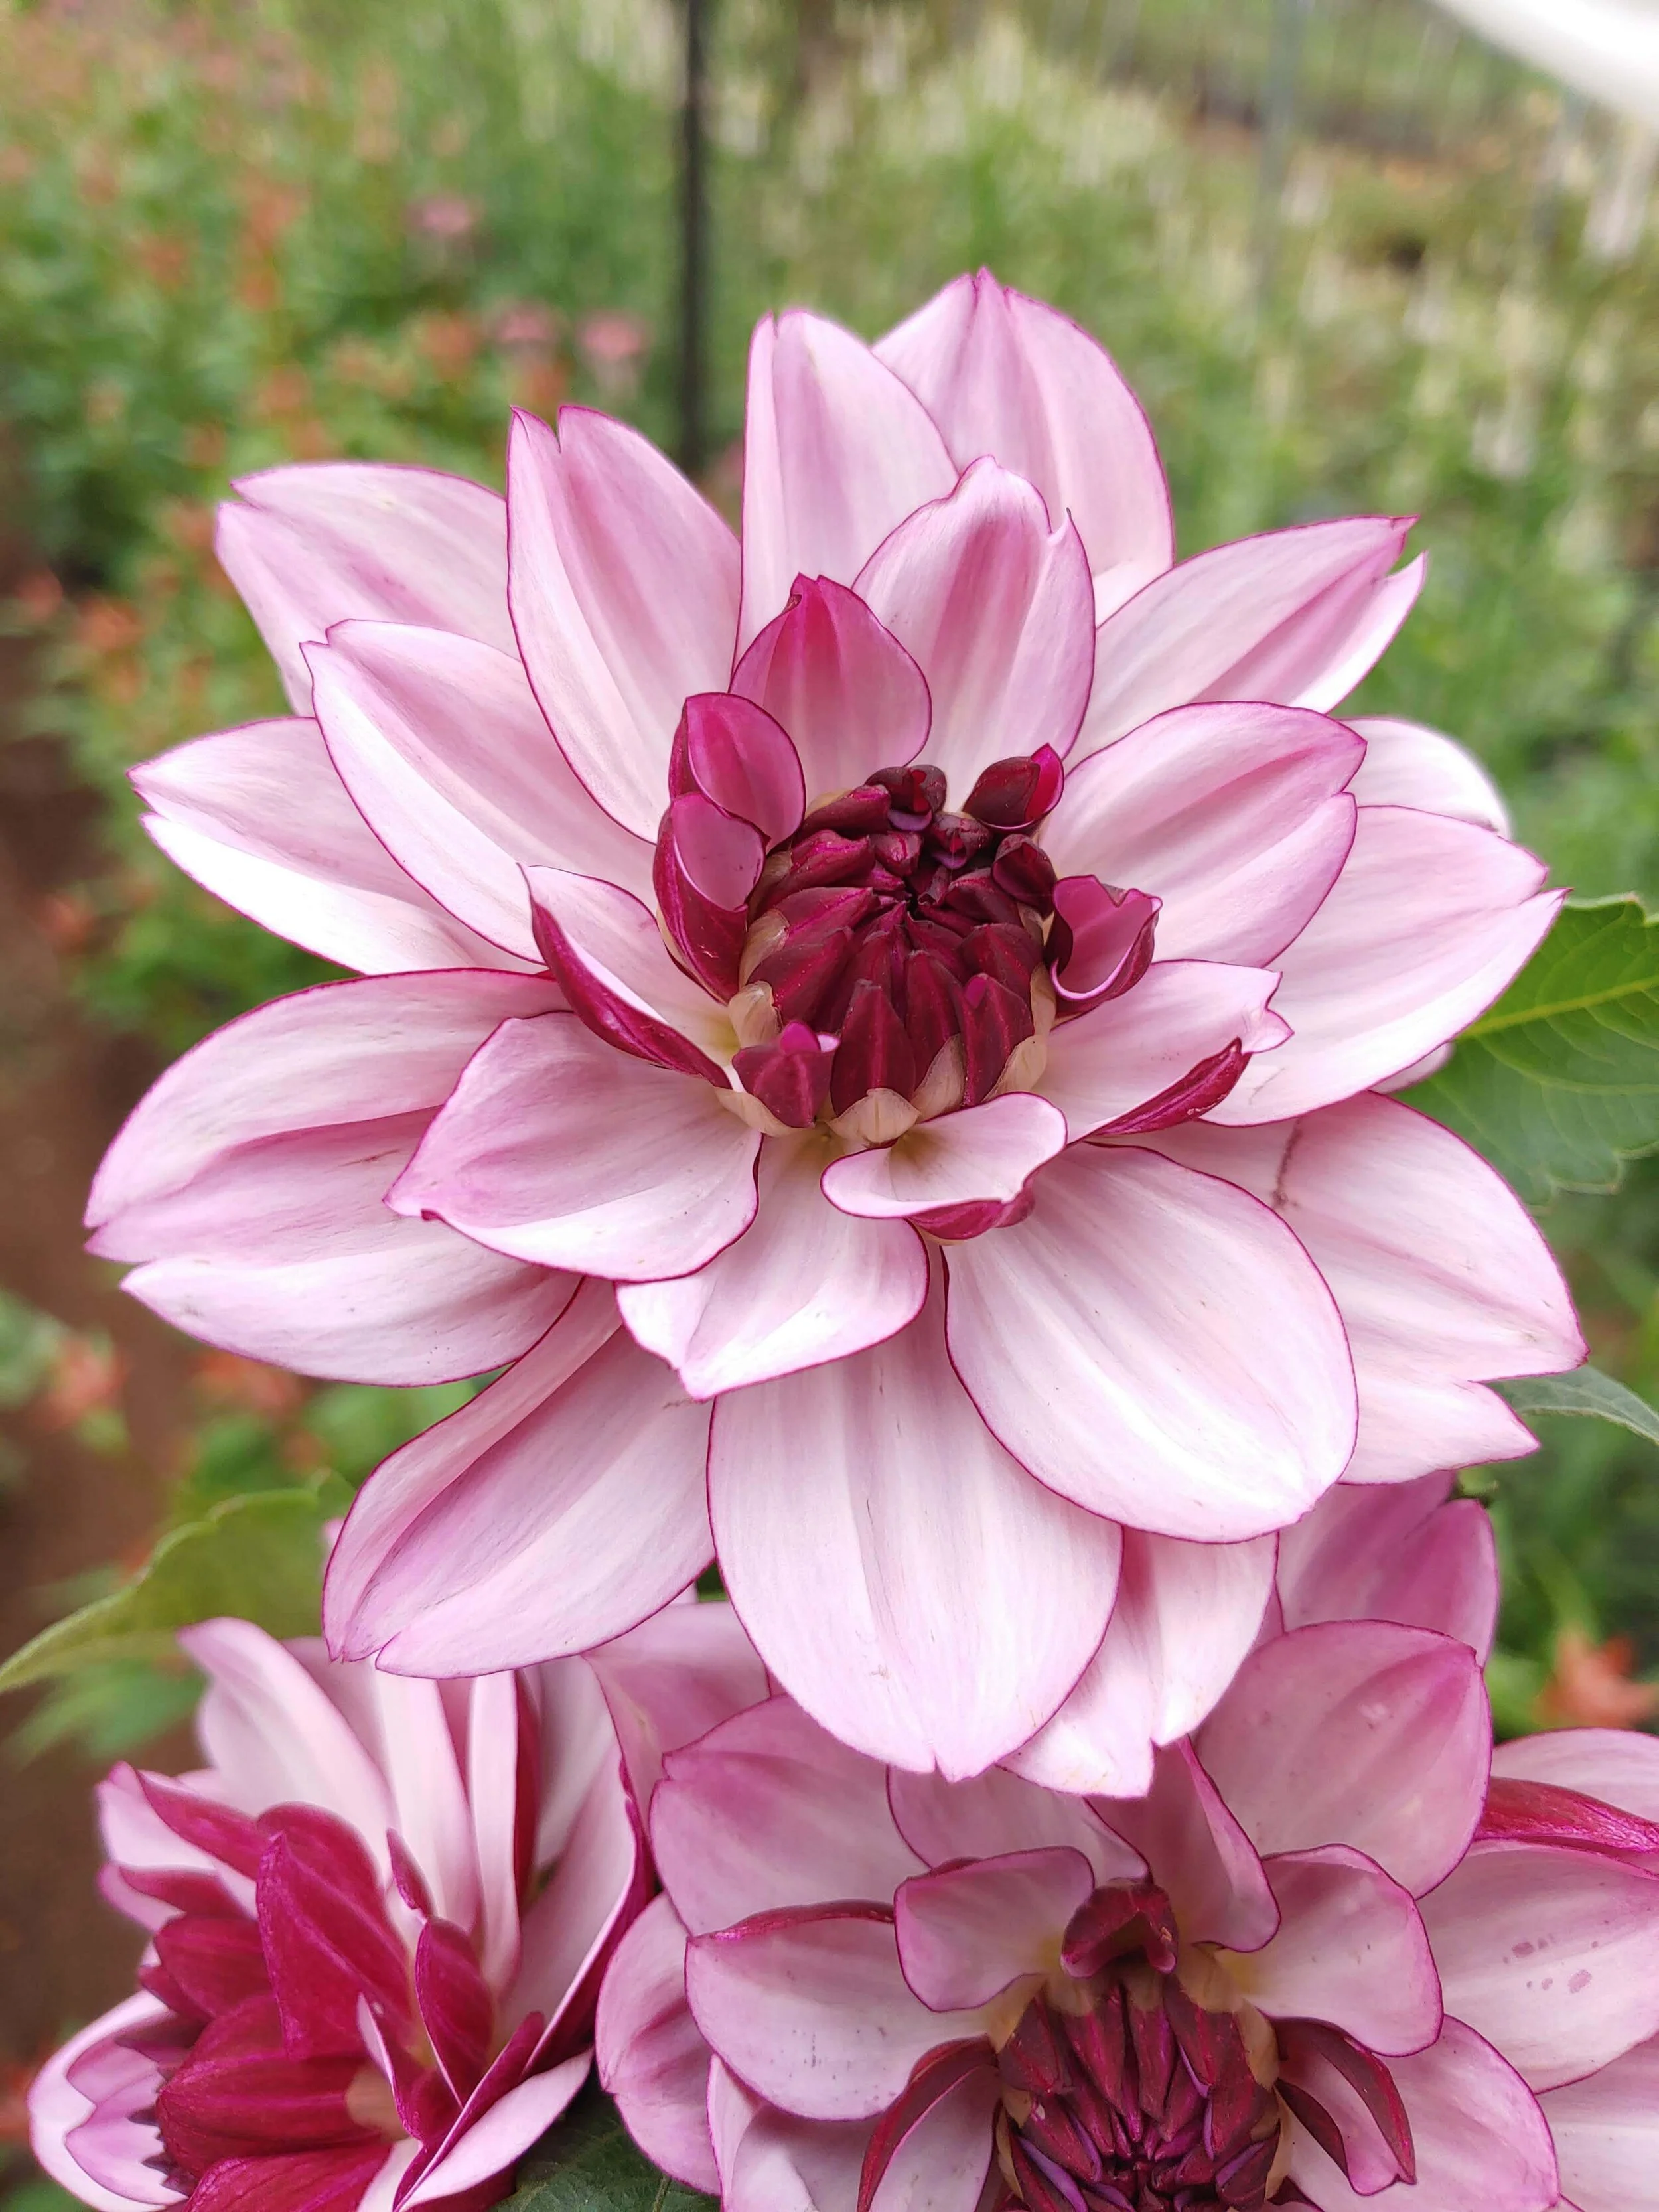
One of my goals this year was to make sure I got a picture of every dahlia variety I grow. So I’ve been making time for that each week as new varieties come into bloom. I thought I’d share some of them with you. If you want to see more, join me on Instagram live, Monday, Sept 21 at 7pm for a Virtual Tour through the Dahlia Field. Follow me on Instagram @flwrtherapy
Mouse over the image for the variety name.


Fall Planting Q&A
I’ve been getting lots of comments and questions about fall planting. So let’s answer some of those.

Lack of Sunshine: The most common comment I hear from people regarding growing (any type of garden) is that they don’t have enough sun. Lack of sunshine can be a common problem especially if you live in an older neighborhood. I remember removing 13 trees from my first home so I could have a small raised bed garden. But here’s the good news— fall planted annuals don’t require loads of sun! If you have an area where the trees drop their leaves over winter, that’s a perfect spot for fall planting. The plants will get plenty of sunshine all winter and when the tree begins to leaf out in the spring, it will naturally shade your plants and keep those cool weather lovers blooming longer. Fall planted annuals are actually a great little hack for those areas that are a little shady the rest of the year.
Cold Weather: Won’t my plants freeze? Fall planted annuals (often known as Cool Flowers) have some unique properties that other annuals don’t. They can survive quite a dramatic temperature swing. By planting in the fall, you give the plants all winter to build robust root systems that will take off when the weather warms in March and give you blooms way before anybody else on the block. You can be the cool kid who takes bouquets to their neighbors for Easter!

Space: Do I need lots of room? No, most of these plants require only 6” of space away from their neighbor. So you can snuggle them in next to your shrubby perennials or even create a container masterpiece. (See our blog for some ideas).
Bloom time: Spring flowers are fun because you can have a lot of variety in a short span of time. From March thru May, you could easily have over 20+ varieties of flowers blooming. Begin with some anemones and ranunculus and then add several of the other plug varieties and you’ll have 3 months worth of blooms.
Are you intrigued yet? We’ve just announced our Grow Your Own Workshop for Spring Flowers. A few years ago we gave a full fledged on the farm version of this but since times are crazy, we’ve condensed the most important parts into a 2 hour online workshop. We’ve also created a Facebook group for participants to grow together throughout the winter where you can ask questions and show off your blooms. So come join us, Sept 29, 7 pm— sign up on the shop page!
Shop our Fall Plant Sale to get your spring blooms!
